JOateyNV
Member
- 58
- 0
- 6
- Location
- Henderson NV
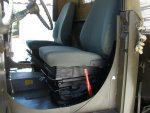
I just got done doing this Mod yesterday. Where were these seats when I was building my Off Road Desert Car. Here's how I did it.
Another HMMWV seat modification, but with 3 seats
1) Remove old drivers and beach seat
2) Fitting mounting rails for Drivers seat base.
a. I cut 2 ½” off three of the ends to clear the parking park. Cut 2 ½” off both ends with the small nutserts and for the back rail cut off 2 ½” of both ends to clear the parking park.
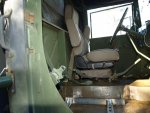
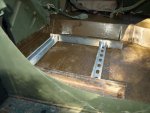
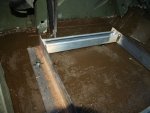
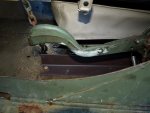
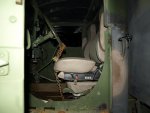
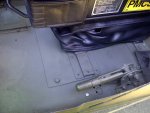
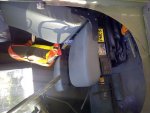
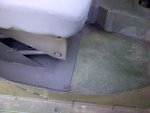
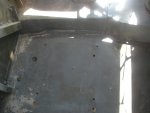
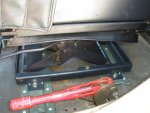
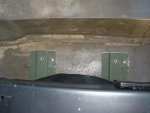
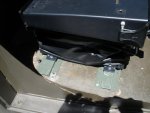
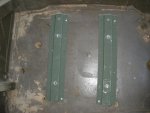
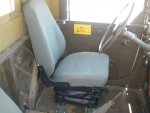
I learned on the passenger’s side later, to use the old mounting holes as a guide to align the rails (see photos). For the fitting stage I removed the seat from the base. This is done by removing the 4 nuts on the bottom of the seat in the little compartment at the top of the seat base. This made it a lot easier to put into the truck and move it around. I also cut the zip tie holding the base in the collapsed position. I attached the mounting rails to the base using 5/16-18 X ½ bolts. This allows you to tighten the base to the rails without messing up the nutserts. Then I put that into the truck and then set the seat onto the holes in the base. I then fit that as an assembly. Remember that the seat base will slide back and forth. Once I got the seat assemble in what I thought was the correct position I eased myself in to the seat for a test fit. Remember I was putting in 3 seats, so I then went on to fitting the passenger’s seat.
3) Fitting mounting rails for Passengers seat base.
a. On this side I only cut the 2 1/2” off the ends with the small nutserts. I plan on using those nutserts to mount the bracket for the center seat. I fit the passenger’s seat the same as I did on the driver’s side. Once I had the seat in position, I checked for distance to the driver’s seat. I figured 19 ½” for the 18” seat. I then checked and recheck that the seats and bases where in the right position.
4) Attaching both mounting rails.
a. The way I did this I lifted the seat off of (make sure on to move the base/rails) the base and drilled 2 of the rivets holes on each rail and inserted rivetsinto the holes. I DID NOT “pop” the rivets into place; I just used them as locating pins. I used a .1875 (3/16) size drill for the rivet holes. I then removed the seat base with the rails attached. I removed the rails from the base and ran the grade 8 bolts into and out of the nutserts in the rails, just to open up the nutserts a little. I then reinstalled them in the cab using the rivets to locate them. I then “popped” those rivets into place. Drilled out the rest of the holes and installed the rivets. If you can’t drill in a spot due to a nutsert below just drill next to it.
5) Installing base to rails.
a. I drilled out the holes in the base to .375 (3/ for easy of installing bolts. Install the 4 Grade 8 bolts that came with the seat kit with a flat and a lock washer. Now you see why removing the seat is the right way to go. (This is the hardest part of the install) TIP: Lift the base up a little so the head of the bolt doesn’t hit the base as you tighten the bolts.
6) Reinstall seats to base.
a. Attach seat to base with the 4 nuts you removed earlier.
I found that one hand in the compartment and the other around the back of the base was the easiest way to get those back bolts.
7) Clean up the cab, take pictures, and send to all your Deuce friends. You’re done.
This install took about 4 hours and the only items that were not included in the seat kit were the eight 5/16 -18 X ½” bolt used in the fitting stages.
Where can I get some of those seats? http://www.steelsoldiers.com/parts-sale/90307-hmmwv-seat-kit-350-a.html
I’ll be installing the center seat in the next week or so, so I’ll edit this to include that adventure.
Have fun and enjoy your hard work and your Deuces new seats.
If you have an questions or find errors in this Mod please e-mail or PM me so I can change it.
Another HMMWV seat modification, but with 3 seats
1) Remove old drivers and beach seat
2) Fitting mounting rails for Drivers seat base.
a. I cut 2 ½” off three of the ends to clear the parking park. Cut 2 ½” off both ends with the small nutserts and for the back rail cut off 2 ½” of both ends to clear the parking park.
I learned on the passenger’s side later, to use the old mounting holes as a guide to align the rails (see photos). For the fitting stage I removed the seat from the base. This is done by removing the 4 nuts on the bottom of the seat in the little compartment at the top of the seat base. This made it a lot easier to put into the truck and move it around. I also cut the zip tie holding the base in the collapsed position. I attached the mounting rails to the base using 5/16-18 X ½ bolts. This allows you to tighten the base to the rails without messing up the nutserts. Then I put that into the truck and then set the seat onto the holes in the base. I then fit that as an assembly. Remember that the seat base will slide back and forth. Once I got the seat assemble in what I thought was the correct position I eased myself in to the seat for a test fit. Remember I was putting in 3 seats, so I then went on to fitting the passenger’s seat.
3) Fitting mounting rails for Passengers seat base.
a. On this side I only cut the 2 1/2” off the ends with the small nutserts. I plan on using those nutserts to mount the bracket for the center seat. I fit the passenger’s seat the same as I did on the driver’s side. Once I had the seat in position, I checked for distance to the driver’s seat. I figured 19 ½” for the 18” seat. I then checked and recheck that the seats and bases where in the right position.
4) Attaching both mounting rails.
a. The way I did this I lifted the seat off of (make sure on to move the base/rails) the base and drilled 2 of the rivets holes on each rail and inserted rivetsinto the holes. I DID NOT “pop” the rivets into place; I just used them as locating pins. I used a .1875 (3/16) size drill for the rivet holes. I then removed the seat base with the rails attached. I removed the rails from the base and ran the grade 8 bolts into and out of the nutserts in the rails, just to open up the nutserts a little. I then reinstalled them in the cab using the rivets to locate them. I then “popped” those rivets into place. Drilled out the rest of the holes and installed the rivets. If you can’t drill in a spot due to a nutsert below just drill next to it.
5) Installing base to rails.
a. I drilled out the holes in the base to .375 (3/
6) Reinstall seats to base.
a. Attach seat to base with the 4 nuts you removed earlier.
I found that one hand in the compartment and the other around the back of the base was the easiest way to get those back bolts.
7) Clean up the cab, take pictures, and send to all your Deuce friends. You’re done.
This install took about 4 hours and the only items that were not included in the seat kit were the eight 5/16 -18 X ½” bolt used in the fitting stages.
Where can I get some of those seats? http://www.steelsoldiers.com/parts-sale/90307-hmmwv-seat-kit-350-a.html
I’ll be installing the center seat in the next week or so, so I’ll edit this to include that adventure.
Have fun and enjoy your hard work and your Deuces new seats.
If you have an questions or find errors in this Mod please e-mail or PM me so I can change it.
Attachments
-
55.5 KB Views: 252
-
40.6 KB Views: 181
-
67.2 KB Views: 197
-
52.7 KB Views: 168
-
47.4 KB Views: 166
-
56.3 KB Views: 167
-
42 KB Views: 200


 not
not 
