• Steel Soldiers now has a few new forums, read more about it at: New Munitions Forums!

  • Microsoft MSN, Live, Hotmail, Outlook email users may not be receiving emails. We are working to resolve this issue. Please add support@steelsoldiers.com to your trusted contacts.

Battery Box Kill Switch Wiring

hank0311

New member
11
10
3
Location
Knoxville, Tennessee
I've been searching for video or diagram for the proper setup to wire a battery box kill switch on a 2000 LMTV. There is no kill switch at the time. I've found a couple of YouTube videos regarding the matter but neither were very clear on the wiring.

I do have the electrical schematics for the truck and simply need to know which E1/E2 from each battery would connect to the 4 pole switch.

Thanks so much in advance.

Henry
 

Skyhawk13205

Well-known member
157
269
63
Location
Alaska
I've been searching for video or diagram for the proper setup to wire a battery box kill switch on a 2000 LMTV. There is no kill switch at the time. I've found a couple of YouTube videos regarding the matter but neither were very clear on the wiring.

I do have the electrical schematics for the truck and simply need to know which E1/E2 from each battery would connect to the 4 pole switch.

Thanks so much in advance.

Henry
Congrats on having the A0.5, I also have a year 2000, those trucks were kinda i between the A0 and the a1, they do not have any of the battery disconnect hardware. The wires run straight to the polarity protection block like the A0. The best option for a kill switch is putting a switch on the 24 and the 12v. When I am working on the truck I am always disconnecting the wires from the battery lugs.
 

Adrok

Active member
Steel Soldiers Supporter
91
182
33
Location
Rochester NY
Want the switch for a secondary to the ignition ( theft deterrent ) or for a quick disconnect for maintenance? On my Deuce I have a 12v normal open solenoid. key to close the circuit. Now the vehicle has 24V power.
 

Ronmar

Well-known member
3,859
7,496
113
Location
Port angeles wa
Well because of all the e1s and e2s you are going to have to trace out the cables anyway…
you have two ground leads, one to the starter, one to the nato plug. Connected to the 2 battery terminals farthest from the frame that are jumped together.

you have one 12v lead to the polarity box, it connects to the batteries where all 4 batteries are connected together(jumpers and 4 terminals) where the inner and outer batteries meet In the middle

you have three 24v leads one to the nato plug, one to the polarity box and one to the starter solenoid, connected to the two innermost battery terminals that are jumped together closest to the frame…

If you have not already done so, this would be an excellent time to remove 2 of those unnecessary batteries. It will simplify the wiring, give you room to work, and that very expensive alternator will thank you by living a longer healthier life…
 

coachgeo

Well-known member
5,147
3,463
113
Location
North of Cincy OH
Well because of all the e1s and e2s you are going to have to trace out the cables anyway…
you have two ground leads, one to the starter, one to the nato plug. Connected to the 2 battery terminals farthest from the frame that are jumped together.

you have one 12v lead to the polarity box, it connects to the batteries where all 4 batteries are connected together(jumpers and 4 terminals) where the inner and outer batteries meet In the middle

you have three 24v leads one to the nato plug, one to the polarity box and one to the starter solenoid, connected to the two innermost battery terminals that are jumped together closest to the frame…

If you have not already done so, this would be an excellent time to remove 2 of those unnecessary batteries. It will simplify the wiring, give you room to work, and that very expensive alternator will thank you by living a longer healthier life…
>- would battery disconnect at positives of the 12 and 24 sides of polarity box be a good place to interrupt/kill with a switch for the positives?
>- For the Negative.... would one negative interrupt/kill be sufficient..... if so which negative line? Keeping NATO not interrupted by these switches IMHO would be good thing
 

Ronmar

Well-known member
3,859
7,496
113
Location
Port angeles wa
Yes interrupting + 12 and 24 at the batteries is a good place to do it, thats how they did it on the A1…

the issue with using a single interrupt on the ground leg, is it is not completely safe for maintenance. It will keep any individual 12or 24v circuit from flowing current but there is still 12v of potential between any 12 or 24v circuit throughout all the truck wiring.

In some instances like with all the devices tied to chassis ground. If you feed 28v thru a simple device like say a blower motor, with no path to ground at the battery for current to flow, you could see 12v applied to ground when referenced to the 12v input applied to the +12 input to the 12v devices, in essence hooking up the power to all the 12v devices backwards. Now the polarity protection device should protect from any current flow backwards thru the 12v circuitry 12-24v battery, but stuff happens…
 

hank0311

New member
11
10
3
Location
Knoxville, Tennessee
Want the switch for a secondary to the ignition ( theft deterrent ) or for a quick disconnect for maintenance? On my Deuce I have a 12v normal open solenoid. key to close the circuit. Now the vehicle has 24V power.
I would like it for maintenance purposes, at the battery box if possible.
 

hank0311

New member
11
10
3
Location
Knoxville, Tennessee
Well because of all the e1s and e2s you are going to have to trace out the cables anyway…
you have two ground leads, one to the starter, one to the nato plug. Connected to the 2 battery terminals farthest from the frame that are jumped together.

you have one 12v lead to the polarity box, it connects to the batteries where all 4 batteries are connected together(jumpers and 4 terminals) where the inner and outer batteries meet In the middle

you have three 24v leads one to the nato plug, one to the polarity box and one to the starter solenoid, connected to the two innermost battery terminals that are jumped together closest to the frame…

If you have not already done so, this would be an excellent time to remove 2 of those unnecessary batteries. It will simplify the wiring, give you room to work, and that very expensive alternator will thank you by living a longer healthier life…


Is this similar to what you're referring to with the 2 battery removal? I've not yet heard of this mod but am more than willing to make life easier with my truck regarding the batteries.
 

Ronmar

Well-known member
3,859
7,496
113
Location
Port angeles wa
Yes, except where he initially shows the wires initiating. The 2 + tetminals on tge 2 batts closest to the frame are 24v.

The middle 4 terminals tied together(2+,2-) are 12v.

Tge 2 - terminals farthest from.the frame are -/gnd.

You are basically removing the forward 2 or rear 2 batteries......
 

InvictusDecretum

Active member
108
210
43
Location
NC
I would like it for maintenance purposes, at the battery box if possible.
haha I am literally in the middle of doing this myself along with cleaning the PPD lugs, or possibly bypassing it for some diodes in the cab. I guess I might as well post how I'm doing it for the collective SS community to tell me how I could do it better/more efficiently.

You will have to make a 1/0 or 2/0 battery cable or two to do this. I am going to interrupt it at the battery box on its way to the PPD, but I realize this is going to leave the cable to the starter alone/with potential. The starter has its own solenoid, which is triggered from cab if I'm not mistaken, so it's basically already disabled.

It is my understanding, mostly from reading about 100 of @Ronmar posts and watching his, helicool, broke overland, and fastidious youtube videos that killing the 24v/12v to the cab would disable the truck nearly completely for security, but also remove voltage/potential for everything except the starter. If I need to swap the starter or something, that's 1 cable to undo.

I am using a Blue Sea Systems 5510E e-Series Dual Circuit Battery Switch to switch both the 12v and 24v side on/off at once. It is rated for 350A continous (vast overkill), 525A for 5min, and 700A per circuit for 30sec (cranking). I suppose I could hook the starter positive to the output side of 24v... I will holesaw mount it on the battery box side facing the exhaust.

If you haven't made battery cables before, I recommend the yellow handled 10 Tons Hydraulic Wire Crimper and either 1/0 or 2/0 Selterm copper lugs on the end (I think the battery cables are 1/0 ?). I have a pretty healthy stockpile of them from running winch cables or whatever. I do not add solder, just hydraulic crimp. Solder is very brittle and probably initially forms a better connection but after you move that cable once, you'll start cracking solder.

A multimeter will be very helpful to you in this project, and LMTV ownership in general. If you don't have one, you can buy a cheap one like this KAIWEETS Multimeter (or if you have another one, keep the cheap one in the truck), or a more "buy it for life" like this Fluke 115 TrueRMS. You can see mine below, after confirming which battery cable is which.

1713914903863.png

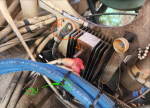
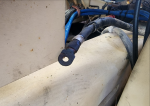
This finned thing is the PPD. The top lug (on mine, I assume also every one, but big assumption) is the cable that goes to the 24v battery side. The bottom one (terribly drawn) goes to the 12v battery side.
1713915034928.png


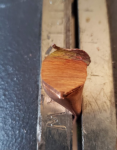
Hydraulically crimped 1/0 AWG 3/8 cut mid-crimp. Can see a nice, solid, cold weld. No solder needed.
1713918810972.png1713918827358.png


1713919004533.png


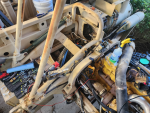
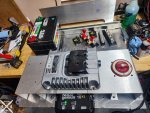
Here is how the truck is running on 2 batteries with the original cables (plus an added chassis ground), courtesy of @fuzzytoaster. The plan is to make new battery cables when I'm done making a new tray for them to sit in like helicool or fastidious, with 2-4 batteries in the back of the compartment and a Eaton or Vanner balancer/converter in the front half + trickle chargers.
1713919159393.png

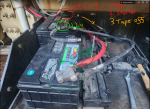
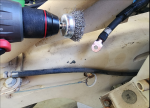
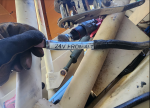
Seemed like as good a time to drill wire brush clean the PPD cable connectors and label them as any.

1713919421847.png
1713919374797.png

1713919390126.png
 

hank0311

New member
11
10
3
Location
Knoxville, Tennessee
haha I am literally in the middle of doing this myself along with cleaning the PPD lugs, or possibly bypassing it for some diodes in the cab. I guess I might as well post how I'm doing it for the collective SS community to tell me how I could do it better/more efficiently.

You will have to make a 1/0 or 2/0 battery cable or two to do this. I am going to interrupt it at the battery box on its way to the PPD, but I realize this is going to leave the cable to the starter alone/with potential. The starter has its own solenoid, which is triggered from cab if I'm not mistaken, so it's basically already disabled.

It is my understanding, mostly from reading about 100 of @Ronmar posts and watching his, helicool, broke overland, and fastidious youtube videos that killing the 24v/12v to the cab would disable the truck nearly completely for security, but also remove voltage/potential for everything except the starter. If I need to swap the starter or something, that's 1 cable to undo.

I am using a Blue Sea Systems 5510E e-Series Dual Circuit Battery Switch to switch both the 12v and 24v side on/off at once. It is rated for 350A continous (vast overkill), 525A for 5min, and 700A per circuit for 30sec (cranking). I suppose I could hook the starter positive to the output side of 24v... I will holesaw mount it on the battery box side facing the exhaust.

If you haven't made battery cables before, I recommend the yellow handled 10 Tons Hydraulic Wire Crimper and either 1/0 or 2/0 Selterm copper lugs on the end (I think the battery cables are 1/0 ?). I have a pretty healthy stockpile of them from running winch cables or whatever. I do not add solder, just hydraulic crimp. Solder is very brittle and probably initially forms a better connection but after you move that cable once, you'll start cracking solder.

A multimeter will be very helpful to you in this project, and LMTV ownership in general. If you don't have one, you can buy a cheap one like this KAIWEETS Multimeter (or if you have another one, keep the cheap one in the truck), or a more "buy it for life" like this Fluke 115 TrueRMS. You can see mine below, after confirming which battery cable is which.

View attachment 921739

This finned thing is the PPD. The top lug (on mine, I assume also every one, but big assumption) is the cable that goes to the 24v battery side. The bottom one (terribly drawn) goes to the 12v battery side.
View attachment 921740


Hydraulically crimped 1/0 AWG 3/8 cut mid-crimp. Can see a nice, solid, cold weld. No solder needed.
View attachment 921769View attachment 921770


View attachment 921771


Here is how the truck is running on 2 batteries with the original cables (plus an added chassis ground), courtesy of @fuzzytoaster. The plan is to make new battery cables when I'm done making a new tray for them to sit in like helicool or fastidious, with 2-4 batteries in the back of the compartment and a Eaton or Vanner balancer/converter in the front half + trickle chargers.
View attachment 921772

Seemed like as good a time to drill wire brush clean the PPD cable connectors and label them as any.

View attachment 921775
View attachment 921773

View attachment 921774
Man! Thank you so much. That's a lot of information you've provided!
 

InvictusDecretum

Active member
108
210
43
Location
NC
Sure thing ! I'm trucking along with with you, putting a disconnect in my truck too. I just got the mount for the Blue Sea Systems 5510E e-Series Dual Circuit Battery Switch delivered today.

If you look at Post #3 in my build thread (which I just started) I made a diagram of how the stock truck is setup. Maybe you're better at reading the engineering wiring diagrams than I am, but I prefer block diagrams. I also indicated what gauge of cabling I have found to be running between them.


20240515_211701 export.jpg
 
Top
AdBlock Detected

We get it, advertisements are annoying!

Sure, ad-blocking software does a great job at blocking ads, but it also blocks useful features of our website like our supporting vendors. Their ads help keep Steel Soldiers going. Please consider disabling your ad blockers for the site. Thanks!

I've Disabled AdBlock
No Thanks