• Steel Soldiers now has a few new forums, read more about it at: New Munitions Forums!

  • Microsoft MSN, Live, Hotmail, Outlook email users may not be receiving emails. We are working to resolve this issue. Please add support@steelsoldiers.com to your trusted contacts.

Broken Axle - Outback ( way outback )

honda

Member
52
-1
6
Location
Southern Arizona
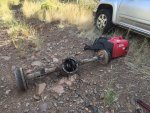
Seems to me there are a lot of unknown risks in trying to do an axle only field replacement so I headed to jacks military surplus in Tucson, looking for a complete differential unit. Even finding an axle on short notice proved to be a bridge too far.

Scored a 308 "working" differential from jacks late yesterday afternoon. Puppy turns smooth, sounds good and otherwise looks to fit the bill. Observation of the gear assembly makes me a happy camper. Jack and I took it out of a donor M1009. Fun guy to work with. He's got the usual grips about VA, but who doesn't? Ask me how I know? Google earth his yards. Jack has 4 or five good sized yards all in the same area and he's into selling stuff. Mucho hardware and a lot of it in good condition.

Brake assemblies get rebuilt today, gear assembly cleaned, new seals installed. Gear oil to wait until unit is installed in the field, maybe. I'm parking a transport trailer at the bottom of the mountain to avoid driving the unit on the long drive home after a field repair. A complete differential field swap is a much more sure thing and should take 2-3 hours.( famous last words. I hope this time I'm a bit closer to time estimates )

Before going to Jacks I picked up some new u-bolts/ washers/ nuts from AZ Spring which I ordered bent up in the am from specs provided by the motorpool guys. It's amazing how easy it is for those motorpool guys to drill into a current database and pull up the spec's for something like u-bolts. Toughest part of the extraction at Jacks was removing the parking brake lines. Everything else, including u-bolt nuts made an easy hour. Having the donor truck lifted high up in the air on Jacks forklift made for easy work conditions. Thanks Jack.

In that the donor truck u-bolts were an easy extraction ( PB Blaster and air tools are my friends ) they will go to the field, just in case those guys bending up the replacement u-bolts had one eye closed when they did their work or the spec's were a bit off. Old and new bolts ( compared against each other ) look the same, with new bolts being about 1/4 inch longer.

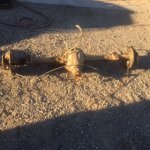
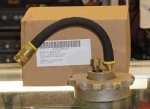
Pic of replacement housing: IMG_0390.JPG
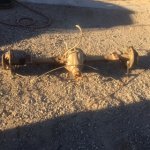
The shadows indicate the end of a long day.

Tally ho. Soon we go off to the races. It's gonna take a few days to get everything staged. I will send pics of the trip. Great white tail hunting ground.
One more thing. The RAZR is out. Too risky for stability. Lot's of drop offs. It's now a 1 ton diesel dually. Trail is barely wide enough ( I hope ) to accommodate, and will need to take jack hammer to cut out some rock interference.

I will check the housing stamps and count the gears upon return and confirm the ratio. All good points. I'm not too concerned at the moment if the front and rear ratios don't line up in that all travel from the current coordinates to the parking lot below are dirt/rock and more rock. Once I get to the transport trailer, it's load her up, tie her down and head for the shop. This is easy a 15 hour extraction day, if all goes well. Gonna be a long day. Hey, life could be worse. I could be in Korea on an unaccompanied.
 

cucvrus

Well-known member
11,474
10,441
113
Location
Jonestown Pennsylvania
:popcorn:Use C4 it will clear a big enough trail. So a Razor can't make it but a dually Chevy can? I have access to a Kubota side by side and am sure I can go places a Chevy dually will never go. And it has a dump bed on it and carries 4 people and 800 lbs. in the back. :tank:This story needs a few more pictures and a sponsorship by the Discovery channel to get this mission done. The plot thickens by the moment. What are you going to do change the gear ratio in the rear axle or the front axle? Jack could have sold you both axles for the field repair.:grin: I doubt the transfer case is going to like the mismatched gear ratios. That is a big difference. Good Luck.
 

honda

Member
52
-1
6
Location
Southern Arizona
Rustystud, very good idea about moving to a more hospitable spot. Unit has a front loaded 13k winch with plenty of chain, cable, snatch blocks etc. Luck was with me in that the unit happens to be on the only relatively level ground found for about 200 meters either direction. From where I came, I figure it was the unintended rock hoping with 40% deflated Wrangler Kevlars that broke the axle. To where I have to go, it starts out with rocks, rocks and more rocks on the decline. No trees or large enough rocks for winch cable support. If I'm gonna do these types of trails, this unit really needs some 14 bolt gear. Tough way to learn. Thanks for weighing in.
 

Recovry4x4

LLM/Member 785
Super Moderator
Steel Soldiers Supporter
34,012
1,810
113
Location
GA Mountains
If you need inches to a couple of feet, you can move the back sideways with a hi lift jack but everybody probably already knew that.
 

marchplumber

Well-known member
Steel Soldiers Supporter
3,834
2,928
113
Location
Peoria, Illinois
Like other member said, this is a story in the making. Success, after the trials and tribulations, will be all the more sweet! Good luck and God's speed!
 

richingalveston

Well-known member
1,715
120
63
Location
galveston/Texas
It would be nice if you or someone made a dummy spindle you could stick in the end of the axle and secure possibly with a screw through the tube (tube could be fixed later)

Then you would be able to put a wheel on it, pull the front drive shaft and get it home.

Not that it helps you any at this time but it sure sounds like it would help a lot of people in your situation.

My first investment was on the axles, I have worked my way all the way to the engine and that is about to get changed also.

Don't know if this could be done with the axle piece you have left. would probably need half the shaft and a way to keep it centered in the tube.
 

doghead

4 Star General /Moderator
Staff member
Super Moderator
Steel Soldiers Supporter
26,246
1,179
113
Location
NY
I've changed axle shafts many times and never had a situation that could not be dealt with in the field. I think you're making this a much bigger deal than it needs to be. I wish I could ride out with you and show you how to do this.


Sent from my iPhone using Tapatalk
 

cucvrus

Well-known member
11,474
10,441
113
Location
Jonestown Pennsylvania
For once I truly agree. This is like a reality TV show. I am glad the engine did not fail. Imagine that changing an engine in the field. Axles and engines and transmissions. OH MY. There's no place like home.
 

honda

Member
52
-1
6
Location
Southern Arizona
Partial recovery.
Made the 7 hour (much longer than expected) trip to the M1009 this weekend. Took what were considered to be the "essentials" for whatever one could expect to find under the circumstances. This is what we took and used:
generator and battery charger
Kano Aerokroil
Assortmant of hand tools
Lift jacks
Cribbing - lots of it - 30 pieces 4x4x18" and 18" railroad tie cuts
replacement/rebuilt-soup to nuts- (good working condition)rear end assembly (308) from donor M1009
Dot 5 brake fluid
Zip ties
German torque wrench

This is what we took and did not use:
4 tires and rims with lug nuts
2 12v batteries
air handling equipment to run off onboard compressor
dot 4 brake fluid/glass jar and syringe to test against installed fluid
12 and 16 gauge stranded conducters

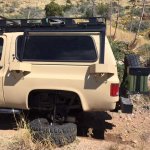
3 hours for the swap, 1 hour to fix the bent diff plate on the recovery truck and add motor oil as substitute gear oil - temporary - ( only insertion tool was a syringe from the brake fluid test set.

Dark as the ace of spades when we hit the trail. No moon, overcast with rain. Then the next problem hit.

Intermittent foam in the fuel delivery system.

Bled fuel several times at filter with minor success. Tightened all touchable work gear hose clamps on the fuel line. Only one we could not touch was where the rubber hose entered the fuel tank. After tightening the hose clamps engine sounded good and ran well for 10 minutes and then foam re-appeared and engine stopped. UGH.

Weird. There was no fuel delivery problem prior to the broken axle. I don't believe in coincidences. Vehicle was obstructing trail so had to back 150 meters down the 30 degree grade mountain with no engine power to a safe LZ. Y'all know what this is like. Brutal. Last 40 yards I tried and lucked out with engine power.

8 hours back to the trail head during rain and the dark - one hour rest in the middle- and load the recovery truck on trailer for trip back. Road speed on the recovery truck with motor oil in the diff would have been a real problem.

This unit needs to get outta the woods. Replacement diff. works well.
I'm a thinking that an inline electric fuel pump, placed at the rubber hose junction between the two steel fuel lines on the inside undercarriage frame might be a good first start to temporarily provide reliable fuel to get outta the woods. This would provide push pressure from the pump to the filter, exposing any leaks which could be fixed. If, after installing the electric pump there is still foam in the fuel, then the fuel tank may need to be dropped to fix the rubber hose as it leaves the top of the tank - Not an easy fix in that the tank must be field drained, partially dropped and then refilled after trailer hitch is removed - this will take some time. Guaranteed 2 day recovery trip.

Anyone got any ideas? Are there additional places to look for the air leak before I go down the electric pump road? Why the air leak now?

Once again, thanks for all your help. Going into the field with a re-built and tested diff assembly was the right and sure path. This part of the recovery was perfect. The old gear assembly is really jamed with debris and may have been unfixable in the field.

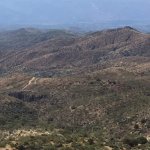
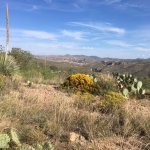
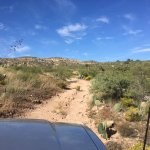
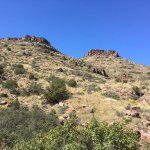
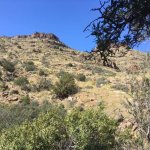
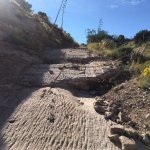
Unscheduled fuel problems are a tough break to deal with. Attached are a few pics of the terrain. Oh btw, no-one but the hero hunters who pulled my sa out drove by the unit all week. Only one set of tracks and it was theirs. See the pics for a little eco eye candy.
IMG_0419.jpgIMG_0454.jpgIMG_0412.jpgIMG_0405.jpgIMG_0390.JPGIMG_0435.jpgIMG_0443.jpgIMG_0448.jpgIMG_0415.jpgIMG_0464.jpg


One more thing. After two days and a night doing this stuff Subway sandwiches from TA taste really good.
 

Attachments

jpg

Member
611
15
18
Location
Boston, MA
Anyone got any ideas?
Just to get you out of the woods, you might consider feeding fuel from a temporary fuel tank to your filter, something like a jerry can strapped to your brush guard with a length of fuel hose from that to your filter. If you still have foam in your fuel after that, you know it's not due to the tank or the fuel lines between the tank and the filter. This would get you out of the woods, to where you can work on your fuel issue in more comfortable circumstances.

An electric pump would help bleed the air from the lines, but I'm not sure it would be necessary.

JERRY_CAN_ADAPTER_DOUBLE_TUBE__14514.1399939229.1280.1280.jpgscepterAdapter.jpg
You might prefer a Jerry can with one of these adapters. The 2-tube model allows for diesel return. 1-tube models are more for gravity feeding heaters etc, though you could probably get away with one for short distances if you locate the can above your filter. If you have only one tube, the IP return would just go into your tank, so your range would be shorter between refills, and you need to take care not to overflow your tank. Lexington container is sold out of the NATO style on the left. Flea bay has both types available.

After reading your story, I've added a jerry can with an adapter like this to my future gear list.

If you don't want to wait for parts to ship, it would be easy to adapt the fuel tank and hose rig for an outboard motor. If you can't borrow one, you can pick up the necessary parts in your local big box store that has fishing/boating gear. The fuel line comes with a squeeze bulb you can use to get the air out of the system. No electric pump required.
 
Last edited:

Recovry4x4

LLM/Member 785
Super Moderator
Steel Soldiers Supporter
34,012
1,810
113
Location
GA Mountains
JPG has a good suggestion but let me offer another thing to try before you go that far. Get a cheap see thru inline filter and use it to bypasss the factory filter temporarilry. They are prone to leakage and the clear filter will sure show you bubbles. There is also an aux pickup tube outside the frame near the right rear that can be used to draw fuel bypassing the entire suction line. A large length of hose and electric pump is like a new fuel delivery system in a bag.
 
Last edited:

jpg

Member
611
15
18
Location
Boston, MA
The Pound is down to where this rig costs $150 delivered. 2 20L cans, a NATO spout, and a 2-tube adapter (fuel feed and return). Flea bay. I'm considering it. Does anyone have opinions pro or con?
jerryRig.jpg
 

Recovry4x4

LLM/Member 785
Super Moderator
Steel Soldiers Supporter
34,012
1,810
113
Location
GA Mountains
My question would be on the cans. Wavian has quality cans. Some of the Chinese cans are really crud. That spout is definitly one of the cheaper ones. I do use one of those but with 5L cans and for motor oil. I think you could likely get there using scepter cans and parts. Let me scrounge a minute.
 
Last edited:

honda

Member
52
-1
6
Location
Southern Arizona
Recovery, excellent idea. Were you born with all these good ideas or did you have to work for them? Let me guess. :) I've been going through some of your posts. You're a bloody genius and from the reading, a gentlemen as well. Pepperoni pizza for you tonight, with extra cheese.
JPG's idea has merit for more than just fuel delivery. Gotta get one of those adaptors.
I can see a path to success which is defined as getting the unit to the trailhead for a sweet ride home on my PJ. Thanks loads to y'all for weighing in.
 

richingalveston

Well-known member
1,715
120
63
Location
galveston/Texas
find someone with a boat that has removable tanks and borrow theirs for a weekend and just get the hose connection to the tank (they have a special quick connect) with the hand pump bulb and extend the line to your IP, put an inline filter in it if you want, close to the Ip and possibly a bleeder valve.

simple to make, looks like you have a roof rack so it could go on the roof.


second thought add the electric fuel pump, they are about 35 bucks at rock auto, connect to front battery. and then go directly to ip. bypass everything else until you get it home. without the electric pump then you need to pipe the hose directly to the fuel pump but if your filter set up is bad, this does not bypass the filter.

better to use new pump, tank and hose until you get it home. A third trip would really suck.

Good luck
 

Recovry4x4

LLM/Member 785
Super Moderator
Steel Soldiers Supporter
34,012
1,810
113
Location
GA Mountains
Most of my genuis was earned, often laying on my back in some briar patch or struggling to keep hydrated in the bloody FL heat and stifling humidity. I've done the filter bypass with an inline and the fuel system bypass on the same truck at the same event. Destroyed a transfer case on the way home too. Those difficult trips sure were educational. Hang in there, she's coming home on your next trip out.
 

honda

Member
52
-1
6
Location
Southern Arizona
Recovery complete. Found a 2 hour 2016-10-21 at 4.12 PM.jpgshortcut via a new road cut by a drilling crew.
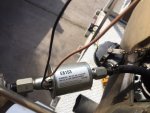
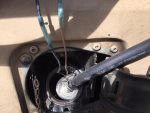
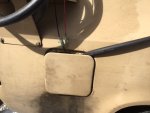
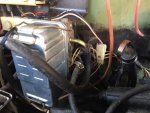
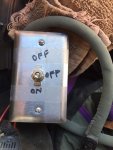
Vehicle was intact, no vandalism. Honda generator charged front 12V battery to 75% while I inserted 3/8 fuel line into fuel tank, followed by Airtex E8153 pump, powered by toggle switch up front tied into the rig runner assembly on the floorboard. Routed new 3/8 fuel line along passenger side, down the front fender and up to the OEM filter, keeping away from turbo exhaust. Apollo 13 special tape was used to support line and protect from tree swipes. IMG_0507.JPGIMG_0508.JPGIMG_0509.JPGIMG_0510.jpgIMG_0522.jpgIMG_0528.jpgIMG_0516.jpgIMG_0524.jpg
Make sure to disengage the OEM fuel pump from working. I did this by disconnecting the fuel line found above the passenger side front wheel. Failure to achieve this step may provide a nasty surprise as the OEM fuel pump will likely still be active and could very quickly pump out a lot of fuel.

I primed the system in the same way we used to get gas when we were teenagers. Diesel does not taste as bad as gasoline.

Fired her up and heard that old familiar purr. Good stuff. Let it run for 15 minutes and hit the trail. Slow crawl out, over the same trail that killed the axle, but this time a lot slower crawl. Once off the 2 track trail, the E8153 provided adequate fuel flow for 55 mph to get 1/2 way home and then loaded her on the PJ for the remaining trip.

Lessons learned:
At least this M1009, mostly stock OEM driveline and suspension, was/is not prepared for the extreme outback. Ratio is 308, not 373 as previously noted and that is only one of the limiting factors. I never should have taken this vehicle onto Rug Road. Bad idea.
Maybe if I had a Dana 60 with 34+ inch tires with matching front end and new fuel line installed, the unit would had a fighting chance over the rocks, slope and loose substrate.

Now it's on to finding a more robust diff set-up without lifting the truck too high. With that rack on top, a lift might make this unit a bit top heavy. I will likely spend the next 2 weeks reading all the posts about diff ideas.

Thanks to all for your recovery ideas. Looking back, it was an easy fix to get out. But that is hindsight.
 

rustystud

Well-known member
9,298
3,072
113
Location
Woodinville, Washington
Thanks to all for your recovery ideas. Looking back, it was an easy fix to get out. But that is hindsight.[/QUOTE]


Now you have your own extreme 4X4 story to tell ! That in itself is worth the price of admission !
 
Top