Ragnarok
Member
- 73
- 3
- 6
- Location
- Pittsburgh, PA
that is AWESOME!
Steel Soldiers now has a few new forums, read more about it at: New Munitions Forums!


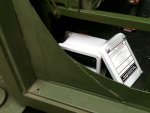
I'll work on a new thread dedicated to my truck build and put pics on that. Once I get it going,I'll put a link here to it.Can you post some pictures of your redesigned air conditioner cover?
Here is a link to the new build thread: http://www.steelsoldiers.com/showth...Build-Thread&p=1376634&viewfull=1#post1376634I'll work on a new thread dedicated to my truck build and put pics on that. Once I get it going,I'll put a link here to it.
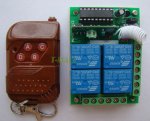
RC type Transmitter and Receiver come to mind.How could you make the pendant wireless?