• Steel Soldiers now has a few new forums, read more about it at: New Munitions Forums!

  • Microsoft MSN, Live, Hotmail, Outlook email users may not be receiving emails. We are working to resolve this issue. Please add support@steelsoldiers.com to your trusted contacts.

Canadian M152 Camper/Bugout Mods

thmpr

Active member
80
136
33
Location
Phoenix, AZ
Unfortunately, No. I was not that far thinking when I added the garage. Those are just rubber oil drip/fatigue mats. :-(
 

John Mc

Well-known member
218
305
63
Location
Monkton, VT
Update 9/24/19
...finally sold on eBay ... Southwind heater (believe it or not)
Installed the .. Gobi heater - looks great.
I have a dead heater in my M37. I've not really looked in to options to replace it yet. What did you not like about the Southwind, and what influenced your choice of the Gobi heater?
 

thmpr

Active member
80
136
33
Location
Phoenix, AZ
My M152 never had a Southwind cab heater, just the huge box heater that ran on gasoline. The Gobi is small for easier fitment with 3 adjustable outlets, made of metal, can be painted to match and inexpensive. Got it for a good deal on eBay. For health and safety reasons, I do not want to use a gas fueled heater - especially an old one.
 

thmpr

Active member
80
136
33
Location
Phoenix, AZ
5/8/2020 Update

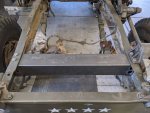
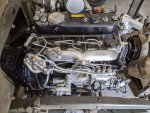
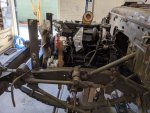
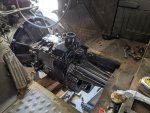
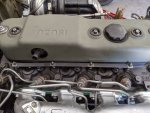
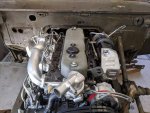
Because of Covid 19 and stay-at-home, more has been accomplished on the M152 in two months than in the previous 6. In a nut shell, the Isuzu engine, NV4500 trans and NP205 transfer have been degreased, washed, detailed, painted, assembled together and installed. This was much harder than expected. On the first attempt, the beautiful engine did not fit and became appearant the huge front "U" shaped frame cross member and the existing transmission mounts had to go. However, what originally was a major disappointment turned into an amazing opportunity to design and construct a new cross member that fits this build perfectly. After 6 hours of head-scratching, grinding, cutting, pounding, stomping, prying, etc., the old cross member clanged to the floor to make way for the new 4" x 4" x 1/8" square steel box section cross member/radiator support secured with grade 8 bolts.

WOW! The new engine/trans fits like a glove and looks perfectly at home as if it was specifically made for this truck. I just stare at it and say "Daaaaaammmmnnn"! The more I work on the Isuzu 4BD2T, the better I like it. Has a built-in oil cooler in the block's water jacket and built-in power steering pump. 400,000 mile engine with cheap parts. Complete rebuild kits are about $600 and include new pistons, liners, shells, gaskets, everything, then good for another 400,000 miles.

The NV4500 trans shift tower sits further back and will require minor tunnel modification, but not bad at all. Will use a Dodge or Chevy NV shift level. Making the new engine and trans mounts now. The turbo diesel will be supported by 4 hydraulic Ford F150 mounts. The trans will sit on a custom 3" x 1-1/2" steel box section.

Switched from air-to-air turbo intercooler to air-to-water. Much more effecient heat transfer and smaller radiator. Will have its own 12v circulation pump. Decided to ditch the old radiator for a new Eastwood Maxx Power tri-pass radiator cooled by the Isuzu's fan in a new shroud. The radiator, huge AC condenser and air-to-water heat exchanger sandwich fits comfortably behind the bar grill with a new, flat-top baffle plate. What is the value of the old, stock, working M radiator?

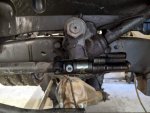
Playing with 1963-67 Corvette power steering. It is very compact consisting of a hydraulic ram that attaches from the front axle housing to the tie rod operated by a small hydraulic control valve bolted through the pitman arm. It requires cutting the stock top drag link and adding a thread to attach to the control valve. This setup keeps the stock steering gear box, column, steering wheel and ... internal horn button. I'm hunting for a longer pitman arm with reverse offset so the control valve sits closer to the frame. Having a longer pitman arm will also reduce the number of turns lock-to-lock since it will be power assisted. If this works, will be a game changer for M series trucks. Very inexpensive. With new ram, control valve, hoses, and some machining , about $600.

Other stuff, installed a New Vintage red LED 5 switch panel in the steering wheel cover panel for various things. Installing the 12 circuit panel with LED blown fuse indicators to the underside of the glove box. Switching to a single group 31 or 34 dual-purpose start/RV AGM battery placed under the driver's seat. This opens up the larger compartment under the passenger seat for tons of much needed storage. Installed Gamma Goat red lenses on the taillights. Added 11 LED clearance lights to the expedition rack. Added Android LED rock lights to each wheel well - won as a prize. Ditched the broken side reflectors for Humvee LED marker lamps. Installed under-floor hydroboost with huge JF9 10,000 gvw master cylinder. Installed under-floor Wilwood clutch master and slave. Using the existing floor pedals that now sit more inline with the accellater pedal. Installed front and rear cameras with large monitor centered above steering wheel. It's also a 128 gig DVR. Installed a 97db switchable back-up alarm. Changing the rear door fixed window to an operable slider with screen. Much more stuff. Still wrestling with final colors, graphics, camo or custom designed vinyl wrap.5-8-20-1.jpg
5-8-20-6.jpg5-8-20-3.jpg5-8-20-4.jpg5-8-20-2.jpg5-8-20-5.jpg5-8-20-8.jpg5-8-20-7.jpg
Added another year to the build and keeping the attention to detail high. Hopefully will be done by summer 2021 ... LOL!

GlennControl Valve R1.JPG
 
Last edited:

thmpr

Active member
80
136
33
Location
Phoenix, AZ
Hi Joshauk, the 4bd to NV4500 adapter was made by 4bdconversions.com. I just went to their site and it is no longer. My kit came with the Isuzu engine and NV4500 I bought together off Craigslist out of Yuma, AZ. At the time, the kit was selling for about $1,000 including the adapter plate, hardware, new clutch, pressure plate and throw-out bearing. Made a killer deal on the package.

Making the motor and trans mounts now. Everything is more difficult than thought, but should turn out good. Attached a few cadd files. Using 4 hydraulic Ford F150 mounts - two at the engine and two on the trans. Should do a good job of quelling the vibes. Worried about the diesel's extra weight.

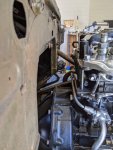
The new turbo intercooler fits nicely behind the engine's valve cover in the firewall recess panel area that contains the foot start button. Ordering up the silicone hosing and T-bolt clamps.

Keep plugging along.
Glenn
 

Attachments

joshuak

Active member
747
215
43
Location
Slower shore, DE
Hi Joshauk, the 4bd to NV4500 adapter was made by 4bdconversions.com. I just went to their site and it is no longer. My kit came with the Isuzu engine and NV4500 I bought together off Craigslist out of Yuma, AZ. At the time, the kit was selling for about $1,000 including the adapter plate, hardware, new clutch, pressure plate and throw-out bearing. Made a killer deal on the package...
Killer deal indeed! Thanks for the answer.

...Making the motor and trans mounts now. Everything is more difficult than thought, but should turn out good. Attached a few cadd files. Using 4 hydraulic Ford F150 mounts - two at the engine and two on the trans. Should do a good job of quelling the vibes. Worried about the diesel's extra weight.

The new turbo intercooler fits nicely behind the engine's valve cover in the firewall recess panel area that contains the foot start button. Ordering up the silicone hosing and T-bolt clamps.

Keep plugging along.
Glenn
Again, looking great!
 

Another Ahab

Well-known member
18,007
4,582
113
Location
Alexandria, VA
Everything is more difficult than thought, but should turn out good. Attached a few cadd files. Using 4 hydraulic Ford F150 mounts - two at the engine and two on the trans.
The cadd files are sweet, is that your work? Because it's nice!

Do you know is there are any similar software for working sketches like that that is free and on-line?
 

thmpr

Active member
80
136
33
Location
Phoenix, AZ
The cadd files are sweet, is that your work? Because it's nice!

Do you know is there are any similar software for working sketches like that that is free and on-line?
Currently, I am using "LibraCAD", a free, bare bones, 2D drafting program. librecad.org
I'm a retired architect that was once a young gun on the leading edge of the CAD revolution in 1984, even wrote my own software package that worked flawlessly for 33 years. Then, a few years ago, my aging 486 dos CAD computer finally croaked taking the proprietary software with it. It was like my hands were cut off. Had to find a light weight, current program that would load onto Windows XP. Unfortunately, LibraCAD takes a while to learn, is very buggie and takes 4 times as long to make a drawing that looks 10 times worse than my old software :-( After a few years of use, I am getting somewhat comfortable with LibraCAD and not willing to learn a different program at this time. I don't foresee any heavy architectural work in my future, just little scribbles and ideas.
 

Another Ahab

Well-known member
18,007
4,582
113
Location
Alexandria, VA
I don't foresee any heavy architectural work in my future, just little scribbles and ideas.
I'm in your boat, I left the business about the time that CAD was taking off.

There was even some software coming out that could embed maintenance records in the drawing files, a very cool idea, It had some acronym but it plumb evades me at the moment.

Seems odd to me that some simeple little sketching program isn't readily available, but oh well!

I'll check out this libracad.org. Thanks!!
 

John Mc

Well-known member
218
305
63
Location
Monkton, VT
I'm in your boat, I left the business about the time that CAD was taking off.

There was even some software coming out that could embed maintenance records in the drawing files, a very cool idea, It had some acronym but it plumb evades me at the moment.

Seems odd to me that some simeple little sketching program isn't readily available, but oh well!

I'll check out this libracad.org. Thanks!!
Fusion 360 has a free version. Just download the full version and register as a startup/enthusiast. It's a full-blown 3D cad program and takes a bit of dong to learn, but there are some great tutorials out there.

Sketchup also has a free version. This used to be Google Sketchup, but they spun it off to Trimble some time ago. The free version is online only, but it works. My kids used it back when it was still owned by Google.
 

thmpr

Active member
80
136
33
Location
Phoenix, AZ
6/27/20 Update

Larry and I have been working almost every day on the M152 making good progress. We are doing the heavy and hard work now … and I mean hard – installing he engine, trans and transfer case. We are on our second design of engine mounts as the first set was just way too hard to install, adjust and service. Have been wrestling with the NP205 transfer and driveshaft angles. Using LS1 engine mounts with caged polyurethane bushings bolted to the 205. Elegant solution to a weird shaped transfer that is hard to mount. Heavy, cast iron transfer fell off the lift onto my knee. Did an extended Peter Griffin.


Been working with Phoenix Rack and Axle learning about driveshaft angles, u joints, cv joints, etc. Turns out the most critical part in this install is that cussed intermediate shaft to the divorced transfer. Need to have that shaft MADE FIRST as short as possible, then attach the trans and transfer together to figure out transfer placement. Thankfully, we did not finalize the transfer location yet and can still move it around to achieve proper u joint angles and zero vibration. Now, will probably need to cut a tunnel in the storage compartment floor for driveshaft clearance to the rear end. Changing all yokes and u joints to heavier 1410 series.

Observation. IF … you are changing the entire drive train as I am, do NOT use a divorced transfer. What a pain in the ***! IF … I had used an integrated transfer, there would have been no need for new mounting brackets and a costly, short driveshaft and the install would have been complete by now. Also, the divorced transfer required cutting out yet another frame cross-member seriously weakening the ladder frame. When all is installed, will have to add about two new cross-members. Also, do not worry about retaining passenger side drop. Driver side drop opens up a larger selection of available, newer, less expensive stuff.

The amount of metal fab we are currently doing is ridiculous. Can't wait for this segment of the build to be complete. Everything else will be a piece of cake in comparison.

Glenn
 

thmpr

Active member
80
136
33
Location
Phoenix, AZ
7/8/2020
OK ... throwing in the towel on the Corvette power steering. After much thought, that form of dated power assist is way too fragile for a 7,000 pound plus off-road vehicle. The control valve shaft will bend or snap off and the ram is barely up to the task on a lightweight Corvette. A ram assist needs to be 2" piston with 8" travel for serious Moab type abuse - like off a fire engine. Will look at Snake River or other current offerings. Fight the battles one can win.

Other slight tid-bits. The Isuzu turbo diesel and NV4500 trans are FINALLY in and under their own weight - which is substantial. The Isuzu's weight is slightly twisting the frame rails in at the engine mounts a few degrees and there is no way to counter this frame twist unless I solid mount the engine and make it a stressed member - not a viable solution for comfort. I hope the frame will eventually settle where it wants when the truck is driven and bounced around for a while. The engine mounts are adjustable for height by adding shims to correct for the frame's inward twist. The engine oil pan needs to be chamfered on the passenger side to properly clear the front differential during extreme suspension travel. Will be adding bump stops to limit the interference. I'm not sure how others install Cummins 4BT's which are 4" taller than the Isuzu 4BD2T I'm using. I am down to the 1/8" in engine placement. Everything is tight as hell, but does look like it was designed for the truck. Installing a 3" snorkel air intake on the passenger side through the existing access hole. Installing a 4" exhaust stack on the driver's side with some very strange pipe routing up through the cab floor behind the driver's seat, then out the side cab wall - all boxed and insulated. It is the only way to get the exhaust pipe up and over the huge frame rail to the side or the truck. Could always just run the exhaust out the rear, but what challenge is there in that? Yes ... I'm a glutton for punishment.

Installed a custom built sliding window in the back door. Looks original and the expanded metal grill still covers it. Can turn on the ceiling ventilators and pull in outside air at night without having to leave the back door open. Cool air should waft across the bed.

Worked extensively on the interior cabinet design. Will be using 1" square black anodized 80/20 aluminum T-slotted smooth sections. Very handy stuff and there are a few dealers in the Phoenix area ... so no shipping charges if willing to wait on their monthly orders. No welding ... bolt together. Ikea countertops.

Installing the NP205 transfer now. Will probably have to cut a tunnel in the storage compartment floor for rear driveshaft clearance :-( sigh

Glenn
 

thmpr

Active member
80
136
33
Location
Phoenix, AZ
Well, time for a 1.5 year update ... LOL! I never stopped working on the M152. Everyday, I try to work on something. Eventually, it will be finished - hopefully by this summer. So much has been done - and all of it done by myself and roommate Larry. Here's the partial list"

Engine, trans, transfer, driveshafts and shifters all in and working, upgraded to 1410 u-joints. Removable, custom "Dodge" water-jetted engine brace in place to level engine and brace frame. 4" side mount exhaust stack with matching expanded metal heat shield on Peterbuilt rubber mounts, radiator sandwiche ... Eastwood Tri-flow, ac condensor and turbo air to water intercooler ... fits with 1/4" clear to front grille.

Rebuilt the front Dana 60 axle here, narrowed 3" off driver side, all new u-joints, seals, bearing, lunchbox locker, Moog ball joints, 1.5" DOM tie rod, etc.

Hired a recommended upholstery shop to tackle the driver and passenger seat rebuild - destroyed them. BBB, etc. again.

Tried my comfortable Chevy HHR seats and found they fit perfect on the existing seat risers. Got a excellent black pair with folding armrests from salvage for $100. Driver seat is electric with adjustable height, tilt and lumbar. Incredibly comfortable for the long hauls. Passenger folds flat and tumbles for clear access to the storage area. Two marine 12v batteries reside under the folding driver seat.

Power steering installed - reverse rotation dodge W250 box, Speedway column and padded steering wheel. No horn button. Ceiling mounted dither valve plays the Nathan K3LA Air Chime train horn hidden on the roof rack.

Underfloor Hydroboost and 10,000 lb master cylinder feeds 4 wheel discs, Mercedes kick panel mounted foot pedal for parking brakes. Ford F350 dual return brake fluid reservoir and finned cooler for brakes and steering.

Camper section almost completely built-out. New plywood sub-floor, wood laminate, poly insulation, white FRP wall panels, custom steel framed cabinets with white 3/4" melamine panels and doors, locking handles, Ikea Saljan black countertops, 10 new camo roll shades to replace the original rotted canvas ones, RGB LED coffer lighting, original ceiling fixtures made into wall sconces, custom air conditioning hidden in cabinet, toilet, refrigerator, oven, sink, TV, folding sofa/bed, motorcycle tie downs, removable wheel chock and dining table, 8' folding side canopy, slide out table from driver belly box, custom flags for roof rack. Still need to clean-up the original steel ceiling panels and cover them in a star-covered, galaxy vinyl wrap.

Body and paint runaround. Decided to have the truck painted Jeep Sarge Green with black fenders and accessories. After interviewing multiple shops, selected one that promised delivery times at a fair price. Brought him 29 freshly sand blasted parts to do minor body work and prime prior to delivering the main truck. Had to retrieve the parts 90 days later half completed and stored in front of an evap cooler. Surface rust on all unprimed parts. Bailed on the work. The usual stuff.
 

Attachments

Top
AdBlock Detected

We get it, advertisements are annoying!

Sure, ad-blocking software does a great job at blocking ads, but it also blocks useful features of our website like our supporting vendors. Their ads help keep Steel Soldiers going. Please consider disabling your ad blockers for the site. Thanks!

I've Disabled AdBlock
No Thanks