Rattlehead
Member
- 645
- 3
- 18
- Location
- Michigan
Wanted to post this awhile back during similar discussions, but my truck was covered in 1/2" of ice!
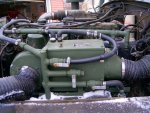
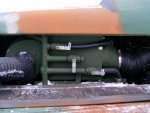
I plumbed my heater hoses into a distribution manifold that has 3 valved outlets, all accessible by simply opening the side panel. Very nice when you want the heater in the mornings and evenings, but not during the day. You know how these heaters still put out heat with the fan off and the vent valve closed. No longer have to climb up on the truck to open the hood! Plus it allows me easy control of another loop that will be used for the camper in the future.
The bottom outlet goes to a coolant filter head mounted just under the heater core platform on the right. The middle outlet is for future use, the plan is to run it to a water/water heat exchanger, and have a second loop of propylene glycol that goes to the van box for air heating, water heating, etc. The top outlet just loops back up to the stock heater core.
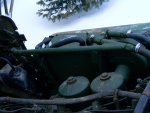
The long horizontal pipe towards the top is the heater hose return manifold. The far right one is plugged for now, to be used for the heat exchanger. The second to the right is for the coolant filter, and so has a valve on it to reduce spillage during filter changing. I didn't like those small cheapo shutoff valves, and packaging is tight, so that is why there is a full size ball valve a little farther away from the filter than I would like, but it does the job. I also had to use a hose connector on the heater core feed so that I could use a pre molded 90 degree hose at the heater core, but its better than having a kinked hose or one that rubs on the hood braces. There is no trapped coolant at the bottom of the distribution manifold. The vertical manifold pipe dumps into the horizontal pipe that goes to the coolant filter. The rest of the pipe below that is just for mounting and is dry.
Don't laugh at my welds! They looked good on the first pass, but after pressure checking there was slight porosity found. It took some regrinding and a couple of passes to get it completely sealed. Note to self....Always pressure check a project that requires zero leakage, BEFORE painting! Still need to paint the handles, too. Had to remove them and cut them shorter for the limited space available.
Attachments
-
197.9 KB Views: 560
-
150.7 KB Views: 551
-
140.1 KB Views: 552


