• Steel Soldiers now has a few new forums, read more about it at: New Munitions Forums!

  • Microsoft MSN, Live, Hotmail, Outlook email users may not be receiving emails. We are working to resolve this issue. Please add support@steelsoldiers.com to your trusted contacts.


CUCV M1008 Build

adf5565

Well-known member
Steel Soldiers Supporter
316
579
93
Location
Tioga, PA
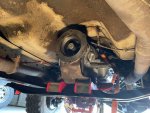
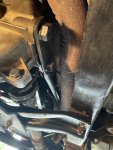
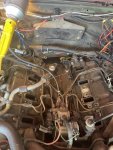
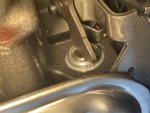
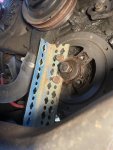
Over the weekend I pulled the oil pan and replaced that gasket. Not a difficult task but by the end I was a little sick of laying on the ground šŸ˜‚ Hopefully thatā€™s good for many years now.

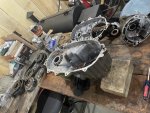
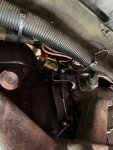
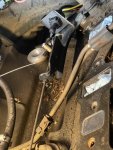
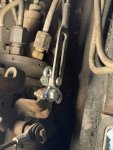
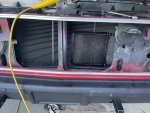
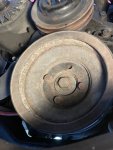
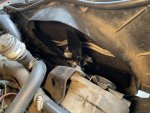
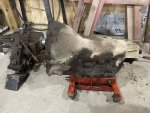
Also tonight I pulled out the transmission. The 4 of the 6 bolts fastening it to the engine were oddly almost loose. And whoever last changed the fluid/filter definitely didnā€™t torque the pan bolts to spec cause those were also very loose. Makes sense why that fluid was leaking.

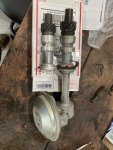
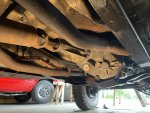
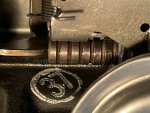
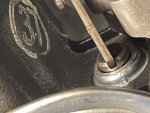
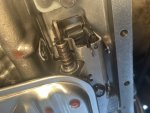
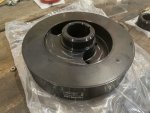
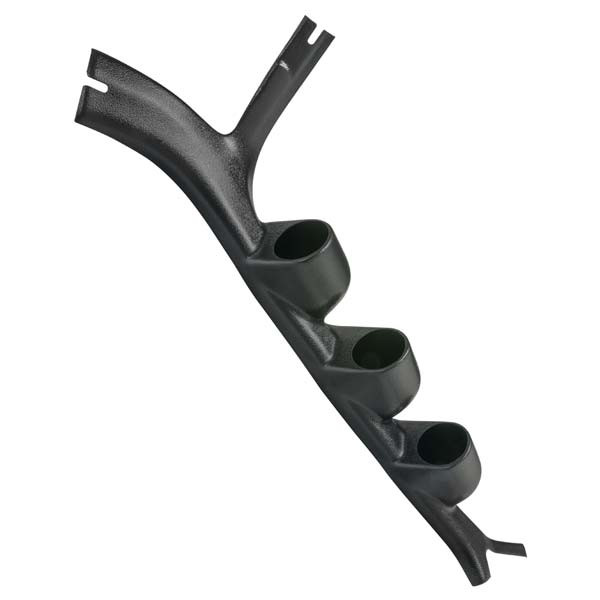
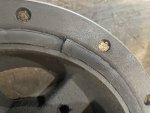
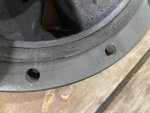
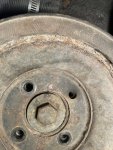
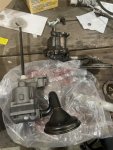
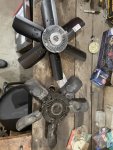
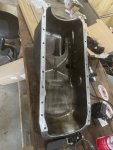
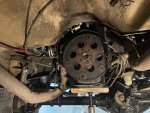
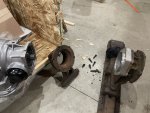
Upon inspection of my new 700r4 and 32 spline output adapter it turns out it came with an adapter for the extension housing/mount. I also previously purchased the ā€œfactoryā€ extension housing on eBay for the 700r4 to the np208. Iā€™m leaning towards using the ā€œfactoryā€ one just so that itā€™s cast iron. Shown in the 4th pic below.
 

Attachments

Last edited:

adf5565

Well-known member
Steel Soldiers Supporter
316
579
93
Location
Tioga, PA
Made some pretty good progress on the swap so far. Changed out the flex plate and got the the new transmission bolted up to the motor. The gap between the torque converter and the flex plate was slightly too much, maybe 5/16 while ideally it is 3/16-1/4. So I ended up buying some precision shims so Iā€™ll get that bolted together once those arrive. I also ended up using the TH400 to np208 extension housing/mount as it turns out the 32 spline kit is an Advanced Adapters setup and my other housing/mount didnā€™t provide enough distance for the splines not to bottom out.

Since this trans does not require vacuum I pulled the vacuum system/lines out and replaced with a basic oil pump gear drive. I realized I was shorted the dipstick/tube with my trans so once that arrives Iā€™ll get the trans mounts/crossmember bolted back up to the frame. I swapped out the trans mounts while it was apart as well.
 

Attachments

adf5565

Well-known member
Steel Soldiers Supporter
316
579
93
Location
Tioga, PA
Im finally getting close to the end of the trans swap and drivetrain rebuild (hopefully). I rebuilt the transfer case and reinstalled that. I procured I believe what is called a torque rod from another member here so installed that as well since my t-case had the bolts to accept it.


I wired up the torque converter lockup along with a switch to lockup in 2nd and 3rd for towing. I switched over the cooler lines to braided style and then added an aftermarket trans cooler so that the fluid from the trans dumps some of the heat through that before going back through the radiator. The company I got the trans from recommends an in-line filter for a few hundred miles so once I get a few more fittings Iā€™ll tighten up all my fittings and secure the trans cooler in its final position.

One of the last and probably most important steps is getting the tv cable installed and set up properly. I used the ā€œoemā€ 6.2-700r4 bracket/rod along with the cable sent with the trans and hooked that up. Had to drop the pan to be able to observe plunger movement and set the cable adjustment. Even using the standard bracket and rod Iā€™m still not getting full plunger movement so tomorrow Iā€™ll give the trans builder a call to see what they recommend. The lever is supposed to just touch the plunger on idle and then with full throttle push it all the way in, which Iā€™m getting close but not all the way. I think Iā€™ll need to pull the intake manifold out so I can access the injection pump better and add a small bracket to extend the length of travel of the tv cable.
 

Attachments

adf5565

Well-known member
Steel Soldiers Supporter
316
579
93
Location
Tioga, PA
I gave bow tie overdrives a call to see what they recommend with regards to the adjustment. They stated the main thing is that the plunger needs to be fully in at full throttle. Since Iā€™m not getting enough total travel I could set idle so it is already slightly depressed to achieve this, however since Iā€™ve already gone this far I might as well do it right.

So I pulled the intake manifold off to get better access to the injection pump and added the adjuster bracket included with the trans TV kit. Essentially it just allows for added travel distance of the cable so the plunger matches throttle travel. Took a few hours of playing with different adjustments but eventually got it set right.

Tomorrow Iā€™ll get the manifold reinstalled and a few other things Iā€™ve finished up recently were finishing the trans cooler/lines and added fluid to the transfer case.
 

Attachments

adf5565

Well-known member
Steel Soldiers Supporter
316
579
93
Location
Tioga, PA
Itā€™s been a great day out here in Pennsylvania. After 6 months of working on it I finally was able to drive the truck on the road. Before that I performed the pressure tests on the trans and confirmed with bowtie overdrives it was set properly. And then today performed the driving test and confirmed everything is shifting the way it should as well as the torque converter lock up. Thereā€™s still plenty more to do on it but itā€™s a great feeling when your work pays off and the truck is finally drivable.
89B46188-8B8A-437B-8C36-75DB39A3F034.jpeg6275D49C-1DB6-4E82-BB88-958FD0525582.jpeg
 

adf5565

Well-known member
Steel Soldiers Supporter
316
579
93
Location
Tioga, PA
Over the past few days I got the grill put together and also painted/installed the brush guard. The grill that was on the truck when I bought it was pretty smashed up so I bought a new one and notched it out for the blackout drive light. Then painted it black.

I also added a pillar gauge pod and coolant/trans temp gauges. The trans came with a drain plug in the pan so that install was easy and then purchased the adapter on eBay to install the coolant temp sensor in the rear of the passenger side head.
9B6C44D0-5E67-4E51-AE37-FC146D0E7415.jpeg70AEA919-AB77-460D-B981-3AE1AB28B950.jpeg
 

Attachments

Last edited:

adf5565

Well-known member
Steel Soldiers Supporter
316
579
93
Location
Tioga, PA
Tonight I decided to get started with changing the harmonic balancer. There has been some vibration at idle so I figured Iā€™d change it just to be sure. Nothing that causes the motor to shake and visually it runs smooth as can be, just creates some vibrations that can be annoying in the cab. I decided to go with Fluid Damper as a lot of people on here have had good feedback on it.

I got started by pulling out the fan and shroud to get better access. Iā€™ll change the belts as well while this is out since it is now way easier to access everything. While removing the crank pulley I found a little surprise, turns out one bolt was missing. Also following some of the great advice on this forum I created a stop out of angle iron to prevent the crank from turning while removing the bolt which is set at 200 ft lbs.
 

Attachments

Last edited:

cucvrus

Well-known member
11,263
9,552
113
Location
Jonestown Pennsylvania
Looking at the pictures I would keep going up front on that engine. It appears that you have a coolant leak at the weep hole of the water pump and it would be wise to just take that front engine cover off and change all the gaskets while you are in there. Also change the grommet for the oil fill. I never had to brace the engine to remove the harmonic balancer. Is this because you are using a breaker bar? I had Isuzu diesels in a skid steer that I had an 8 ft bar on and the bolt would just make the machine lift. I could not get in with an impact gun. That time I got my wallet out and paid $275. to get a seal changed. After thought was I should have just paid in the first place. Good Luck. You have come a long way. Get belts that fit tight when the pullies are collapsed all the way. I never had any luck with the belt numbers others use. I use whatever I can buy new and fit semi tight when all the loose on the adjustments. I drive to the local parts store and walk in and out and change them on the road at the store.
 
Last edited:

mutt1966

Member
283
13
18
Location
Allentown, PA
Over the past few days I got the grill put together and also painted/installed the brush guard. The grill that was on the truck when I bought it was pretty smashed up so I bought a new one and notched it out for the blackout drive light. Then painted it black.

I also added a pillar gauge pod and coolant/trans temp gauges. The trans came with a drain plug in the pan so that install was easy and then purchased the adapter on eBay to install the coolant temp sensor in the rear of the passenger side head.
View attachment 872349View attachment 872351
Where did you get the A-Piller Gage Cluster, Thanks
 

adf5565

Well-known member
Steel Soldiers Supporter
316
579
93
Location
Tioga, PA
Looking at the pictures I would keep going up front on that engine. It appears that you have a coolant leak at the weep hole of the water pump and it would be wise to just take that front engine cover off and change all the gaskets while you are in there. Also change the grommet for the oil fill. I never had to brace the engine to remove the harmonic balancer. Is this because you are using a breaker bar? I had Isuzu diesels in a skid steer that I had an 8 ft bar on and the bolt would just make the machine lift. I could not get in with an impact gun. That time I got my wallet out and paid $275. to get a seal changed. After thought was I should have just paid in the first place. Good Luck. You have come a long way. Get belts that fit tight when the pullies are collapsed all the way. I never had any luck with the belt numbers others use. I use whatever I can buy new and fit semi tight when all the loose on the adjustments. I drive to the local parts store and walk in and out and change them on the road at the store.
Yeah itā€™s on the list to change out those gaskets. Unfortunately I have to use the truck this weekend so I wonā€™t get to them this time (other than the crank seal) but I plan on getting back into it later in the year. I guess thatā€™s what I get for having this as my only truck to get stuff done but it wasnā€™t that much time involved to take it apart to this point so itā€™s alright. With regards to the water pump weep hole, is that an issue with the pump itself or would be remedied during the gasket change?

With regards to the brace, yeah I used a breaker bar. A few posts on here I found for the balancer changes the member used a similar setup to be able to loosen or tighten the bolt.

And I bought the belts from hillbilly wizard so they should be good to go I hope!
 

adf5565

Well-known member
Steel Soldiers Supporter
316
579
93
Location
Tioga, PA
Where did you get the A-Piller Gage Cluster, Thanks
I got it from glow shift gauges. It fits pretty well, I think itā€™s intended for trucks that have a headliner but it still looks fine as is. Gauges themselves were auto meter.


mutt1966

Member
283
13
18
Location
Allentown, PA
I got it from glow shift gauges. It fits pretty well, I think itā€™s intended for trucks that have a headliner but it still looks fine as is. Gauges themselves were auto meter.

Thanks for the Info....
 

adf5565

Well-known member
Steel Soldiers Supporter
316
579
93
Location
Tioga, PA
Last night I finished up the rest of the balancer install. Changed out the front crank seal as well. I think it was Sharecropper on here that had a great idea, just purchase a m16x1.5x70mm long bolt to get the balancer half installed prior to switching to the standard bolt length. The TM says to pound with a block of wood but Iā€™m not sure I trust that one. Swapped out the belts from the set purchased from Hillbilly Wizard which fit great and got everything back together.

Upon inspection of the original balancer it was beginning to show its age, some cracks and a slight bulge at the seam. Iā€™m glad I changed it out. I also cleaned up the crank pulley as it had some crap inside and sprayed a quick coat of paint.

I canā€™t say the fluid damper balancer eliminated all vibration but it is noticeably much better, so far so good! Also it turns out a friend of a friendā€™a family owns the company, it sure is a small world.
 

Attachments

ezgn

Well-known member
Steel Soldiers Supporter
650
1,039
93
Location
Lake Elsinore Ca.
Yeah itā€™s on the list to change out those gaskets. Unfortunately I have to use the truck this weekend so I wonā€™t get to them this time (other than the crank seal) but I plan on getting back into it later in the year. I guess thatā€™s what I get for having this as my only truck to get stuff done but it wasnā€™t that much time involved to take it apart to this point so itā€™s alright. With regards to the water pump weep hole, is that an issue with the pump itself or would be remedied during the gasket change?

With regards to the brace, yeah I used a breaker bar. A few posts on here I found for the balancer changes the member used a similar setup to be able to loosen or tighten the bolt.

And I bought the belts from hillbilly wizard so they should be good to go I hope!
The leak of antifreeze at the weep hole would most likely indicate the water pump is in need of replacement. It is something that should be fixed without delay.
 

ezgn

Well-known member
Steel Soldiers Supporter
650
1,039
93
Location
Lake Elsinore Ca.
Last night I finished up the rest of the balancer install. Changed out the front crank seal as well. I think it was Sharecropper on here that had a great idea, just purchase a m16x1.5x70mm long bolt to get the balancer half installed prior to switching to the standard bolt length. The TM says to pound with a block of wood but Iā€™m not sure I trust that one. Swapped out the belts from the set purchased from Hillbilly Wizard which fit great and got everything back together.

Upon inspection of the original balancer it was beginning to show its age, some cracks and a slight bulge at the seam. Iā€™m glad I changed it out. I also cleaned up the crank pulley as it had some crap inside and sprayed a quick coat of paint.

I canā€™t say the fluid damper balancer eliminated all vibration but it is noticeably much better, so far so good! Also it turns out a friend of a friendā€™a family owns the company, it sure is a small world.
[/QUOTEAC
 
Last edited:

ezgn

Well-known member
Steel Soldiers Supporter
650
1,039
93
Location
Lake Elsinore Ca.
Last night I finished up the rest of the balancer install. Changed out the front crank seal as well. I think it was Sharecropper on here that had a great idea, just purchase a m16x1.5x70mm long bolt to get the balancer half installed prior to switching to the standard bolt length. The TM says to pound with a block of wood but Iā€™m not sure I trust that one. Swapped out the belts from the set purchased from Hillbilly Wizard which fit great and got everything back together.

Upon inspection of the original balancer it was beginning to show its age, some cracks and a slight bulge at the seam. Iā€™m glad I changed it out. I also cleaned up the crank pulley as it had some crap inside and sprayed a quick coat of paint.

I canā€™t say the fluid damper balancer eliminated all vibration but it is noticeably much better, so far so good! Also it turns out a friend of a friendā€™a family owns the company, it sure is a small world.
Are the belts you got from Hillbilly Wizard the AC Delco ones you show?
 

adf5565

Well-known member
Steel Soldiers Supporter
316
579
93
Location
Tioga, PA
It has been a fairly productive last few weeks. I purchased cut to fit hood insulation from LMC and installed that. It made a noticeable difference on cab noise, obviously the truck is still fairly loud but it was a good improvement.

Also the oil pan gasket I changed a month or two back started having a few small leaks up front so I decided to replace that again. The first time I followed the CUCV Wiki and used both the gasket and rtv but this time I followed the TM and just used rtv. Iā€™m happier with how this turned out and so far no leaks.

While the oil pan was out I decided to change the oil pump for the Bostic Motors high flow pump. I believe itā€™s used on later year 6.5ā€™s? My original oil pressure still seemed to line up with what others get but it didnā€™t inspire confidence either (when warm 10-12psi idle, 30psi at 2700rpm). With the new oil pump Iā€™m at ~20 psi idle and and 55 psi in the 2-2.5k rpm range.

I also worked through a broken starter bolt issue here:

And lastly I put all of it to the test and went out for a 770 mile round trip camping excursion to the Adirondacks. Overall did pretty well, the 6.2ā€™s gutlessness showed a little bit trying to climb some hills on the highway in a ~30mph headwind but I made it there and back without issues and received many compliments along the way so it was worth it.
 

Attachments

adf5565

Well-known member
Steel Soldiers Supporter
316
579
93
Location
Tioga, PA
I decided to add the Derale 17120 20ā€ 6 blade fan as well as a Hayden 2799 severe duty clutch to help keep the temps in check. So far it seems like it makes a difference, climbed a few steep hills with the camper and engine temps rose to about 215 but seemed to stop there (I could here the fan with the clutch engaged really moving some air) and then dropped pretty quick back to ~190 on the downhill side. I had the peddle to the floor for a couple mins climbing so itā€™s probably a worst case test. Iā€™ll probably still add a Flowkooler water pump and possibly different thermostat (has a 195 in it now) but overall it did fairly well.

Also to help with cab noise from air whistling I changed the door window and vent window seals as the old ones were probably original and completely dry rotted and brittle.
 

Attachments

Top
AdBlock Detected

We get it, advertisements are annoying!

Sure, ad-blocking software does a great job at blocking ads, but it also blocks useful features of our website like our supporting vendors. Their ads help keep Steel Soldiers going. Please consider disabling your ad blockers for the site. Thanks!

I've Disabled AdBlock
No Thanks