• Steel Soldiers now has a few new forums, read more about it at: New Munitions Forums!

  • Microsoft MSN, Live, Hotmail, Outlook email users may not be receiving emails. We are working to resolve this issue. Please add support@steelsoldiers.com to your trusted contacts.

Cucv upgrades.

jpg

Member
611
15
18
Location
Boston, MA
I never expect to run >200Amps ever (VERY hard on a single belt)
Right. My M1010 has 2 alternators, a 100A 24v and 160A 12V, and normal belts don't survive very long. That's 2400 and 1920 watts respectively, with 1/2" pulleys. I got less than 1,000 miles out of my last set of belts. They quickly stretched to the point where I no longer had enough adjustment to tighten them. I installed the shortest belts possible. I had to use tools to get the 24v belt onto the pulley. I had to dismount the 12v to get the belt installed.

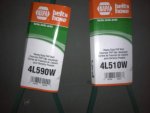
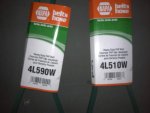
I'm about to install these, NAPA's heaviest duty belts, with kevlar cords. I'll report back on how they hold up. Wish me luck...
photo (6).jpg
I suggest those contemplating larger alternators might consider heavier belts to support them.
 

tim292stro

Well-known member
2,118
41
48
Location
S.F. Bay Area/California
The XM1027 will be using the Cummins serpentine - so belt HP will not be as much of a design problem like with a V-belt.

For V-belts the design of the system is more critical - standard Industrial belts are rated for 2HP or less (1.5kW TOTAL) and most aren't rated for high temperature. If you're doing high temperature (under-hood), automotive (needs oil resistance), and small pulleys with a big load on your smallest pulley (typically the alternator sheave), you really want something with Kevlar or Aramid and a notched V-face to allow the tighter alternator pulley radius. Also you will want to look at belt profile and wrap along with the total power demand of all the accessories.

You want the most wrap around the power input pulley and the largest load's pulley so as much contact surface as possible is used to transmit the load, and ideally you want the largest load to be the furthest load from the input of the driving pulley (crank pulley), this way it pulls the belt tight over all of the accessory loads (it might go slack if the big load was the last thing the belt saw before going back to the driven pulley).

Vehicles are systems and any modification has to take into account the balance of the system. :beer:
 

jpg

Member
611
15
18
Location
Boston, MA
The Napa belts pictured above are rated at 17HP, so I have hope that they will work OK. NAPA also sells HD notched belts rated at lower HP. If these green belts don't work, I may try the notched belts next.
 
Last edited:

Thomas_G

Member
93
7
8
Location
Houston, TX
I upgraded my M1008 with:

1. Napa 4908 filter base with FF105 Fleetguard Fuel Filter
2. Napa AC60G Starter Relay
3. High Torque Starter
4. Air Tex 8153 Electric Fuel Pump
5. Centerville MFG NATO CAN to Civilian 7 Pin Trailer Harness For Towing Boat (Money Well Spent).
6. AC Delco Mechanical Lift Pump
7. Push Button Glow Plug System
8. Diesel Logic Glow Plugs
9. 3.73 Ring & Pinion (To Be Installed)
 

Gunfighter1

New member
100
0
0
Location
AZ
  • H4 headlights
  • Headlight harness
  • Sound deadening (inside, underhood)
  • Bigger fuel tank
  • LED lighting on everything but the headlights (exterior, blackout drive light, dash-board)
  • Tint
  • AM/FM radio-stereo with an aux jack.
  • Group 31 batteries
  • Higher output alternators (>150Amp, better for fast charge on short errands)
  • Spin-on fuel filter
  • AC60G, with 24-to-12V regulator replacing ballast resistor
  • Manual glow override switch as a backup (with a working glow controller as a primary)
  • Better horn (I mean come on... :beer:)
Whered you get the bigger fuel tank and what capacity is it?

For my mods function and reliability took the forst priority.
New h4 headlights
Headlight harness
New starter(mine burned out)
New glow plug relay ( old one cracked)
Dog head relay
Turbo
2 in lift kit
rollcage
The last were the just for fun mods, with many more still to come.
 

tim292stro

Well-known member
2,118
41
48
Location
S.F. Bay Area/California
Moving to a 31 gallon is the only off-the-shelf part that fits without modifications. There was once a semi-custom 40-gallon made by a company that is no longer in business (40 gallon suburban tanks don't fit with the suspension/rear trailer hook and cross member). With the jerry can in the back, that would give you 36 gallons of fuel - if your M1009 can manage MPGs in the upper teens, you could see ranges approaching 600 miles :), and a single fuel up cost at about $100 :shock:.
 

ODFever

Madness Takes Its Toll...
Steel Soldiers Supporter
2,011
73
48
Location
Orlando, FL
- 12 volt conversion
- factory A/C installed from a donor truck (required the 12 volt conversion)
- under hood insulation blanket
- installed makeshift soundproofing using Harbor Freight anti-fatigue mats and residential carpet on the front floorboards and rear floorboards
- installed upgraded shocks
- installed a Modine 4 core brass radiator
- installed heavy duty transmission cooler
- bead welded and bolted Class III hitch
- Tekonsha trailer brake controller with the power leads connected to the bus bar under the hood
- 116 dB 12 volt stainless steel marine grade WOLO trumpets, 15" and 18"
- 40 mm ammo can installed between the front seats
- water can / jerry can bracket installed on the driver side rear cargo area
- Built additional 12 volt power sources with separate 15 amp blade fuses and on/off switches, and ran the leads directly to the bus bars to isolate the power draw from the truck's electrical system.
- Redesigned the way water flows out of the cowl box so it no longer floods the interior during heavy rain.
- Sealed the body seams inside the cowl box with Class A RV windshield caulk.
- Installed KC 851 HID off road lights onto custom built brackets that are bolted to the grill guard. Connected the headlights to the dimmer switch - when I dim the high beams, the KC's shut off.
- put cheap seat covers on the front seats to keep the vinyl from causing 2nd degree burns on my legs from the sun in the summer
 

ODFever

Madness Takes Its Toll...
Steel Soldiers Supporter
2,011
73
48
Location
Orlando, FL
I just spent the past 30 minute searching SS for pictures. Here's what I found.

http://www.steelsoldiers.com/showth...ave-you-done-to-your-CUCV-today-lately-Part-2
Post #826, 828, 839, 1394, 2107, 2110, and probably a bunch more posts that I can't find.
http://www.steelsoldiers.com/showthread.php?113461-M1009-Water-leaking-into-cab&highlight=cowl post #7
http://www.steelsoldiers.com/showth...r-conditioner-transplant/page2&highlight=cowl post # 77

I didn't take any pictures of the cowl box. Getting tools inside the box was hard enough - I couldn't see what I was doing. Spreading the caulk was not easy. I squeezed a bunch out of the caulk gun and smoothed it over with gloved fingers. Many spots were impossible to reach with the gun.
 

tim292stro

Well-known member
2,118
41
48
Location
S.F. Bay Area/California
Thanks, those are good pictures of the cowl stuff. I'm looking to do the same work on the M1009 since it isn't so much "leaking" as much as it seems like the cowl drains are plumbed into the cab aua

Here's the direct links to the posts ODFever was referring to in the post above that have to do with the cowl rework:

http://www.steelsoldiers.com/showth...ing-into-cab&p=1576349&viewfull=1#post1576349

http://www.steelsoldiers.com/showth...r-transplant&p=1571849&viewfull=1#post1571849

http://www.steelsoldiers.com/showth...r-transplant&p=1571852&viewfull=1#post1571852


I have a digital borescope, so when I do my work I'll take some more pictures and post them here.
 

ODFever

Madness Takes Its Toll...
Steel Soldiers Supporter
2,011
73
48
Location
Orlando, FL
I discovered that rain enters narrow passages on both sides of the cowl box. Those passages get clogged with leaves, acorn, etc. The channels that direct the water to the bottom of the cowl are not long enough to direct it to the ground. The water finds its way into the cab through the drain vent. Cutting the flaps in the sides of the cowl was necessary to add the pieces of galvanized steel. My father in law and I essentially extended the channel along the outside of the box and forced the water to exit closer to the ground. I hope this additional explanation is beneficial to your modifications, Tim292stro. I HIGHLY recommend sealing up the body seams FIRST. You don't have to pull the hood and the fenders off to seal the seams; you just have to remove the windshield wipers and the cowl cover.
 

jpg

Member
611
15
18
Location
Boston, MA
I'm about to install these, NAPA's heaviest duty belts, with kevlar cords. I'll report back on how they hold up. Wish me luck...
photo (6).jpg
Here is the promised update: The 51" belt on the 24V alternator held up OK. 500 miles later I still have about an inch of alternator adjustment remaining.

The 59" belt for the upper alternator totally stretched out. After 500 miles, it was too loose even with the alternator adjustment maxed out. You can really hear it "thrum" when the engine idles. So today I replaced it with a 58" belt. I had to dismount the alternator to install the belt. Re-mounting the alternator was a PITA because the belt was under a little tension even with the alternator adjustment at minimum. Aligning the holes for the alternator bolts took some fussing. The back alternator belt required a mirror to get it lined up. But once I got it all together and tightened up, I have a full 2" of alternator adjustment left!
:beer:

So the upper alternator belt is now the Napa 4L58W, the 58" version of the heaviest-duty, lowest-stretch, kevlar-corded belt Napa offers. These belts cost about $20 each. The loose-belt "thrumming" at idle is gone!

The M1010 Plan B upper alternator generates 2.3KW (160A@14.2V) which is 3HP just for the alternator. That belt also drives the fan. The lower generates 2.84KW (100A@28.4V) which is 3.8 HP. Normal 1/2" auto belts are not designed to handle this much horsepower. A typical 1/2" belt is designed to handle a total of 2 HP for the sum of all the pulleys it drives. This is why I wore out 5 belts in 4,000 miles finding the right belts for this truck. The belt guys tell me that GM really should have upgraded to wider belts for these heavy alternators, but our pulleys are sized for 1/2" belts.
 
Last edited:

HETvet

Member
395
7
18
Location
Bedford, texas
Fresh 5.9 12 valve 6BT cummins; block and head decked, fire ringed. Line honed/ hone block with torque plate and main caps installed. Port and polish the heads, port match the heads, ceramic coat the area with in each fire ring, exhaust valves, exhaust runners/ports, exhaust manifold, and the area above the first ring land on the piston. HY351 VGT turbo, 4 inch straight pipe exhaust, mishimoto radiator, aftercooler, oil cooler and trans cooler, head studs, main studs, connecting rod studs, electric water pump, P7100 injection pump and 20% over injector nozzles on 10% over injectors, air dog 2 lift pump, larger tank, G56 trans, LED lights through, magnum box t case, reed racing steering knuckles, high steer/cross over steering, high pinion King pin Dana 60, 4.56:1 gears front and rear with Arb air lockers front and rear, disc brakes all the way around.
 

Skinny

Well-known member
2,130
490
83
Location
Portsmouth, NH
Here is the promised update: The 51" belt on the 24V alternator held up OK. 500 miles later I still have about an inch of alternator adjustment remaining.

The 59" belt for the upper alternator totally stretched out. After 500 miles, it was too loose even with the alternator adjustment maxed out. You can really hear it "thrum" when the engine idles. So today I replaced it with a 58" belt. I had to dismount the alternator to install the belt. Re-mounting the alternator was a PITA because the belt was under a little tension even with the alternator adjustment at minimum. Aligning the holes for the alternator bolts took some fussing. The back alternator belt required a mirror to get it lined up. But once I got it all together and tightened up, I have a full 2" of alternator adjustment left!
:beer:

So the upper alternator belt is now the Napa 4L58W, the 58" version of the heaviest-duty, lowest-stretch, kevlar-corded belt Napa offers. These belts cost about $20 each. The loose-belt "thrumming" at idle is gone!

The M1010 Plan B upper alternator generates 2.3KW (160A@14.2V) which is 3HP just for the alternator. That belt also drives the fan. The lower generates 2.84KW (100A@28.4V) which is 3.8 HP. Normal 1/2" auto belts are not designed to handle this much horsepower. A typical 1/2" belt is designed to handle a total of 2 HP for the sum of all the pulleys it drives. This is why I wore out 5 belts in 4,000 miles finding the right belts for this truck. The belt guys tell me that GM really should have upgraded to wider belts for these heavy alternators, but our pulleys are sized for 1/2" belts.
I just got my alternators mounted up (a pair of 12v 160A Leece's) and haven't looked at belts yet. Someone must have put smaller belts on it because they were the same width as the stock Chevy belts and sit very far in the pulleys. Looking at what you have, I'm going with 1/2" belts since this makes sense. My alternators will not rotate all the way in to the smallest tension adjustment due to interference. I can only use the outer half of the adjustment range. Should I be looking at a 51" and 59" belt or try the 58" and see what happens?
 

jpg

Member
611
15
18
Location
Boston, MA
I just got my alternators mounted up (a pair of 12v 160A Leece's) and haven't looked at belts yet. Someone must have put smaller belts on it because they were the same width as the stock Chevy belts and sit very far in the pulleys. Looking at what you have, I'm going with 1/2" belts since this makes sense. My alternators will not rotate all the way in to the smallest tension adjustment due to interference. I can only use the outer half of the adjustment range. Should I be looking at a 51" and 59" belt or try the 58" and see what happens?
Just got back from NAPA. I handed them my shredded 1/2" FHP belt, and they gave me this:
photo (11).jpg
The FHP belt lasted me 18 days, about 200 miles. They tell me this HD belt will last longer, and that the FHP was not right for the truck. That's not what they told me 18 days ago. The new belt is $8 more expensive than the old one, $27 for a belt... Hopefully that means it's better. I'll report back to the group...
 

Lizard Dog

Member
78
1
8
Location
Los Angeles, Calif.
I'll reiterate: Doghead relay, HD headlight harness, spin on fuel filter.

And I'll add my favs:
- Factory GM center console
- Magnetic puck lights for dome lights
- Clear window tint (for cooling interior without dark windows)
- Rostra cruise control
- Combination pintle/ball hitch
- Replaced military trailer wiring outlet with a combo 7+4 pin
 
Top
AdBlock Detected

We get it, advertisements are annoying!

Sure, ad-blocking software does a great job at blocking ads, but it also blocks useful features of our website like our supporting vendors. Their ads help keep Steel Soldiers going. Please consider disabling your ad blockers for the site. Thanks!

I've Disabled AdBlock
No Thanks