• Steel Soldiers now has a few new forums, read more about it at: New Munitions Forums!

  • Microsoft MSN, Live, Hotmail, Outlook email users may not be receiving emails. We are working to resolve this issue. Please add support@steelsoldiers.com to your trusted contacts.

Dash pad, console, interior restoration...

linx310

New member
478
0
0
Location
texas
Part 1:


Ok I have spent the past 2 weeks trying to get my interior finished.
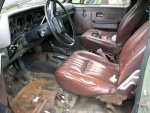
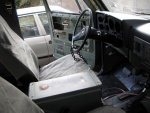
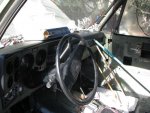
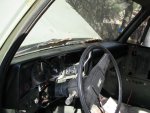
First I restored the console and dash pad area.


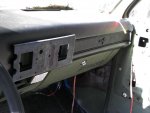
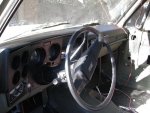
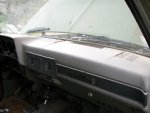
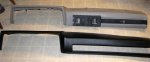
I bought a coverlay dash cover that was on sale for $169. I had my doubts since I have heard horror stories that some of these don’t fit at all but these reviews were from years ago so I thought I would give them a shot.


Glad I did because the thing fits like a glove and with it installed I cannot even tell it’s a cover.


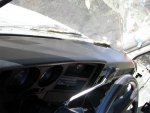
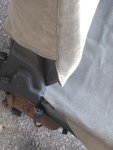
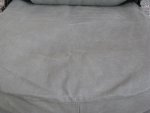
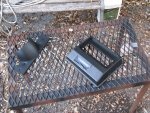
I painted my old dash pad around the edges with SEM Vinyl/Plastic dye to match the dash cover and the other interior pieces I am dyeing black. I Followed the instructions that came with the dash cover and made sure to only put the glue around the edges so it does not crack as it heats up and cools down. I then used a dictionary, newspaper, a broom stick, and a broken pool stick to add pressure so it could dry over night.


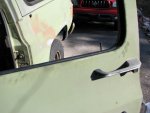
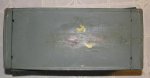
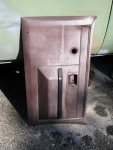
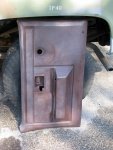
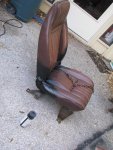
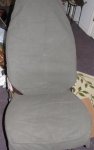
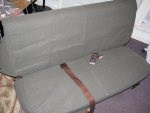
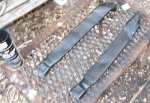
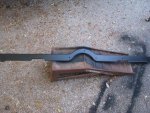
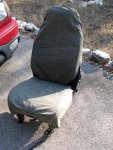
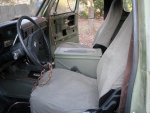
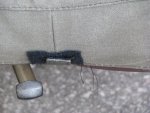
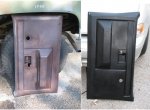
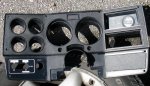
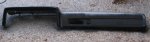
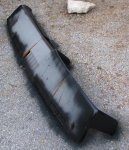
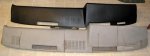
Using the same SEM dye I repainted the console pieces, door panels, seat belts, and kick panel. They look brand new now!


Part 2 below:
 

Attachments

linx310

New member
478
0
0
Location
texas
Part 2:

I forgot to take pictures of the door panels, I will uploads those next week.

I painted the front transmission channel using krylon fusion. Looks much better than it did before.


I replaced all the window channel seals with new felt and seals.


I drilled the holes and painted the ammo can I am going to use for a console.


As mentioned in another thread some people have used 3 inch pvc to hold up the rear of the can. I could not get it level using a 3 inch pvc pipe so I used a 2 inch one.


Painted the can and pvc pipe with krylon fusion.


Part 3 below:
 

Attachments

linx310

New member
478
0
0
Location
texas
Part 3:


Got my M1009 canvas seat covers in from Jakota and did some test fitting.


I marked the exposed areas the seat cover could not cover on the front seats and painted them with the SEM dye to match the other interior pieces.


I also took some pics with all the restored pieces after the dash cover glue finished drying. The dash pad looks brand new!

Added some pictures what the seat belts and and kick panel look like now to.
 

Attachments

linx310

New member
478
0
0
Location
texas
Thanks for the tip with the pvc pipe. I've been looking for something like that. How did you secure that to the floor?
Once I had it lined up I used some white spray paint to paint the holes onto the floor. I then drilled those holes and used bolts to secure it to the floor.
 

linx310

New member
478
0
0
Location
texas
BTW does any one know where to buy the plastic clip that goes onto the door panels about midway down?

Do I need a tool to install these?
 

linx310

New member
478
0
0
Location
texas
UPDATE:

Spent all day today trying to get the interior back together. The weather was perfect high 70s with little humidity.

I painted the frames of my seats with rustoleum "hammered". Gives it a similar look to the bed liner I used on the floor.

I painted the $12 amplifer I bought so I can listen to a MP3 player (installation of this mentioned in another thread of mine) so it would match the rest of the truck.

I attached it to the ammo can console I am building. I am waiting for my hole saw to arrive so I can drill the holes for the cup holders.

After the paint dried on the seat frames I installed the canvas seat covers I got from Jakota.

Quick review.

Pros:
They look great.
Much more durable then the vinyl.
Won't get as hot as the vinyl in the Texas Sun.
They are green!

Cons (very minor issues):
Lots of little pieces of loose thread I had to cut
The direction of the fabric grain looks weird on front seat covers.
No relief cut on rear seat cover for the lever that allows the seat to fold down.

Overall I am very happy with them. If you are looking for seat covers that are not Cabelas real-tree these are great.

Before installing the seats I put the shifter pieces I restored back together. The rubber is faded so it looks old, but it is not torn so I kept it.

With the seats installed the interior is really coming together. I am going to order some braided cable sleeves so I can channel the speakers cables into the amp neatly.

I also need to get some cable holders for the cables that run to the roof power accessory power block the military installed some time ago.

I took it for a test drive for the first time since I got it.

It drives like a brand new truck. It shift so nicely you can barely even tell.

Also as requested I included pic of the door panels I restored. It is a before and after.

REST OF PICS IN NEXT POST
 

Attachments

combatmech

Active member
1,213
5
38
Location
Carrollton, Texas
Nice job on the dash. Finished mine last month. Super easy.....Dang near looks new with everything installed. I added a wood kit to the dash...which doesnt look too bad.
Like the seat covers.....
 

combatmech

Active member
1,213
5
38
Location
Carrollton, Texas
I got my dash cover from LMC. On a scale of 1 to 10...I'd give it an 8 as far as fit goes. I used color match paint on the exposed areas of the old dash and black RTV to seal around the edges of the cover that woudnt stay down. She came out real nice. The wood kit came from a guy on ebay. It was for a civy Blazer but fit just as well. I posted pics on the what have you done to your cucv thread.
 
Top