• Steel Soldiers now has a few new forums, read more about it at: New Munitions Forums!

  • Microsoft MSN, Live, Hotmail, Outlook email users may not be receiving emails. We are working to resolve this issue. Please add support@steelsoldiers.com to your trusted contacts.

Diablo Build Update (pics)

hot rod deuce

New member
600
0
0
Location
Kasota, Mn
Hey dman, nice work,

ready for some thought?

not to pick any fights but i like talking about "theory". I understand your frame cutting theory and understand that is what some schools teach BUT i look at it a little differntly. I look at it like a bridge Now think of the top, bottom and sides as paper.

There is pull on the bottom and rip on the sides. Most trailer beams get holes cut in the sides to remove weight. Its just like a bridge truss. Load is placed on the top, pushes down and pulles apart on the bottom (this is not considering side loads) now all the sides do is hold the two together. See what i am saying? Now for the paper part. Take a stickey note grasp between thumb and pointer, try PULLING it apart holding in the center. Cant do it. This is the bottom web. NOW take the same paper and grasp on the edge and it will rip, thus this is the side web when force is applied....

some thing to think about.
 

devilman96

New member
2,056
17
0
Location
Boca Raton, FL
Ah... no fight there your 100% correct on the strength of a C beam... Very valid and truthful point but consider what I am building for. If I were building something more monsterish like yours, different story! Middle of the road build I would put the frame cut in the middle of a cross-member and weld the member back in. Rock crawling and such I would torque tube the frame form one end to the other. My weight is going down, my length is going down and with my motor and 395s I couldn't winch my truck into the trouble your truck could easily drive to.

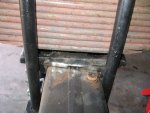
In consideration of what your saying its hard to see in the pics but the top and bottom cuts are staggered almost 2 inches from each other. If the frame were to get enough pull on it to start a crack on ether side it would have to run the length of the weld before breaking because it is physically imposable for crack to run the height of the frame through a zig zag. Cracks are fatigue... fatigues go for the weakness because they are lazy and will always follow the path of least resistance.

Even in the most abusive conditions I don't physically see how I could ever get that much force no matter how hard I try short of driving it off of a cliff!!! Lucky for me there are no cliffs in Florida LOL
 

devilman96

New member
2,056
17
0
Location
Boca Raton, FL
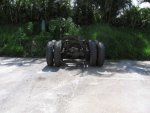
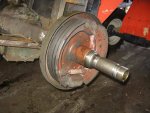
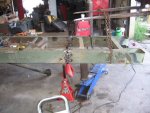
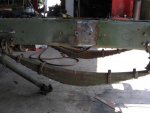
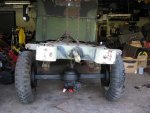
Well here we go... 24 or so hours after cutting the wheels off I have the springs slung... Will take a few more hours to get the rear end stripped of paint, reassembled with new bearings and gaskets and painted but so far its gone pretty quick for working alone. I have about 14 hours "working" time thus far with about 250 Red Bulls poured through me... For a first timer I would think thats pretty good.

Im sore... Im tired... but Im winning... lol

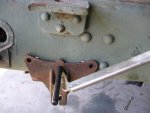
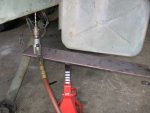
Pics... (testing out that new 10 pics at a time upgrade) I have no idea what order thee will go up in but if you hate laying on the floor drilling holes upside down while being covered in hot metal shavings you will enjoy one of these.
 

Attachments

devilman96

New member
2,056
17
0
Location
Boca Raton, FL
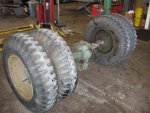
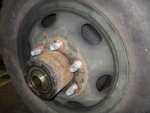
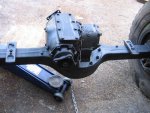
1:40 AM and the rear end is back together... Damn that KICKED MY ARSE!!! I think it took longer to strip, rebuild, paint, reinstall the brakes, flip the hubs, etc than it did for me to do the whole frame job... Man Im whooped!!!

Will reinstall it tomorrow and then spend about 10 hours cleaning this place up (looks like a bomb went off)... I will have pics of the reinstall but I gave up tonight on the rear... to damn tired... to damn busy!
 

devilman96

New member
2,056
17
0
Location
Boca Raton, FL
Yeah... Those guys should be sponsering this truck with the ammount I am drinking trying to keep my dead arse moving!!!

Ugh... Finally!!! It rolls under its own power! I still have to hook up the little stuff but I am thinking about holding off for a few. I am really wanting to pull the cab next weekend though I might take a weekend off after this round, I am EXHAUSTED!!!

Was it all worth it??? I have been wondering about that since yesterday about 5 pm... After backing it out of the shop it took me about 3 seconds into the turn to think hell yes it was worth it. This things moves and maneuvers so much easier!!! The freed up power is great and you can smoke the tires in first and second... tweaking the fuel a bit should really make this thing fun. I was very surprised at how hard and fast this thing lunges with 4 engaged. With the 395's I don't think it will be so peppy but the speed and fuel gain will be a very welcome side effect.

I think I have enough pics to do a TA... It will take a few weeks though! Thats a LOT of typing and pic editing and I have yet to finish the one on the clutch!!!
 

Attachments

Recovry4x4

LLM/Member 785
Super Moderator
Steel Soldiers Supporter
34,012
1,808
113
Location
GA Mountains
I'm going to have a hidden camera here when Mike picks up is 12' bed with his 8' truck! Thats going to make some folks chuckle. Looks great Mike.
 

devilman96

New member
2,056
17
0
Location
Boca Raton, FL
Well... Since someone er'nother crashed the server *ROTFLMFAO cause it wasn't mine* I will repost the pics and a few updated ones...

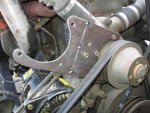
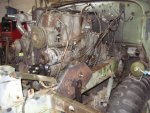
AC bracket and the likes from Saturday...

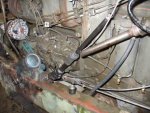
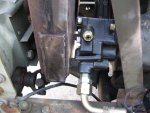
Beginning of the PS nightmare which has lasted Sun 9am-9pm Mon 3pm-11pm and Tues 3pm - 9pm... Im not bragging... this thing has been a NIGHTMARE to get installed. The bracket pictured is anatomically correct but like the AC bracket will be a template for something prettier and stronger.

Last but not least the 12V alternator now has a bracket... 1-2 hours...

The belt situation is going to get interesting to say the least... The fan and shroud have to go. I am installing 3 9" or 10" (have yet to make up my mind) electric fans which will be on thermostatically controlled relays. I am hoping one works for the AC and the other two for the engine. 3750 CFM total.... I have my fingers crossed but with the improved shroud and such I think I should well exceed the stock CFM. The belting will go as follows (I hope)...

24V Alternator belts will now run the AC, 24V and water pump... a 3rd pulley will get bolted to the front of the water pump pulley (that should be fun) which will run the 12V alternator... Sounds like a lot but the 2 half inch belts will not have the fan load any longer so I am freeing up most of the load they were pulling. The compressor will stay the same... I THINK all of this will fly fairly flawlessly... and of course the 5 ton PS pump is ran by the timing / injector pump gearing on the motor... I don't think I could squeeze another damn thing in here...

Its going to take the better part of a week to get this stuff done... I have to get a ball joint tapered reamer to resize the steering arms... Hunt down the right sized steel plate to remake the brackets... blah blah blah... so nothing exciting for a while... Then its cab off, paint chassis, insulate the bottom of the cab and get my bed outta poor Kenny's yard before he trades it for something he needs LOL...
 

Attachments

bottleworks

New member
920
3
0
Location
Central NC
Wow, it is looking great! Do you have an LDS engine? What engine can the 5 Ton P/S pump bolt on to? What about just adding the pulley on to the compressor to run the 12V alt? What's the plan for the evaporator housing?? I keep watching this thread every day for updates!
 

devilman96

New member
2,056
17
0
Location
Boca Raton, FL
LDT... Same block and so on so a LDS pump bolts right up... If you were to keep the stock fan you would need to modify the bottom LH corner of the shroud for the pump to fit. I guess 5 ton's have longer front noses?

Err ummm I proably could machine a pulley and adapt it to the compressor but how ya gonna adjust the belt? Too many problems... With the fan removed all you have to do is drill a pulley and use the existing fan bolt holes...

Back up and read through the thread I have already bought the evaporator and condenser from Danhard. http://www.danhard.com/sub11.htm PN 00204 converted to 24V.
 

hot rod deuce

New member
600
0
0
Location
Kasota, Mn
hey hey nice PS gear box! If it makes you feel any better about chopping the top of the web off the frame front, almost every new truck I look at has the front couple feet of the top rail chopped off.
 

devilman96

New member
2,056
17
0
Location
Boca Raton, FL
Wiring question...

I think I have my answer but I want someone to concur to make me feel a little more warm and fuzzy about this...

Batteries wired in series ups voltage, this we know... But if you are wiring motors the same do you get the same effect?

I.E. two 12 motors wired in series is now requiring 24V to run... yes?

I know the amperage draw will remain the same because it is still 2 motors (vs. one 24V would be half amps) but each motor would suck up 12V each... Or???... I am thinking yes but am known to be "we todd did" sometimes...

Anyone care to elaborate?
 

Recovry4x4

LLM/Member 785
Super Moderator
Steel Soldiers Supporter
34,012
1,808
113
Location
GA Mountains
RE: Wiring question...

I can't elaborate but I've been told that it won't work. Bjorn would know the answer to this one
 
225
1
18
Location
edmonton ,alberta
rules of thumb...

If you wired two 12-v motors in series with a 12-v supply,each motor would "see" 1/2 the voltage...approx 6-v.I say approx because of line and field losses you can't predict without the motors in hand.The motors would also rotate at 1/2 the speed they would normally turn.
It follows that these same motors in series if fed 24-v would individually see 12-v.amperage load would double on the supply side,and the motors would turn at design rpm.
however...d-c motors are not designed to be run in series.if the load on one motor were to change for some reason,the other motor would speed up or slow down proportionally.
this very quikly leads to a situation in which one of the motors sees excess voltage and burns up (literally).the motors speed will change due to the rise or fall in the oposite motors amp draw.amperage has a direct relationship to torque in a dc motor.
you need a means to syncronize the motors.expensive.
i suggest you make up a seperate 12-v bus for the motors,essentially running them in parralell.voltage is under better control.amp load rises with the number of motors you add.this should isolate each motor to it's own 12-v circut.
 

devilman96

New member
2,056
17
0
Location
Boca Raton, FL
RE: rules of thumb...

Eh friggen ruin my parade already lol... Just goes to show... Ask dunb questions before doing dumb things!!!

I was hoping to keep my cooling fans on the 24 side and the AC fan on the 12... Looks like I will use a few extra relays instead and keep it all on the 12V side.... Thanks! [thumbzup]
 
225
1
18
Location
edmonton ,alberta
maybe hydraulics?

didn't mean to rain on the parade... :wink: hope i didn't discourage you in any way.your build is way cool,and i admit i love the look of a bobbed duece with huge tires.
One thing to maybe consider...since you have what amounts to a good size hydraulic pump for your steering,you might look into a hydraulic drive for the cooling fan.
I've seen these many times on cranes and other off road equipment for cooling the hydraulics...it's just a radiator after all.they can be had in rather large sizes too.plenty of torque in a hydro motor for turning a large fan. cheers.
 

devilman96

New member
2,056
17
0
Location
Boca Raton, FL
Ok I lied... lots to take pictures of... I am just not sure if they are interesting or not.

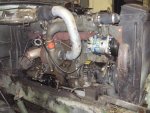
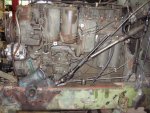
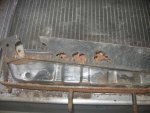
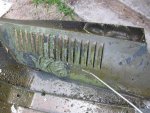
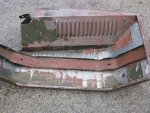
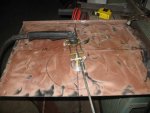
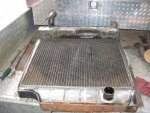
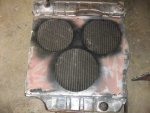
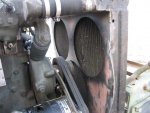
I cut down my shroud and made a new plate for the 3 10" fans... 1250 CFM each X 3 = 3750... Should be plenty even with the AC shoved in front of the Rad... I also re soldered most of the thing over again... Lots of stress cracks and such... Yanked out the bottom support, judging by the rust that thing was a bad idea to begin with!!!

I wanted to show the clearances also in case anyone wants to use the same 5 ton pump, you can see the whole shroud corner would have to go through the stock fan would be fine to keep. I have to make up the top brackets yet but I have to reassembly the front end to check my clearances for the condenser core... its a TIGHT fit with the front grill and 1/8th forward from where it sat before would ruin it all.

Did a little paint stripping to... Gonna need a WEE bit more than what I had sitting here though... Most of the sheet metal will get stripped 2X and then sand blasted before being primed. My reasoning is I hate sand blasting, it will take 2 bags per part vs. 10 and though a little more costly at 20$ a gallon stripping saves HUGE amounts of time.

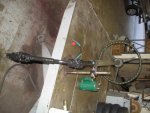
Got the second joint on the steering column done too... Getting closer to moving!!!
 

Attachments

devilman96

New member
2,056
17
0
Location
Boca Raton, FL
RE: no room...

Pusher fans...

CFM would be the # 1 thing... Cant get enough out of one fan for this engine let alone adding the AC to it... need even more air... Im in Florida... running "to cool" would be a dream down here!!! I also have no room in front of the radiator for it... I have a wench and have to cram the core up there with only 1" of space. Couldn't do a reverse mount on the inside of the shroud... Or I could but the shroud would have to be removable IE 5 times the work.

In regards to the Hyd fans... I actually have 7 or 8 pieces running around here with them... clearance issues.... There even deeper than a stock fan assy.

Gimme a few more days and check back... It will all make sense...
 
Top
AdBlock Detected

We get it, advertisements are annoying!

Sure, ad-blocking software does a great job at blocking ads, but it also blocks useful features of our website like our supporting vendors. Their ads help keep Steel Soldiers going. Please consider disabling your ad blockers for the site. Thanks!

I've Disabled AdBlock
No Thanks