- 2,960
- 33
- 48
- Location
- Tiro, Ohio
After putting up with a sticky cable for a year, I put on a new cable. Got the cable from saturn surplus, forget how much.
I cheated and rasied the bed to replace the cable. My tool rack is removed also, I would recommend removing the tool rack for access.
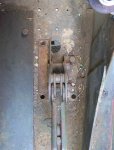
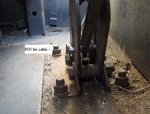
I have the newer style e-brake handle. To remove the old cable, I pulled the pin on the e-brake handle, then removed the 4 outer nuts around the handle, leaving the one nut to hold the handle assembly in. The bolts are welded underneath, so removing the nuts from the top side is a snap.
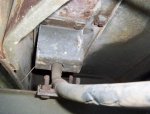
This allows the bracket under the floor to be removed. The cable is bolted to the bracket by two plates, these have ridges to hold the cable in place.
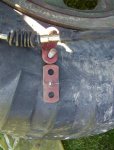
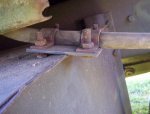
There is a flat plate clamped to the cable where it rubs the edge of the toolbox. Couple of bolts and it is off also.
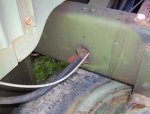
Where the cable goes through the frame, a clamp is installed to prevent rubbing.
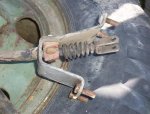
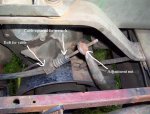
The cable is bolted to a bracket on the brake by one bolt. On mine the head of the bolt was facing the transfer case, kind of hidden. You may have to pry the slot apart a little to remove the cable.
The adjustment nut needs removed from the cable end, There is a place on the cable to put a small wrench(approx 3/ to prevent the cable from turning when removing the adjustment nut. Adjustment nut was a 3/4 wrench size.
When installing the new cable, I ran the adjustment on the handle to approx. the center, then tightened the adjustment nut on the cable till I had a good brake.
My adjustment nut was still tight, but if loose, tighten another nut next to it
so your adjustment stays put.
Dennis
I cheated and rasied the bed to replace the cable. My tool rack is removed also, I would recommend removing the tool rack for access.
I have the newer style e-brake handle. To remove the old cable, I pulled the pin on the e-brake handle, then removed the 4 outer nuts around the handle, leaving the one nut to hold the handle assembly in. The bolts are welded underneath, so removing the nuts from the top side is a snap.
This allows the bracket under the floor to be removed. The cable is bolted to the bracket by two plates, these have ridges to hold the cable in place.
There is a flat plate clamped to the cable where it rubs the edge of the toolbox. Couple of bolts and it is off also.
Where the cable goes through the frame, a clamp is installed to prevent rubbing.
The cable is bolted to a bracket on the brake by one bolt. On mine the head of the bolt was facing the transfer case, kind of hidden. You may have to pry the slot apart a little to remove the cable.
The adjustment nut needs removed from the cable end, There is a place on the cable to put a small wrench(approx 3/
When installing the new cable, I ran the adjustment on the handle to approx. the center, then tightened the adjustment nut on the cable till I had a good brake.
My adjustment nut was still tight, but if loose, tighten another nut next to it
so your adjustment stays put.
Dennis
Attachments
-
36.7 KB Views: 273
-
59.7 KB Views: 277
-
48.1 KB Views: 275
-
38.7 KB Views: 275
-
62.7 KB Views: 276
Last edited:


