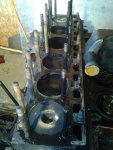
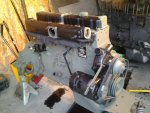
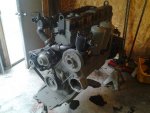
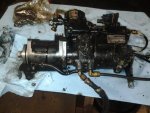
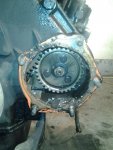
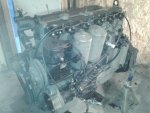
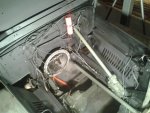
Today was a bit of a rough day. I had planned on completely installing and timing the fuel system, rebuilding the turbo, and getting the clutch pilot bearing removed if I had time. I had a couple setbacks to say the least. First I had to pull the fuel pump out of the old engine and get it ready for installation into the new engine. Reading through the TM's really helped as I didnt realize there was so much involved in timing the fuel pump. You can see more of the nastiness in the engine as I was pulling the pump gear out. Once I had removed the pump and got it on the work table I noticed it had a few lines looped back to themselves

I went to the old chinese blueprint and saw how it was supposed to be routed. I need to do a little research.. but I am pretty well convinced it is the fuel density compensator that has been bypassed. I have never really checked into it when I got the truck since I started running WMO before I ever heard of bypassing the FDC and figured mine wasnt bypassed since it still ran like a champ anyways. For now I am going to leave it as is since I know the truck runs in this configuration and I will address that at a later date.
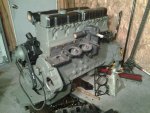
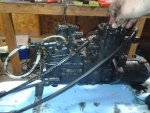
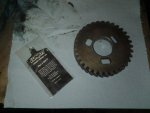
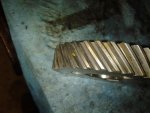
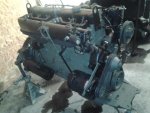
So, on to setting the timing. I have officially decided that rigging flight controls on the EA-6B Prowler is a more pleasant task. The replacement engine had the fuel pump removed, however the pump gear was left in it sealed in a plastic bag. It had a couple rust spots, but nothing a brass wire brush cant fix. I figured it would be best to reuse it rather than transferring the one out of the old engine to the new one. The line of thought here would be the same as if you reuse cam lifters, they go right back in the same spot since they have worn together and are "mated." I had a bit of assembly lube from a cam install on a different project left over and figured this would be a good time to use it. I really fear severe damage upon initial fire up, so in my mind an ounce of prevention here is worth a pound of cure.
As per the TM's, once initially timed and installed, the fuel pump shaft has to be held steady as you torque the gear bolts. I wish I could have gotten a picture of this, you guys would have had a laugh. I needed to hold the crank still as well, so there I was with my big 4 foot long ratchet resting on my shoulder, breaker bar in my left hand holding the pump shaft steady, and torque wrench in the right torquing those gear bolts, all while trying to lean over and keep an eye on the pump timing marks. It was a royal pain, but I got it.
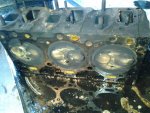
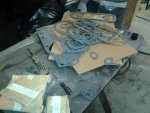
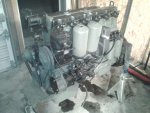
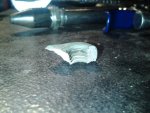
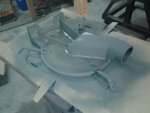
Moving on I put fresh fuel filters in the canisters and filled them with a mixture of diesel and seafoam, mounted them up. Plummed them into the fuel pump. Installed the fuel injectors and as I was going through final torque I heard a big SNAP

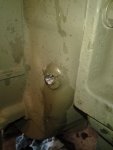
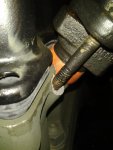
I had broken a chunk off of the head where the injector hold down bolt threads into. I am way too far into this assembly to have this happen. Turns out that after checking the depth of the screw hole, I still had "plenty" of room for a longer bolt to get good thread grip. This is where the redneck ingenuity side of me came in. Granted it doesnt look pretty, it held torque, the real test will be if it holds under pressure of running. This is a gamble, but at this point its worth a shot. Its not like it will destroy any major component if it fails. I am tempted to use something to the sort of J-B-weld on it just for some extra hold, but I am undecided.
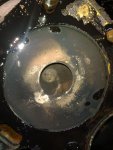
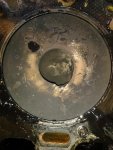
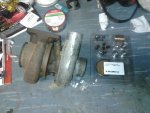
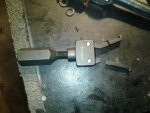
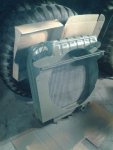
After all my little setbacks and dealing with a couple customers, I found myself working way into the night. The fuel system wasnt complete, but at a stopping point, obviously the turbo rebuild hasnt even been started, but I figured I would pull the clutch pilot bushing out real quick so I can return the rental tools in the morning... the removal tool broke

I find it ironic that the brand name of the tool was "evertough" ... Evertough my @$$!

 47.1 KB Views: 84
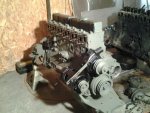 54.1 KB Views: 86
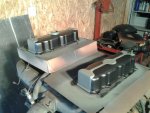 49.1 KB Views: 75