• Steel Soldiers now has a few new forums, read more about it at: New Munitions Forums!

  • Microsoft MSN, Live, Hotmail, Outlook email users may not be receiving emails. We are working to resolve this issue. Please add support@steelsoldiers.com to your trusted contacts.

Finally bought a MEP-831a

rustystud

Well-known member
9,147
2,685
113
Location
Woodinville, Washington
I'm curious if anyone else has had issues with their muffler nuts becoming lose from operating vibrations. If so I came across a product that seems to hold together for the 8 hrs I was able to test them, before having to tear down engine. NORD-LOCK NL8SP VIBRATION PROOF LOCK WASHER 5/16" paired with M8 x 1.25mm Locking Flange Nut Black Oxide Hex Exhaust Manifold Nut.

View attachment 693043View attachment 693042

When I installed these previously the stud was short by a few millimeters, this in turn causes the locking action of the (Locking Flange Nut) to not be effective by itself. A longer stud would have to be installed to accommodate the Locking Nut(Stock stud is a M8x 18). The Nord-Lock washer as far as I could and can tell it held up very effectively. It takes a far amount of force to remove (reason covered in video).


https://www.youtube.com/watch?v=IKwWu2w1gGk

After reading a report of what can happen if the muffler works its self lose, I decided to search for a solution to solve this. Report follows.
Model No.–MEP 831A – 3kWSerial No.–FZA15746 At 850 hours, the muffler bolts failed on the exhaust system causing excessive vibration and broke the muffler off from the exhaust pipe where the two were welded together (Figure 3).The entire exhaust system was replaced. Total repair time was approximately 6 hours.

Figure 3. Muffler and Header Pipe Showing Broken Welds as a Result of the Muffler Bolt Failure
View attachment 693045

I love the "Nord-Locks" ! I especially like to use them on the Injection pump in place of the "wire-nuts" .
 

rustystud

Well-known member
9,147
2,685
113
Location
Woodinville, Washington
Can you expand on the lapping comment? We were always taught to lap the valves until you have the correct width contact area (verified by bluing) then stop. You don't lap a valve until it completely covers the seat. That leaves no room for it to wear in over time.
Who ever said "lap the valves until it covers the seat" ? I sure did not. You only lap the valves until you get a solid contact around the valve face.
What you said about the only reason to "lap" the valves was for valve cooling was incorrect. It has nothing to do with valve cooling. It has ever thing to do with valve "sealing" . Lapping the valves is a cheap mans valve job. Instead of taking them to a machine shop and having the valves and seat ground. When your valves and seats look as good as his does there is no need to go the machine shop route. Just a little lapping and your golden.
 
Last edited:

Guyfang

Moderator
Staff member
Moderator
16,129
22,773
113
Location
Burgkunstadt, Germany
We use only nord locks on all our electrical connections. And all new circuit breakers come with them installed. On the transformers we install, 20 KVA, we use them one time. If you have to remove a component, it always gets new washers.
 

AfghanVeteran2010

Member
Steel Soldiers Supporter
290
20
18
Location
Odessa/Texas
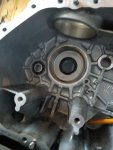
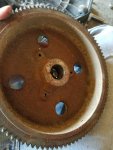
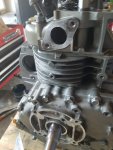
Pulled Flywheel and Crankshaft today, going to hone it tomorrow and clean it out. When using flywheel locking wrench and an puller to pull flywheel use M6x1.00 12.9 bolts don't cheap out. It takes a lot of force to break flywheel nut lose, as well as the puller. I ended up bending the bolts I had used with the puller, I don't think anything less then 12.9 would hold.
Also when using the Flywheel locking wrench take the engine off of the mounting plate and rotate it so it faces the opposite direction. The idea behind this is so the handle of the locking wrench will be able to use the plate as a fixed point to prevent it from freely turning by itself, makes it easier.

20170803_165011.jpg20170803_164326.jpg20170803_171823.jpg
 
Last edited:

DieselAddict

Well-known member
Steel Soldiers Supporter
2,486
1,891
113
Location
Efland, NC
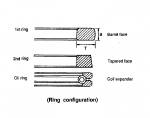
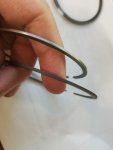
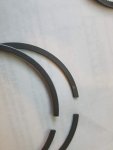
Its hard to tell by the photos but it looks like the top ring is the silver one.

It looks like the one with the matte finish is tapered.
 

AfghanVeteran2010

Member
Steel Soldiers Supporter
290
20
18
Location
Odessa/Texas
Honed the cylinder today took it out side after and noticed some vertical scratches that are still present honed for 22 secs at 550 - 600 rpm. I think I need to rehone it till they go away, right? This camera just doesn't show scratches that easy. I had to place link to my Google Drive, the site downgrades the resolution.


https://drive.google.com/drive/folders/0B45AWBFXIAUtWFhUTG05U1hmQms?usp=sharing

thanks
 
Last edited:

DieselAddict

Well-known member
Steel Soldiers Supporter
2,486
1,891
113
Location
Efland, NC
Hm. This is tough one. In the spirit of transparency, this isn't how I would run it BUT...

Since you are already headed down this path, I would hone it one more time and carefully compare the results with what you have now. If the vertical scratches don't lighten up you'll have to decided if you want to live with them or take it to a machine shop and have it cleaned up to like new condition. Since they look dark they are deep enough to hold carbon. Sure the engine will run. The scratches will be leak paths for the rings.

I'm kinda anal with this stuff since I build race engines. I would have had it bored. But that is me. What you have will be servicable. Vertical scoring will reduce your power output a little.
 

AfghanVeteran2010

Member
Steel Soldiers Supporter
290
20
18
Location
Odessa/Texas
Thanks Diesel Addict

Attempt #2

Honed for 40 secs, seems most of the scratches lightened up. Ill will retake pictures in a few hours, couldn't see screen in sunlight. My finger nail does not catch any of the scratches, before and after.

https://drive.google.com/drive/folders/0B45AWBFXIAUtd2FlZEVYSlllZVE?usp=sharing


If I end up taking it to a shop, from what it understand that will involve a oversize piston and rings to match. I am considering it though just don't know how much they will charge when its done.
 
Last edited:

rustystud

Well-known member
9,147
2,685
113
Location
Woodinville, Washington
The last hone job looks pretty good. Your up and down speed was to fast though. The crosshatch pattern should be more pronounced, more widely spaced. You should have used more hone oil also. Still all in all a pretty good job ! Put some pistons in there and run it !
 

AfghanVeteran2010

Member
Steel Soldiers Supporter
290
20
18
Location
Odessa/Texas
I forgot to add. Don't use "synthetic" oil until your new rings are broken in. Us a good 5-30W standard oil. Also when you first start-up, load the generator to at least 80% . Keep it at this for at least two hours. Four hours would be better if you can. Then shut-off the unit and drain the oil and replace the filter. For the next twenty hours keep the standard oil in it. Then you can drain the oil and replace the filter and install a good synthetic oil. These "Yanmar" engines are fantastic little power houses, and with just normal maintenance can last years. I really love them !
Are you sure about 5W-30, the service manual specifies 10W30 or yanmarL70AE oil.png
according to chart I need to use 20W-40.

MonthLowHigh
Jul69.1°F94.3°F
Aug67.9°F92.8°F
Sept61.6°F86.1°F


Also should I add break in oil additive?

Thanks everyone
 
Last edited:

AfghanVeteran2010

Member
Steel Soldiers Supporter
290
20
18
Location
Odessa/Texas
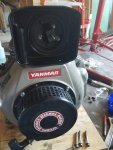
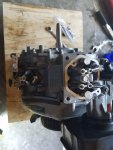
Made it pretty far on putting it back together. When I order the gasket set I didn't even think about the pre-heater, so were just going to do with out it. It rarely gets that cold here. Still need to do the valve adjustment yes I put the flywheel cover on. Should I redo the timing on the injection pump??


20170806_151206.jpg20170806_151215.jpg20170806_151527.jpg20170806_151538.jpg
 

rustystud

Well-known member
9,147
2,685
113
Location
Woodinville, Washington
Are you sure about 5W-30, the service manual specifies 10W30 or View attachment 693618
according to chart I need to use 20W-40.

Month
Low
High
Jul
69.1°F
94.3°F
Aug
67.9°F
92.8°F
Sept
61.6°F
86.1°F

Also should I add break in oil additive?

Thanks everyone
Honestly any good (non-synthetic) engine will work here. The 5W-30 is just extremely common to find now a days.
Your only going to be using this oil for just a very short time. Five to ten hours max. Then drain it out, replace the oil and filter and run it about another ten hours. Then you should be able to go to a good synthetic oil.
Remember during this break-in period the generator should not go under 80% load. The closer to 100% the better.
You need this pressure on the rings to seat them in properly.
 
Top
AdBlock Detected

We get it, advertisements are annoying!

Sure, ad-blocking software does a great job at blocking ads, but it also blocks useful features of our website like our supporting vendors. Their ads help keep Steel Soldiers going. Please consider disabling your ad blockers for the site. Thanks!

I've Disabled AdBlock
No Thanks