• Steel Soldiers now has a few new forums, read more about it at: New Munitions Forums!

  • Microsoft MSN, Live, Hotmail, Outlook email users may not be receiving emails. We are working to resolve this issue. Please add support@steelsoldiers.com to your trusted contacts.

FLU419 SEE HMMH HME Owners group

FarmMOG

Member
42
1
8
Location
Texas/Oklahoma
I have been thinking about how to run a double set of aux hydraulics to the front loader arms to use like a conventional skid steer tractor. This is my thought: have a hydraulic splitter manifold plumbed into the aux hydraulic circuit that is already on the SEE. Here is a link to a three way manifold splitter https://summit-hydraulics.com/produ...MIvLik5KmI2AIVAQNpCh25eg9vEAYYCSABEgKEz_D_BwE.
You could have another power line connected to the current solenoid control with a one way diode that would prevent the other switch from activating the air solenoid and the rpm coming up to 2000 RPM whenever it was switched on. This new solenoid would control two separate hydraulic lines independently of each other and still allow aux hydraulics from the currently installed system. It would prevent having to plumb the rear hydraulic system up to the front and thus having to switch the lines from the backhoe to the front every time you needed to use the system. I think it would work like a champ. Any comments or suggestions would be greatly appreciated. Thanks in advance.
 

The FLU farm

Well-known member
Steel Soldiers Supporter
3,341
1,328
113
Location
The actual midwest, NM.
You should look into how an HMMH is equipped, which has a splitter button on what's the curl lever on a SEE.
On the HMMH it's used for sideways tilting of the forks.

I like levers, so I'd prefer adding a new valve with a separate lever. If I could do that on my tractor, you can do it.
 

FarmMOG

Member
42
1
8
Location
Texas/Oklahoma
You should look into how an HMMH is equipped, which has a splitter button on what's the curl lever on a SEE.
On the HMMH it's used for sideways tilting of the forks.

I like levers, so I'd prefer adding a new valve with a separate lever. If I could do that on my tractor, you can do it.
I talked to the local hydraulic shop about this very same thing, and he came up with a few ways to do this, and some reasons it might not work.
1. Add two additional sections to existing hydraulic control valve. This would require finding two like valves and then inserting them into valve assembly. Could be hard to find exact type of control valves needed, and then if it was lever actuated, adding additional control linkage into cab. There is room to do this, but would be difficult and potentially expensive, along with finding exact valves that would work.
2. If there is an additional power output on valve assembly (not exactly sure the correct name), then you can connect another valve assembly to it. This is very questionable to do unless he can find model numbers and op specs on valve assembly. This would be my preferred method if there is a power out on the assembly.
3. Connect rear hydraulics to extra valve assembly and plumb to front. This is not that complicated to do, but you have to either have the aux front hydraulics or the backhoe connected, which would involve switching out whenever you need to use the one not connected. It also brings up the point about not having the rear hydraulics engaged and running the engine over 2000 RPM.
4. If no power out on hydraulics assembly, then connect a splitter into assembly on one of the existing valves. This is my second choice with the existing aux hydraulics being the best candidate for the job.

If you want to run linkages into cab to control extra hydraulics, there are two ways mechanically and one way electrically to do this.
1. Mechanically: install a system of push pull tubes connected to levers or joystick. Levers are what currently controls the loader assembly. Expensive and hard.
2. Mechanically: install a remote control using cables attached to levers or a joystick. Again expensive and somewhat difficult, but not as extensive as option number 1.
3. Run wires from electrically controlled solenoids to either switches (cheapest) or a joystick (cheaper than mechanically connected). You don't get as good as control of the hydraulics as mechanically, but is still very usable.
 

The FLU farm

Well-known member
Steel Soldiers Supporter
3,341
1,328
113
Location
The actual midwest, NM.
Okay, I dove into that part of the world of hydraulics when installing a separate valve for angling a snow blade on my tractor. Read up on it, ordered a suitable (open center) valve from Surplus Center, spent much time routing hoses from the "power beyond" in very cramped quarters, and was rewarded with a setup that works great.
I even had an electrically operated splitter valve setup I could've used, and ones specifically made for the application were available, but I wanted a separate lever.

On a SEE I'd mount the valve to the outside on the back of the cab, much like I mounted it under the floor on the tractor. By turning the lever portion 180 degrees (which I realized was possible on that series valve) the hydraulics are all outside and the lever ends up inside.

I'm sure you could do it, and now you have me motivated to do it on the Winter SEE. I could use a pair of QDs on it to operate the rock bucket with a grapple.
 

Pinsandpitons

Active member
162
55
28
Location
Central Washington
On the hydraulic controls topic; adding in solenoid controlled A/B valves to the curl circuit has got a few advantages.
1. No linkages to try and design and install correctly for travel etc
2. Not adding another stick to the cramped forest of controls in the cab (plus for me, may be minus for lovers of sticks)
3. Scalable, Not limited to only one more function
I work on snowcats for a living and they have a twelve way blade plus a 12 or 14 way ( depending on how you count) tiller on the back controlled from a joystick with buttons for different functions. It looks complex at first but it's just two proportional valves that get switched to various circuits by buttons. I've thought about this project too a bit and it seems to me the lowest hanging fruit is the inline a/b with one additional wire set coming to the cab from the loader lift frame. My .02.

Long first post. I'll be back. Just got my SEE. Runs and drives great but I have a looooong list of things to attend to before I can really put it to work.
 

The FLU farm

Well-known member
Steel Soldiers Supporter
3,341
1,328
113
Location
The actual midwest, NM.
Welcome, Pinsandpitons. Even if you prefer switches over levers.

And I should admit (just won't do it publicly) that there can be such a thing as too many levers. I have yet to master curling the bucket out while raising the boom and pulling the dipper in on the backhoe when digging or cleaning out a ditch.
For whatever reason, maybe simply because now it doesn't really matter, I can do it all in an elegant and fluid motion when dumping the bucket.

The superior twin stick setup on the small, modern backhoe is so much easier to use, I think. Well, it used to be. Now I have enough hours on the SEE's Case levers that I'm struggling for a while when operating the twin sticks.

Either way, I'd rather have more levers (even if I can't operate them correctly) than any switches.
 

Pinsandpitons

Active member
162
55
28
Location
Central Washington
That was one of the first things I thought I would try to switch hydraulically on the SEE. I have hundreds of hours in a cat backhoe loader and excavator and was wondering how hard or if anyone has ever switched those stupid case levers to cat controls.
 

The FLU farm

Well-known member
Steel Soldiers Supporter
3,341
1,328
113
Location
The actual midwest, NM.
At one point I did research it, and there was a twin stick setup available. Buying used seemed much more feasible, price wise.
Maybe I should continue that quest...except no matter what, I'll still have one backhoe with the Case levers. Unless I switch both over.
That'd be the smart thing to do, I suppose, if I ever want to get any good with operating either setup.
 

FarmMOG

Member
42
1
8
Location
Texas/Oklahoma
I have about 3 hours working a backhoe (in the SEE only), and would sure like to use a two lever setup. This would be way down on my priority list, as it functions just fine for now. My next project is to fix the front hydraulic valve assembly; several different small issues that will require complete disassembly and rebuild. This needs to be done relatively soon, as the aux hydraulics have to be connected together to keep the system from overheating, and the loader bucket bleeds down rather fast during use. While I have to remove and rebuild, I was thinking this would be the best time to install the two aux lines to the front bucket assembly. I will talk to the hydraulics shop next week hopefully and see what we all can come up with to work the best. I am not looking forward to have this expense, but it is necessary and maybe will force me to include the extra lines as a not too much more cost over the currently needed work.
 

The FLU farm

Well-known member
Steel Soldiers Supporter
3,341
1,328
113
Location
The actual midwest, NM.
FarmMog, I forgot to take a photo of the valve setup in the tractor today. I think the valve was around $150, and then about as much in hoses and fittings.
To me the real task would be to figure out the best places to tap into the SEE's system.
 

The FLU farm

Well-known member
Steel Soldiers Supporter
3,341
1,328
113
Location
The actual midwest, NM.
Okay, here you go. Had to use the tractor today, and even remembered to take photos.

The valve's mounted to the floor, upside down if you will (sorry for the dirt, inside and out, but this one's been worked hard for a while now). Anyway, that's how I picture the valve mounted, except to the back of the SEE's cab.

The lever is extended a bit to make it more comfortable to reach while driving. Normally it would've pointed down, but I turned that section 180. In a SEE it would come forward through the back of the cab.

Made a simple bracket for the QDs on the loader, and that was it.DSCN1653[1].jpgDSCN1652[1].jpgDSCN1650[1].jpg
 

Speedwoble

Well-known member
606
301
63
Location
New Holland, PA
I looked into getting a 3 circuit loader control valve from a tractor, that would allow joystick control of the loader functions and another valve for grapple operation. However, it would require giving up the control of the loader from the backhoe position.

Rather, I will get a hydraulic multiplier like this one https://summit-hydraulics.com/product-category/hydraulic-multipliers/ they have a 24v solenoid available. Then I will mount a push button switch to the end of one of the loader handles.
 

The FLU farm

Well-known member
Steel Soldiers Supporter
3,341
1,328
113
Location
The actual midwest, NM.
That first one looks a lot like the one I had on the tractor for a while, when needing four remotes for one implement.
Anyway, I wouldn't pay extra (or bother even if the price was the same) for a 24 Volt version. I run the 12 Volt snow blower controls off of one battery, and it works fine.
Come to think of it, all CUCVs run everything except the starter off of one of their two batteries.
 

Pinsandpitons

Active member
162
55
28
Location
Central Washington
Flame me if necessary as I'm not yet sure if this question belongs in this thread; BUT... i tested the stanley breaker that came with my SEE the other day and it worked great as far as I could tell, but when I disconnected it (brief run ~30 sec) it started bleeding out of the nut at the top. (I think that nut covers the accumulator adjustment screw) Like really bleeding. Probably nearly the whole volume it holds. So the question is, has anyone experience with this problem or rebuilding these units? I think its the BR85 and seal kits are available.

Also, though the cost of the multiplier speedwoble found is kinda steep, it would do what you want. Maybe you could get just the valve block and magnets and save some on the quick disconnects which wouldn't be required. They're very proud of those things.
 
Last edited:

The FLU farm

Well-known member
Steel Soldiers Supporter
3,341
1,328
113
Location
The actual midwest, NM.
Sorry, can't help you with that one. Heck, I haven't even tried my SEE tools yet.
But what I did learn from messing with the impacts (also Stanley) is that the web site has lots of good info, and that parts are readily available.
 

FarmMOG

Member
42
1
8
Location
Texas/Oklahoma
Okay, here you go. Had to use the tractor today, and even remembered to take photos.

The valve's mounted to the floor, upside down if you will (sorry for the dirt, inside and out, but this one's been worked hard for a while now). Anyway, that's how I picture the valve mounted, except to the back of the SEE's cab.

The lever is extended a bit to make it more comfortable to reach while driving. Normally it would've pointed down, but I turned that section 180. In a SEE it would come forward through the back of the cab.


Looking at the bracket for the quick disconnects, it looks like the brackets are angled and welded into the fittings the hose connects to. Did you make this yourself, or buy an angled fitting and then weld it to the bracket. Very nice looking.

I really prefer to use valves that are electrically controlled, as I can keep my hands on both loader levers using some sort of switch connected to them, and not become task saturated trying to move between the different levers. It also lets me install a constant on switch if needed to keep the fluid moving. I am trying to come up with an implement to make for the front quick disconnect that will allow me to drive and pull t posts with a log splitter type lever controlled from the front of the SEE. We have several miles of fence to build and I sure have worn my shoulders out using the standard t post driver. I am wanting to automate it as much as possible, as I am getting older and not quite able to do what I used to.

.View attachment 712409
 

The FLU farm

Well-known member
Steel Soldiers Supporter
3,341
1,328
113
Location
The actual midwest, NM.
As I recall, I used flat stock to make that bracket, which is angled down (forward) then welded 45-degree fittings to it, to make the hoses comfortable and have the QDs facing straight forward.

Not that I've tried it with the SEE yet, but have set maybe a 1/4-mile of fence posts with the tractor's bucket. Basically just pushing down on the post with the bottom of the bucket while moving ever so slowly backwards to make up for the decreased distance as the bucket effectively moves forward as it's going down.

Having a pipe (cut to the right length) to keep the T-posts from bending helps a lot, as would someone to hold the post when first starting to sink it in.
 

LZahariev

Member
40
0
6
Location
Chicago, IL
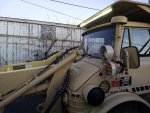
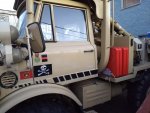
Added a light bar to help for those night jobs. Also, found a place for two fuel cans. I am still shopping for a spare tire, unfortunately it was missing when I purchased the SEE.IMG_20171216_163042341.jpgIMG_20171216_163240694.jpg
 

The FLU farm

Well-known member
Steel Soldiers Supporter
3,341
1,328
113
Location
The actual midwest, NM.
That light bar could come in handy. I've been meaning to put two 30-degree work lights up there, to complement the 60-degree ones that live where the stock lights were.

And speaking of visibility, you should be glad that you don't have a spare.
 

LZahariev

Member
40
0
6
Location
Chicago, IL
I was debating to replace the stock lights or get the light bar but eventually settled on the light bar. It is definitely more light then I was expecting.
 
Top