- 961
- 1,818
- 93
- Location
- Wauchula, FL
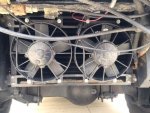
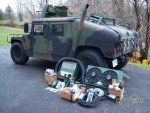
The Plan: Take a readily available Humvee AC kit, Red Dot PN# RD-2-5497-0, NSN:4120-01-581-9451, Contract CAGE: 31UG4
Note: I found my kit at the auction site we all love.
and the FMTV Interior AC unit (Evaporator-Heater Assembly) 1st generation Red Dot PN# R-5750-1
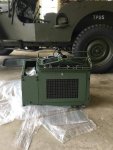
Combine them to make a fully functional Air conditioner for my 2003 M1078A1 with the 3126B engine before the Florida summer heat gets here.
Don't get me wrong, I wanted to collect all the factory original parts to do it but doing so looked like a more difficult (meaning finding all the separate parts not the installation) and long process.
After having the Humvee kit and the AC unit side by side I was able to verify this could be done with some rewiring and some custom brackets.
Being a Prototype Engineer with my own machine shop, I set out to design and fabricate the brackets and pulley necessary for a clean installation that should allow the DIY guys the opportunity to have a working AC in there FMTV's. Note rilling, welding, and machining the generator pulley are required.
Here is what it looks like installed.

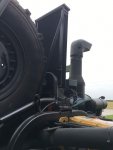
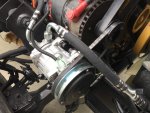
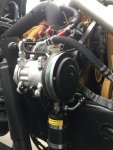
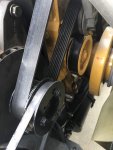
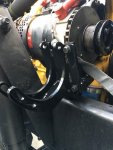
The Compressor (SanDen model# U4311) is mounted using the Red Dot AC universal adaptor mount kit 75R 6010 / RD-5-5032 to the custom steel bracket that is welded to the generator mount. To do the welding the generator and generator bracket were removed. I also made some custom bushings that allow for a better fit of the compressor to the universal mount. instead of just using the stacked washers that came with the kit.
The Generator Pulley was removed and machined to fit the new v-grove pulley.
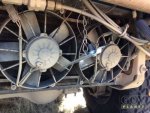
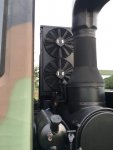
The Condenser is mounted to the round tube by drilling two 1/2" holes for the two 1/2" bolts. The angle support is mounted to the existing welded loop on the tire support tube, no drilling required for that. Drilling some 5/16" holes in the condenser for the mounts would be required and some minor trimming of some sheet metal around the AC line connectors. All of the custom brackets for the condenser are made of aluminum.
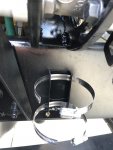
The Drier is mounted using a custom aluminum bracket mounted to the frame using existing holes in the frame. No drilling required.
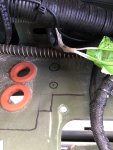
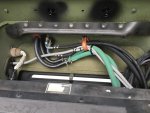
The interior AC unit has 4 holes that require drilling through the floor, 2 for the high and low AC lines and 2 for the drains. The two for the AC lines are shown with the two circles with the dot in the middle. I found the best fit was to put the low pressure line closest to the windshield. To ensure the best fit for the drain holes, make a template (using some paper or cardboard) of the bottom of your AC unit and then match it up with the mounting holes in the floor.
The electrical lines were routed through an existing hole made for wires to go through.
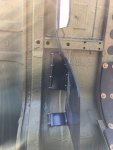
The Engine Skirt was moved out in order to miss the compressor using custom aluminum spacers. Drilling out the rivets holding the skirt on and drilling holes in the aluminum spacers to match the skirt and mount would be necessary.
The AC lines, fill ports, connectors, crimpers etc all "should" come in the humvee kit and was pretty straight forward making the lines.
The Electric requires splicing wires from the humvee harness into the interior AC harness. The new interior AC unit requires two 24v power supplies and one 12v power supply. After removing the old heater it leaves one 24v power supply for the blower and one 12v power supply for the lights. So you only need to find one 24v power supply for the condenser off of the fuse panel. I wired it to a spare fuse that wasn't being used and put a 25amp fuse in it.
Final step find a qualified AC specialist to charge the system. Now we have 50-60 degree air conditioning at the vent depending on the out side temperature.
Note:
This is on a M1078A1 with a 3126 engine that has the serpentine belt
My humvee kit did not have the the universal compressor mount, I've been told that it should have.
To make this work on a M1078 with the 3116 engine a similar but different custom bracket I would need to designed a new bracket for welding to the generator bracket for the compressor mount. As the 3116 generator mount is different than the 3126 mount.
Now I can enjoy driving it this summer!
If I get enough serious interests I would consider building some sort of bracket and hardware kit to make your humvee kit and interior AC unit installation as easy as possible for those interested.
I hope this makes sense to everyone. I'll go back over it later and make changes to any mistakes I catch.
Note: I found my kit at the auction site we all love.

and the FMTV Interior AC unit (Evaporator-Heater Assembly) 1st generation Red Dot PN# R-5750-1

Combine them to make a fully functional Air conditioner for my 2003 M1078A1 with the 3126B engine before the Florida summer heat gets here.
Don't get me wrong, I wanted to collect all the factory original parts to do it but doing so looked like a more difficult (meaning finding all the separate parts not the installation) and long process.
After having the Humvee kit and the AC unit side by side I was able to verify this could be done with some rewiring and some custom brackets.
Being a Prototype Engineer with my own machine shop, I set out to design and fabricate the brackets and pulley necessary for a clean installation that should allow the DIY guys the opportunity to have a working AC in there FMTV's. Note
Here is what it looks like installed.


The Compressor (SanDen model# U4311) is mounted using the Red Dot AC universal adaptor mount kit 75R 6010 / RD-5-5032 to the custom steel bracket that is welded to the generator mount. To do the welding the generator and generator bracket were removed. I also made some custom bushings that allow for a better fit of the compressor to the universal mount. instead of just using the stacked washers that came with the kit.
The Generator Pulley was removed and machined to fit the new v-grove pulley.
The Condenser is mounted to the round tube by drilling two 1/2" holes for the two 1/2" bolts. The angle support is mounted to the existing welded loop on the tire support tube, no drilling required for that. Drilling some 5/16" holes in the condenser for the mounts would be required and some minor trimming of some sheet metal around the AC line connectors. All of the custom brackets for the condenser are made of aluminum.

The Drier is mounted using a custom aluminum bracket mounted to the frame using existing holes in the frame. No drilling required.

The interior AC unit has 4 holes that require drilling through the floor, 2 for the high and low AC lines and 2 for the drains. The two for the AC lines are shown with the two circles with the dot in the middle. I found the best fit was to put the low pressure line closest to the windshield. To ensure the best fit for the drain holes, make a template (using some paper or cardboard) of the bottom of your AC unit and then match it up with the mounting holes in the floor.
The electrical lines were routed through an existing hole made for wires to go through.

The Engine Skirt was moved out in order to miss the compressor using custom aluminum spacers. Drilling out the rivets holding the skirt on and drilling holes in the aluminum spacers to match the skirt and mount would be necessary.
The AC lines, fill ports, connectors, crimpers etc all "should" come in the humvee kit and was pretty straight forward making the lines.
The Electric requires splicing wires from the humvee harness into the interior AC harness. The new interior AC unit requires two 24v power supplies and one 12v power supply. After removing the old heater it leaves one 24v power supply for the blower and one 12v power supply for the lights. So you only need to find one 24v power supply for the condenser off of the fuse panel. I wired it to a spare fuse that wasn't being used and put a 25amp fuse in it.
Final step find a qualified AC specialist to charge the system. Now we have 50-60 degree air conditioning at the vent depending on the out side temperature.
Note:
This is on a M1078A1 with a 3126 engine that has the serpentine belt
My humvee kit did not have the the universal compressor mount, I've been told that it should have.
To make this work on a M1078 with the 3116 engine a similar but different custom bracket I would need to designed a new bracket for welding to the generator bracket for the compressor mount. As the 3116 generator mount is different than the 3126 mount.
Now I can enjoy driving it this summer!
If I get enough serious interests I would consider building some sort of bracket and hardware kit to make your humvee kit and interior AC unit installation as easy as possible for those interested.
I hope this makes sense to everyone. I'll go back over it later and make changes to any mistakes I catch.
Last edited:


