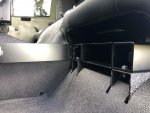
Thanks Keith for figuring this out. I just did this install and it's working great. It was 90 here yesterday and it was blowing mid 40's at the vents.
Couple notes:
- The EZ Clip fittings I got didn't come with the green o-rings but you can get them at any auto parts store.
- I wired the condenser fan so it's always on when the A/C is on. I'll just turn the A/C off when fording.
- I had a hard time finding a shop that could figure out how much R134 to put in so I just bought a gauge kit and vacuum pump and did it myself (included in the cost below). Just Google search for a chart that shows system pressures for the ambient temp and fill the system until you reach those pressures. I ended up using 3 pounds which was at the low end of the pressure range. I'll check it once I run it for a while and add more if needed.
Here's the list of the parts I used with pricing in case anyone else wants to give it a try.

Here's the EZ-Clip info. There are a few extras but off the top of my head I can't remember which ones they are.
I got them from Truckerac.com but they're also available at hosewarehouse.com
E-Z CLIP FITTING STRAIGHT 08-6031E 1 27.84
FEMALE O-RING w/R134a PORT Ftg 6 Hose 6
E-Z CLIP FITTING 90° 08-6933E 1 19.89
FEMALE O-RING with R134a PORT 10-10
E-Z CLIP FITTING 90 08-6961E 3 15.80
DEGREE FEMALE O'RING Ftg 6 Hose 6
E-Z CLIP FITTING 90 08-6963E 1 16.61
DEGREE FEMALE O'RING Ftg 10 Hose 10
E-Z CLIP FITTING 90 08-6962E 2 16.42
DEGREE FEMALE O'RING Ftg 8 Hose 8
E-Z CLIP FITTING STRAIGHT 08-6061E 2 13.62
FEMALE O-RING Ftg 6 Hose 6
Here's the A/C Hose info. I got them at hosewarehouse.com
GH001-8 Eaton Aeroquip EverCool A/C HoseSAE J2064 Type E E-Z Clip Multi-Refrigerant Hose 5 ft
GH001-6 Eaton Aeroquip EverCool A/C HoseSAE J2064 Type E E-Z Clip Multi-Refrigerant Hose 10 ft
GH001-10 Eaton Aeroquip EverCool A/CHose SAE J2064 Type E E-Z Clip Multi-Refrigerant Hose 10 ft
Installed pics....
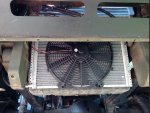
The 16"x23" condenser fit perfectly. I used nutserts and 1" spacers to mount it to the existing sheet metal around the radiator. I'm thinking I might need to beef it up a little so I'll keep an eye on it. Same with the fan mounting. The plastic ties it came with are pretty cheap so I'll probably replace them with something stronger.
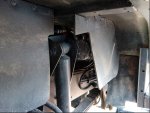
Pulley from Fleet Farm drilled and tapped into the stock pulley.
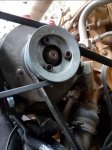
I modified the low pressure inlet fitting (upper left) so I could access the valve with the cab down. The high pressure side valve is coming out of the drier again so it can be accessed with the cab down.
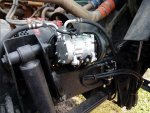
The drier and high pressure switch come with the condenser kit. The yellow wire goes to the Heater/AC box in the cab. The black goes to ground.
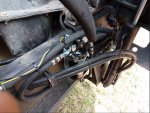
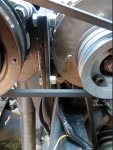
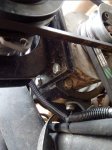
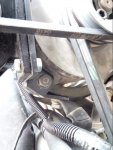
The bracket is made out of 1/4" steel bent and wrapped around the bottom of the alt bracket to an existing hole. I also welded a tab for the alternator pivot bolt to go through. At the top for the bracket I welded a tab and bolted it into the alternator ground hole. (Some people may not like that idea but I think it'll work fine since the belt tension is pulling the bracket towards the alternator so there should be very little stress on it.)

Couple notes:
- The EZ Clip fittings I got didn't come with the green o-rings but you can get them at any auto parts store.
- I wired the condenser fan so it's always on when the A/C is on. I'll just turn the A/C off when fording.
- I had a hard time finding a shop that could figure out how much R134 to put in so I just bought a gauge kit and vacuum pump and did it myself (included in the cost below). Just Google search for a chart that shows system pressures for the ambient temp and fill the system until you reach those pressures. I ended up using 3 pounds which was at the low end of the pressure range. I'll check it once I run it for a while and add more if needed.
Here's the list of the parts I used with pricing in case anyone else wants to give it a try.

Here's the EZ-Clip info. There are a few extras but off the top of my head I can't remember which ones they are.
I got them from Truckerac.com but they're also available at hosewarehouse.com
E-Z CLIP FITTING STRAIGHT 08-6031E 1 27.84
FEMALE O-RING w/R134a PORT Ftg 6 Hose 6
E-Z CLIP FITTING 90° 08-6933E 1 19.89
FEMALE O-RING with R134a PORT 10-10
E-Z CLIP FITTING 90 08-6961E 3 15.80
DEGREE FEMALE O'RING Ftg 6 Hose 6
E-Z CLIP FITTING 90 08-6963E 1 16.61
DEGREE FEMALE O'RING Ftg 10 Hose 10
E-Z CLIP FITTING 90 08-6962E 2 16.42
DEGREE FEMALE O'RING Ftg 8 Hose 8
E-Z CLIP FITTING STRAIGHT 08-6061E 2 13.62
FEMALE O-RING Ftg 6 Hose 6
Here's the A/C Hose info. I got them at hosewarehouse.com
GH001-8 Eaton Aeroquip EverCool A/C HoseSAE J2064 Type E E-Z Clip Multi-Refrigerant Hose 5 ft
GH001-6 Eaton Aeroquip EverCool A/C HoseSAE J2064 Type E E-Z Clip Multi-Refrigerant Hose 10 ft
GH001-10 Eaton Aeroquip EverCool A/CHose SAE J2064 Type E E-Z Clip Multi-Refrigerant Hose 10 ft
Installed pics....
The 16"x23" condenser fit perfectly. I used nutserts and 1" spacers to mount it to the existing sheet metal around the radiator. I'm thinking I might need to beef it up a little so I'll keep an eye on it. Same with the fan mounting. The plastic ties it came with are pretty cheap so I'll probably replace them with something stronger.


Pulley from Fleet Farm drilled and tapped into the stock pulley.

I modified the low pressure inlet fitting (upper left) so I could access the valve with the cab down. The high pressure side valve is coming out of the drier again so it can be accessed with the cab down.

The drier and high pressure switch come with the condenser kit. The yellow wire goes to the Heater/AC box in the cab. The black goes to ground.

The bracket is made out of 1/4" steel bent and wrapped around the bottom of the alt bracket to an existing hole. I also welded a tab for the alternator pivot bolt to go through. At the top for the bracket I welded a tab and bolted it into the alternator ground hole. (Some people may not like that idea but I think it'll work fine since the belt tension is pulling the bracket towards the alternator so there should be very little stress on it.)


Last edited:


