yertnamreg
Member
- 92
- 21
- 8
- Location
- Houston TX
As suggested, I'll do a post on extending the frame of your FMTV.
Disclaimer: I'm not an expert in metal fabrication and there is no way what I've done is as strong as the frame originally was, but its good enough for my purposes.
Let's start with some back story... I originally purchased my truck with the intention of turning it into an RV. I looked at a lot of different ways to get a box on the back, but ultimately chose to use a van/box truck body. Hey, if its good enough for commercial trucks, it should be good enough for mine.
I started looking around a bodies and found a few candidates, but 20ft boxes are hard to find. 24ft and 26ft are much more common. Eventually I found a 22ft box that had never been used that a shop had accidentally bought for a job that didn't work out, so I contact them and put a downpayment on it.
Now I had a problem.... I needed to stretch the truck 2ft so the box is fully supported when mounted. My uncle works at a BIG metal fab shop that does production work for big name brand companies and he offered to help do the stretch. With approval from his bosses we got access to the shop and the welding equipment after hours.
First things first, we needed U channel that matches the channel on the truck. This is easier said than done. The channel on the truck is 5/16" thick which is kind of a non-standard size. You can get it but it typically takes a week for a metal shop to order it and get it in stock. What the shop is going to get though is 5/16" plate which they'll then have to brake to form the channel. Thankfully the shop my uncle works at had 5/16" plate in stock and a press brake with more than enough capacity to bend it.
Now comes the question of where do you put the new channel you just bent. Originally I planned to just weld it on the end of the frame. While this minimizes cutting and welding, it has some problems. The rear crossmember, tail light assembly, and ICC bumper all have to be removed and moved back onto the new frame rail. Thats a lot of huck bolts to remove and a lot of holes to drill in the new material.
Instead, I hatched the plan of cutting a little farther forward in the frame which would avoid all the above issues. This also allowed me to use the rear most huck bolt hole to align the top frame rail when reattaching it.
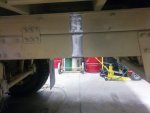
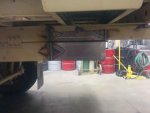
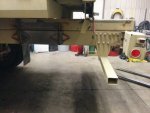
In terms of welding we didn't do anything special. Just cleaned up the edges, removed the CARC with a wheel and welded the seams. We cut diamond shaped fish plate that we covered the seams with afterward to give the joint additional strength.
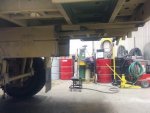
At this point we are 90% done. The only thing left to do is attach the big lower frame rail/bumper/cross member piece and plug in the electrical extensions I made. I have video of the whole process which I'll be cutting down and putting on youtube. Here are some initial pictures. I'll post more as well as the video as I have them.
FYI I am selling the flat bed for cheap if anyone is interested.
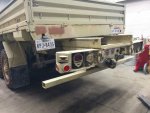
Edited to add finished product pics
Disclaimer: I'm not an expert in metal fabrication and there is no way what I've done is as strong as the frame originally was, but its good enough for my purposes.
Let's start with some back story... I originally purchased my truck with the intention of turning it into an RV. I looked at a lot of different ways to get a box on the back, but ultimately chose to use a van/box truck body. Hey, if its good enough for commercial trucks, it should be good enough for mine.
I started looking around a bodies and found a few candidates, but 20ft boxes are hard to find. 24ft and 26ft are much more common. Eventually I found a 22ft box that had never been used that a shop had accidentally bought for a job that didn't work out, so I contact them and put a downpayment on it.
Now I had a problem.... I needed to stretch the truck 2ft so the box is fully supported when mounted. My uncle works at a BIG metal fab shop that does production work for big name brand companies and he offered to help do the stretch. With approval from his bosses we got access to the shop and the welding equipment after hours.
First things first, we needed U channel that matches the channel on the truck. This is easier said than done. The channel on the truck is 5/16" thick which is kind of a non-standard size. You can get it but it typically takes a week for a metal shop to order it and get it in stock. What the shop is going to get though is 5/16" plate which they'll then have to brake to form the channel. Thankfully the shop my uncle works at had 5/16" plate in stock and a press brake with more than enough capacity to bend it.
Now comes the question of where do you put the new channel you just bent. Originally I planned to just weld it on the end of the frame. While this minimizes cutting and welding, it has some problems. The rear crossmember, tail light assembly, and ICC bumper all have to be removed and moved back onto the new frame rail. Thats a lot of huck bolts to remove and a lot of holes to drill in the new material.
Instead, I hatched the plan of cutting a little farther forward in the frame which would avoid all the above issues. This also allowed me to use the rear most huck bolt hole to align the top frame rail when reattaching it.
In terms of welding we didn't do anything special. Just cleaned up the edges, removed the CARC with a wheel and welded the seams. We cut diamond shaped fish plate that we covered the seams with afterward to give the joint additional strength.
At this point we are 90% done. The only thing left to do is attach the big lower frame rail/bumper/cross member piece and plug in the electrical extensions I made. I have video of the whole process which I'll be cutting down and putting on youtube. Here are some initial pictures. I'll post more as well as the video as I have them.
FYI I am selling the flat bed for cheap if anyone is interested.


Edited to add finished product pics
Last edited:


