• Steel Soldiers now has a few new forums, read more about it at: New Munitions Forums!

  • Microsoft MSN, Live, Hotmail, Outlook email users may not be receiving emails. We are working to resolve this issue. Please add support@steelsoldiers.com to your trusted contacts.

Fuse block melted

Salty dog

Active member
112
175
43
Location
Spring, Texas
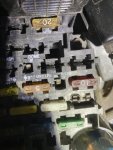
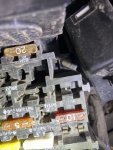
Discovered that the “Main light” 30 amp fuse slot had melted/ distorted in the past. The fuse will not fully go into the slot, I discovered the problem when I was driving and suddenly lost my driving lights . Is there a way to repair the slot? Carefully cut the plastic to allow the fuse to be fully seated or do I need to replace the fuse box?
 

Attachments

WWRD99

Well-known member
Steel Soldiers Supporter
1,138
1,755
113
Location
York Pa
Discovered that the “Main light” 30 amp fuse slot had melted/ distorted in the past. The fuse will not fully go into the slot, I discovered the problem when I was driving and suddenly lost my driving lights . Is there a way to repair the slot? Carefully cut the plastic to allow the fuse to be fully seated or do I need to replace the fuse box?
What I have done with those before is remove the wire that was burned from the fuse box and fix it or replace the wire end as it usually has burned up insulation then open up the plastic fuse slot so a new fuse can go in there...if the wire socket is melted and the wire just pops out then use some hot glue to hold it in place,,,or something like that as long as it doesn't conduct electricity.
 

frank8003

In Memorial
In Memorial
6,426
4,985
113
Location
Ft. Lauderdale, Florida
Golly..... this was so common in the Chrysler products 1965 to 1970
I would take the offending wire and connectors and drill hole right
thru the "fuse" block and put a line fuse in that puppy. I win.

It was my Dads cars, I was helping, He just knew how to turn the
key to get to work and to get home to Mom.
They had been thru so much and They were raisin up 4 kids.

I searched quite a few junkyards and about 40/50 same
flavor cars there always finding the same fault so I just fixed my way.
 

Salty dog

Active member
112
175
43
Location
Spring, Texas
I inspected the damaged area and saw that the metal retainer on the top left is also cracked, leading me to believe it will eventually fail applying pressure to the fuse. Can a new fuse box be spliced in? Do they make repair parts or would I have to find a donor box to repair the damaged metal
 

Valor

Active member
196
216
43
Location
Apple Valley, Ca.
I inspected the damaged area and saw that the metal retainer on the top left is also cracked, leading me to believe it will eventually fail applying pressure to the fuse. Can a new fuse box be spliced in? Do they make repair parts or would I have to find a donor box to repair the damaged metal
How about take the contacts out and put them in an open, unused socket? Just relabel the socket.
 

cb88

New member
15
1
3
Location
Charlotte
Also, swapping to LED headlights... will probably take you from around 10-11Amps on highbeams (with plain old NAPA 55W headlights I had) to more like 3-5.5 amps. Its not a cheap fix but it is a fairly permanent one.. your headlights would run on battery about twice as long also. You can combine this with the headlight harness (clarification: LMC headlight relay harness) and wire the harness to 24V to lower current draw at the bulbs even further and have 4x the headlight on time just make sure the particular LEDs you use work at 24V, Trucklites are good for 12-32V and appear to have some regulation as they don't pull constant current (they are constant power).
 
Last edited:

chevymike

Well-known member
603
468
63
Location
San Diego, CA
just make sure the particular LEDs you use work at 24V,
The lights are 12v, NOT 24v. The only system on the truck that is 24v is the starting system. Everything else runs on 12v. The M1010 also had the rear box heater and A/C that ran on 24v but M1008/M1009 don't have those.
 

cb88

New member
15
1
3
Location
Charlotte
The lights are 12v, NOT 24v. The only system on the truck that is 24v is the starting system. Everything else runs on 12v. The M1010 also had the rear box heater and A/C that ran on 24v but M1008/M1009 don't have those.
Bother to read my post fully would ya? If you install the LMC harness... you run straight to the battery and can wire it as 12V or 24V at your discretion since it's a relay.

In any case the LEDs don't look stock so many people will avoid them anyway in which case.. nevermind.
 
Last edited:

cb88

New member
15
1
3
Location
Charlotte

Just match to the year. I haven't installed it on mine but many people have. also I haven't tested wiring it to 24V with LEDs but it should work fine. 24V on the contact is not particularly demanding (like higher voltages > 48V would be since they arc can vaporize the contact). Good stuff on the topic of this harness here: https://www.steelsoldiers.com/threads/lmc-truck-head-light-circuit-mod.124720/
 
Last edited:

Salty dog

Active member
112
175
43
Location
Spring, Texas
Took some time today to try and mess with the fuse block, my original Hope was to relocate the main lights fuse to a empty socket, but after reading Warthogs thread on the lighting circuit it looks like one side of the main light fuse is a metal jumper going to the tail light fuse, not sure my original plan will work. I removed the two screws holding the fuse block to the wall , but it looks like one from the engine compartment side is still holding everything together. What steps are required to open up the fuse box
 

nyoffroad

Well-known member
944
690
93
Location
Rochester NY
YOU DO HAVE THE BATTERIES DISCONNECTED, RIGHT?

"What steps are required to open up the fuse box" your halfway there, just unscrew that single bolt in the center of the under hood plug and that separates all the under hood wiring from the fuse box. What I'd do isjust cut the 'hot' wire going to the HL fuse and and install a simple inline fuse holder and run it like that. the other more correct way would be to replace the fuse box but that would also entail hours of work changing over the box itself or the box and harness.
I also second the LMC relay kit, simple to install and so much easier on the fuse box and HL switch. If your handy all the parts are available over the counter or online and build it yourself.
 

Salty dog

Active member
112
175
43
Location
Spring, Texas
The batteries are disconnected, one side of the main fuse has a broken contact and the plastic grove where the fuse sits is melted and prevents the fuse from sitting properly, my original plan was just to move the circuit to another location till I read Warthogs write up on the circuit that it includes a metal jumper, is there a way I can take the fuse block apart to rebuild the circuit including shaving the plastic to fit a new fuse
 

frank8003

In Memorial
In Memorial
6,426
4,985
113
Location
Ft. Lauderdale, Florida
Just drill a hole thru offending fuse block, maybe two at its ends.
Where it is on borh sides and put new heavier duty wire in right thru there
and put a fuse wherever you decide is best. Can not rebuild factory stuff.

Got that done yet? Some factory stuff can not be repaired.
Use some of that engineering know how that You know How.
I know you can figure it out, like what is best for You and It.
Post #3
 

Salty dog

Active member
112
175
43
Location
Spring, Texas
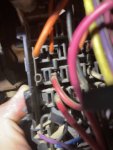
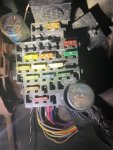
Here is a pic of the backside of the fuse box, on the left hand side you can see the metal bridge that connects the Main light circuit 30a to Stop & tail lights circuit 10a. I was able to use a straight dental pic to straighten the wings on the PAC Conn III connectors. This allowed me to than push the bridge out , I than used the same dental pic to flare the wings back out and relocate the bridge , Above the Stop & tail lights fuse location is a empty slot. So I simply moved the bridge up one location. I used the same dental pic to remove the orange wire on the Stop& tIl lights circuit and moved that up one slot. Because the red wire for the Main lights 30a was melted and pretty much fused to the box, I cut the wire as close to the original Pac Conn III connector and added a new PAC Conn III connector. When I had the bridge out I used some cleaner and a old toothbrush to clean the bridge up before reinserting it
 

Attachments

Salty dog

Active member
112
175
43
Location
Spring, Texas
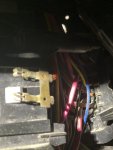
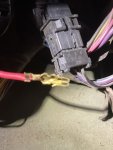
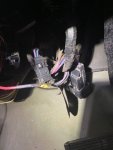
I went ahead and replaced the Park Conn III connector and added a segment of heat shrink, I than reassembled the fuse box and tightened everything back down. Inserted the fuses in their new locations and connected the batteries. Everything is functioning as it should, I am going to order the LMC light relay kit and install that in the next week or so.
 

Attachments

Top
AdBlock Detected

We get it, advertisements are annoying!

Sure, ad-blocking software does a great job at blocking ads, but it also blocks useful features of our website like our supporting vendors. Their ads help keep Steel Soldiers going. Please consider disabling your ad blockers for the site. Thanks!

I've Disabled AdBlock
No Thanks