• Steel Soldiers now has a few new forums, read more about it at: New Munitions Forums!

  • Microsoft MSN, Live, Hotmail, Outlook email users may not be receiving emails. We are working to resolve this issue. Please add support@steelsoldiers.com to your trusted contacts.

Gator Yanmar 3TN injector heat shield removal.

marchplumber

Well-known member
Steel Soldiers Supporter
3,804
2,837
113
Location
Peoria, Illinois
Is the "heat protector" made of soft metal? Brass? Bronze? Copper? what about a simple "easy out" to get it rotating in the bore, then an internal slide hammer attachment to pull straight out? It doesn't appear to be threaded from the IPB, so soak with lube/penetrating oil and pull?

You might have thought of this already,,,,,,,,,,,,,,,,,,,,,,,,,,

Let us know what results you have and what you attempted.
 

Lionel

Member
Steel Soldiers Supporter
498
24
18
Location
Baltimore/ MD
They look like little steel cups with a 1/8" hole. It appears that the injector "crushes" against the bottom of the cup to seal, so they need to come out. I'm going to try a flat bottom tap to grip it and try to rock them out.
 

Lionel

Member
Steel Soldiers Supporter
498
24
18
Location
Baltimore/ MD
Ok, my 3 cylinder Yanmar was running rough and sending raw fuel out of the exhaust. (You could smell it, but not see it). What none of the manual trouble shooting guides tells you is that these things are even in there, and if they are not replaced along with all 3 copper washers, each time the injector is removed, the potential for leakage past the shield and subsequent fouling occurs. Mine were obviously never removed as they were stuck, stuck.

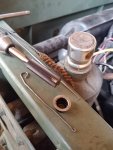
Step one is to remove the injector. If the second copper washer does not come out with the injector, fish it out with a hook. They crush and flatten out so they can be a tight fit getting past the threads. Here's0419191304.jpg a pic of the tools I used to get these things out.
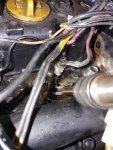
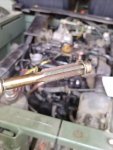
Next is to get that heat shield out. If picking it with the bent wire doesn't pull it out, use the flat bottom tap to do it by gently screwing it into the shield. It will probably start to spin. As you are doing this, rock it back and forth while pulling up. Two came out doing it this way. The third I had to gently tap it in with a hammer. That loosened it up, but I still had to do it a couple of times after it lost its grip pulling the HS through the soot.0419191317.jpg0419191353.jpg

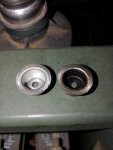
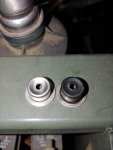
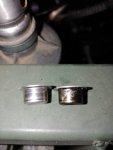
Here is a comparison of the fouled shield vs the new one.0419191258.jpg0419191257b.jpg0419191257a.jpgThe injector pushes against the dimple in the bottom to seal.
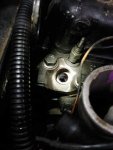
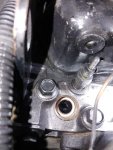
Here is a shot down into the cleaned pre-combustion chamber.0419191242_HDR.jpg

Next, put in a new copper crush washer.0419191258a.jpg

Put in the heat shield.0419191259.jpg

Put in the last copper washer.0419191300.jpg

That's it! Screw the injector back in and re-assemble everything. Don't forget the larger copper washer at the top.

The system is self priming but will take a bit of cranking. I ran it through several idle to full throttle cycles and man what a difference.

Enjoy those Gators folks!
 
Last edited:
Top
AdBlock Detected

We get it, advertisements are annoying!

Sure, ad-blocking software does a great job at blocking ads, but it also blocks useful features of our website like our supporting vendors. Their ads help keep Steel Soldiers going. Please consider disabling your ad blockers for the site. Thanks!

I've Disabled AdBlock
No Thanks