• Steel Soldiers now has a few new forums, read more about it at: New Munitions Forums!

  • Microsoft MSN, Live, Hotmail, Outlook email users may not be receiving emails. We are working to resolve this issue. Please add support@steelsoldiers.com to your trusted contacts.

Getting closer to Bob

Bcurtman

New member
119
1
0
Location
Rosebud, Mo
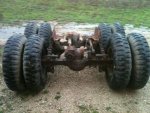
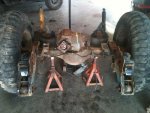
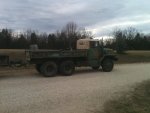
Deuce bobbed and air ride install in pictures

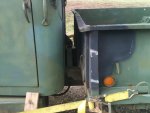
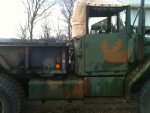
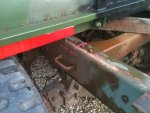
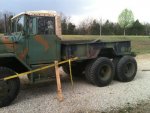
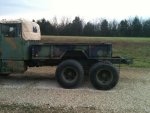
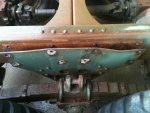
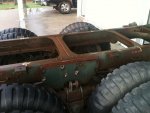
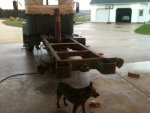
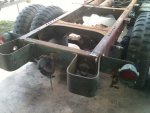
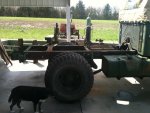
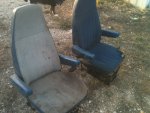
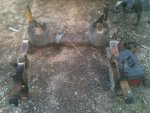
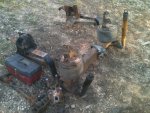
Had a productive day yesterday. Removed all the mudflaps off of the deuce bed so when it is removed it can be set on the ground. Removed the gun holder on the drivers side for more foot room. Pulled the M105 down to my other shop where the torch is and checked out the mounts to see if i will cut them or just the bolts. Put a 2" thick piece of foam in the back of my drivers seat in place of the extra-firm 4" original stuff. Now I have a nice seat back-and room to drive.

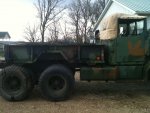
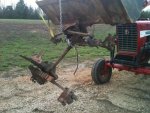
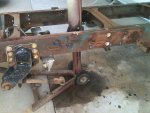
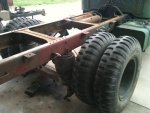
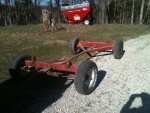
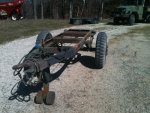
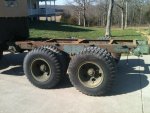
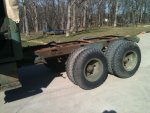
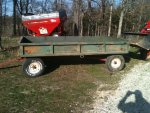
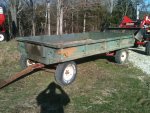
The deuce bed will be going on a haywagon that currently has a wood 16' flatbed on it. Looks like a very easy install as the wagon telescopes lengthwise and the brackets for the frame rails adjust widthwise. This will make a very nice utility wagon that can still haul hay, or just put the troop seats back in and have the most awesome hay ride wagon ever.

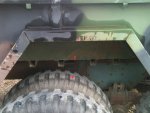
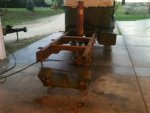
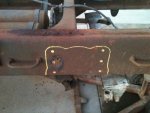
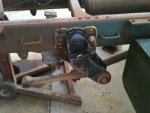
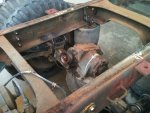
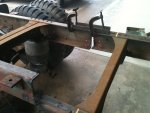
Threw about a ton of miscellaneous scrap iron in the bed of the deuce to go to the scrap yard. Once that is hauled, I guess I'll torch the bolts on the bed and remove it, then the same for the M105. My air ride will be ready to pick up this week, so now its just about time.
 
Last edited:

Bcurtman

New member
119
1
0
Location
Rosebud, Mo
Got the air ride suspension home today, along with both air ride seats out of the Pete. Seats are pretty dirty but nothing a good cleaning and some camo seat covers won't cure. I measured the frame width on the Pete, and it was 34". Got home and unloaded the suspension and measured the deuce frame width. Guess what-34". Nothing was cut on the suspension and it was slid out the rear of the frame the same way I am going back in, so all there is to do is measure, drill, and bolt. All I will need is u-bolts. The suspension for the other axle is still available here in central Missouri.

For you guys with air ride seats, where did you tap into for the air supply?
 

Bcurtman

New member
119
1
0
Location
Rosebud, Mo
Got the air ride home and setting on the ground outside the shop. All in one piece and no cutting required. Got the air ride seats ready to install and seat covers are being shopped. Took the 105 bed off of the trailer, and took the wood flatbed off of the hayframe in preparation for the M35 bed. Picked up a bottle of acetylene today so I can remove the deuce bed perhaps this evening. I removed the bolts on the 105, and even though they are good grade cad plated, the carc makes them very hard to remove. Time for the gas axe.
 

Attachments

Bcurtman

New member
119
1
0
Location
Rosebud, Mo
Got a lot done yesterday afternoon. Gotta love the additional daylight! Removed the bed from the deuce and set it in place on the hay wagon frame. Looks good! It fits well too. I set the M105 bed in place on the deuce so I can figure out how much room I want to leave between the cab and the bed. I think I am going as short as possible on the wheelbase.
 

Attachments

Bcurtman

New member
119
1
0
Location
Rosebud, Mo
Got a little more done on Thursday. Not rushing, but time has allowed so I am "after it". Set the bed in place and got it positioned where I want it. Marked the axle center location on bed and frame, and marked the end of bed location so I can cut 9-1/2" forward of that to keep my bumperettes. Rear bogie will come out this weekend, and we will start fitting the air ride in. If the weather holds, I'll make some good progress. I'm going to set the bed on 2" box tube to raise it up a bit.
 

Attachments

gijoe13

New member
114
5
0
Location
Eliot,Maine
Looks good so far. Good luck. I will be doing the same thing this weekend but with front springs. Look forward to your progress pictures. :grd:
 

Bcurtman

New member
119
1
0
Location
Rosebud, Mo
Had a great weekend-other than lots of rain-but I've got the back of the deuce under cover so we made lots of progress. Got the bogie out from under the truck, rear bumperettes / crossmember off, axles separated, and air suspension set in place on the axle going back in. All this with just me and soldier B; my 13 year old son. I'm checking now on ride height, and I'm concerned that I may have to add a block to the rear to get the ride back where it was with this air ride setup, which is a Reyco according to the hangers. Then comes some drilling and bolting-set the bed again and verify end of bed-then cut the frame off. Stay tuned!
 

Attachments

Bcurtman

New member
119
1
0
Location
Rosebud, Mo
Got the u-bolts ordered today from Stengel Brothers, picked up a piece of steel to make spacers to center the 3-1/2" deuce axle in the air rides 4-1/2" axle perches, and located the air ride hangers on the frame. Lots of measuring!!! Also picked up the 12 grade 8 bolts to attach the hangers. Think I might invest in a new drill after drilling the first two holes tonight! Turns out my air ride suspension is a Reyco 102AR, and there is a ton of info including exact mounting dimensions on the web. Seems like it is going together very well. I think it will be mounted by the end of the weekend. I work a full time job while doing all this too. The other twin suspension from the same truck is still available. Hopefully more pics tomorrow.
 

Bcurtman

New member
119
1
0
Location
Rosebud, Mo
If you want step by step pictures of a deuce bob, here they are. Those of you with a mechanical eye will notice that I still have to address a pinion angle issue. I'm hoping that is taken care of by my local machine shop by the end of the week. I have to have the driveshaft lengthened, add 1-1/2" blocks in the rear, add 3" tube for between 105 bed and truck frame, hook up brakes and bleed them, and then re-plumb the air with nylon tubing, and it will be pretty well done. Of course then I have to install the air ride seats with new covers, mount up some 395's, and get it painted. I anxious to get it driveable so I can check out the difference first hand.
 

Attachments

Bcurtman

New member
119
1
0
Location
Rosebud, Mo
I just looked. 14 days since I actually started on it. Maybe an hour in the evenings on average. Basically 2 good weekends. It helps to have all the tools. When I was young I didnt have a shop and had all my tools in a box I could carry. Now I have a shop and every tool imagineable (almost) and I dont do as much as I did then! The prior fabrication and engineering experience also makes a lot of this happen faster. I'm not racing, but I wonder how long it usually takes to cut one down? I guess once you have a recipe, it would go faster. I spent more time planning and measuring than anything.
 

135gmc

New member
307
0
0
Location
St Paul/MN
Very nice. The right tools do make a job easier. I keep thinking about building one up, and you are helping convince me....
 

c.herman126

New member
1
0
0
Location
Milton, VT
Great work! It is nice to see the process, especially when it's laid out and kept simple. I'm looking forward to the final result.

Best of all, you're working on it with your son! :beer:
 

Bcurtman

New member
119
1
0
Location
Rosebud, Mo
My son and I removed the blocks that the trailing arms attach to this evening. These also have the angle in them to control pinion angle. They will get machined flat tomorrow and a 3" block will go back on top of them to level everything out, set the pinion at 0 Deg. and get that air bag bar up to the height of the rear pumpkin bottom. Luckily, I ordered my u-bolts long enough to begin with. Measure, measure, measure! We're getting there, but it has to be right the first time.
 
Top
AdBlock Detected

We get it, advertisements are annoying!

Sure, ad-blocking software does a great job at blocking ads, but it also blocks useful features of our website like our supporting vendors. Their ads help keep Steel Soldiers going. Please consider disabling your ad blockers for the site. Thanks!

I've Disabled AdBlock
No Thanks