• Steel Soldiers now has a few new forums, read more about it at: New Munitions Forums!

  • Microsoft MSN, Live, Hotmail, Outlook email users may not be receiving emails. We are working to resolve this issue. Please add support@steelsoldiers.com to your trusted contacts.

Glow plug lost through combustion chamber cup

dcowan

Member
34
31
18
Location
Rogersville, MO
Changing all the glow plugs on my M1097R1 I bought off govplanet out of texas a couple weeks ago and every one tested bad. On the last one #2 back from front on driver side it came out with no plug on the end just the threads. I tried easy out with no luck and finally removed the injector and hoped to get it out that way. I got it pushed through with a small punch and it dropped right through what I know now is the combustion chamber hole. I had no idea at the time or I would have blocked it with something. I'm guessing my only hope at this point is pulling the head, but I'm hoping those with more experience here have better ideas.

If I do have to pull the head any advice would be appreciated. It looks like it can be done in the chassis, at least I hope.

If I had it to do over I would block that combustion chamber hole and also hook something on the glow plug tip before I drove it through. Would have saved me a lot of heart ache. Live and learn.
 

Barrman

Well-known member
5,274
1,796
113
Location
Giddings, Texas
I bought one of these Wi-Fi borescope a year or so ago:


There is a magnet adapter for the end. I bought mine because a spark plug ejected itself out of my old E39 BMW. I used the magnet and hook attachment to get all the parts out of the cylinder.

Yes, pulling the head is the best option. However, this might get the job done as well.
 

dcowan

Member
34
31
18
Location
Rogersville, MO
So I have similar and tried fishing it through the hole but it won't fit. The hole in the combustion chamber cup is to small to get the camera through. The other issue is I tried a magnet on a glow plug I removed that wasn't destroyed and the glow plug end is not magnetic
 

Mogman

Moderator
Staff member
Moderator
Steel Soldiers Supporter
7,016
9,689
113
Location
Papalote, TX
I did not think the hole out of the pre-cup was big enough to lose the broken piece into the cylinder, unless you drove it through the pre-cup.
 

87cr250r

Well-known member
1,267
1,991
113
Location
Rodeo, Ca
Glow plug tip should be non-magnetic. A clean vacuum (so you can see if you caught it) on the injector hole should be your best bet. Bring the piston near TDC. You may need to pull a valve cover and jack a valve open to get enough airflow to pull it out.
 

Barrman

Well-known member
5,274
1,796
113
Location
Giddings, Texas
Good idea on the vacuum.

Trying to snake something in through the intake valve might also be an option. The intake has to come off anyway to do the head removal. Might be worth a try.
 

simp5782

Feo, Fuerte y Formal
Supporting Vendor
12,130
9,407
113
Location
Mason, TN
Glow plug tips on the old IDIs used to fall into the cylinder all the time when swapping em. We used to just run the truck and it would blow out the exhaust valve with the rpms up. It's not tougher than the piston or Valve.
 

TOBASH

Father, Surgeon, Cantankerous Grouch
Steel Soldiers Supporter
Supporting Vendor
3,596
3,518
113
Location
Brooklyn, NY
I don’t recommend running the engine. 21:1 compression will damage the piston and possibly crack it. This is your personal vehicle AND NOT a fleet vehicle.
 

spankybear

Well-known member
898
924
93
Location
WA
I did not think the hole out of the pre-cup was big enough to lose the broken piece into the cylinder, unless you drove it through the pre-cup.
WRONG!!!!!! The broken glow plug WILL making into the cylinder. You run the engine it will have a chance of cracking the cylinder wall. First hand experience here... The swollen glow plug tool is woth it's weight in gold... Again first hand experience.
 

87cr250r

Well-known member
1,267
1,991
113
Location
Rodeo, Ca
My engine swallowed a piece of a star washer some time back. It embedded in the piston vs being ejected but not before scoring a cylinder. It also made a nasty knocking noise until it embedded.

PXL_20220519_010013405.jpg
 

dcowan

Member
34
31
18
Location
Rogersville, MO
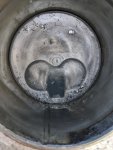
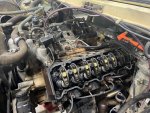
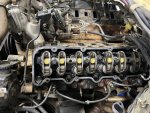
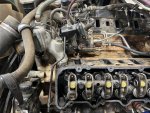
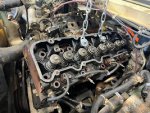
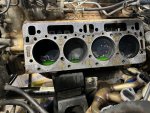
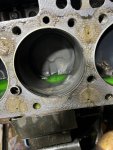
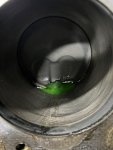
Here is an update. I spent about two hours trying to suck it back up through the combustion chamber hole. I even tried using small poly hose to fish down in the combustion chamber hole to get down into the cylinder and suck it back up. I had no luck. The hole is oblong and really hard to fish anything down. I ultimately pulled the head off and there it was laying on the lower part of the piston as you would expect. To help anyone else out that has to do this here are my steps and some tips. My problem cylinder was #2 back from driver side front. I have a 6.5 non turbo diesel.

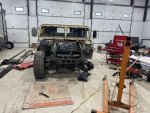
I removed the hood. Glad I did, made it a lot easier to work. I took off driver side tire after getting tired of standing on it. That helped a lot. Dog house off of course. Most work can be done from the front but most of the back bolts are easier from the cab.

I didn't find a TM for doing cylinder head removal in frame so had to wing some things. I did use the TM for engine maintenance outside frame for help, but some steps were not needed since I only took off one head.

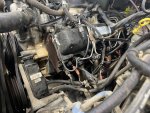
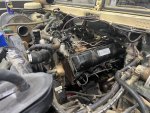
  1. Removed v belts
  2. Remove generator (This was one of the toughest tasks. I finally used an engine puller to help out since its so heavy)
  3. Removed generator mount (its heavy). This was a bear. Had to end up detaching power steering and pulling it forward. I did not detach lines.
  4. Removed exhaust header ( you can just drop it down out of the way)
  5. Removed intake plastic plenum? (Not sure proper name)
  6. Removed wiring harnesses. ( I left passenger side one and moved it up out of way of manifold and that worked fine. Rest pulled back into cab)
  7. Removed intake manifold (easier than I expected)
  8. Removed driver side injector lines. (This wasn't as bad as it looked. You will want a crows foot with long extension and ratchet)
  9. Removed crossover cooling manifold. Not completely just layed over to passenger side.
  10. Removed valve cover. This was tough and I'm not sure I didn't tweak my cover a bit. It was really siliconed on.
  11. Removed head bolts (left 2 loose at front and rear. The back bottom driver side is kinda tough)
  12. Put a chain on two inner valve screw studs and pulled head off. Be ready for an antifreeze waterfall.
  13. Laid eyes on the glow plug tip that caused all this pain and suffering.

I'm including a bunch of pics that hopefully help someone out.
IMG_2377.jpgIMG_2378.jpgIMG_2382.jpgIMG_2383.jpgIMG_2384.jpgIMG_2385.jpgIMG_2387.jpgIMG_2388.jpgIMG_2389.jpgIMG_2390.jpg
 
Top