• Steel Soldiers now has a few new forums, read more about it at: New Munitions Forums!

  • Microsoft MSN, Live, Hotmail, Outlook email users may not be receiving emails. We are working to resolve this issue. Please add support@steelsoldiers.com to your trusted contacts.

GLOW PLUG nightmare !

antennaclimber

Moderator
Moderator
Steel Soldiers Supporter
1,370
962
113
Location
State College, PA
Sounds like your card has failed in a way that has latched the relay to ground. It would be best to get a new card and I would stop using a booster. My shop has seen several two way radios damaged from capacitive discharge type boosters. I would recommend using regular jumper cables from another 24 volt vehicle or disconnect the batteries and charge them individually with a regular battery charger.

Many of the card failures that we see are from reverse polarity or over voltage damage. Some are from persons removing the card with metal tools while the card has power to it. I know the cards are difficult to remove from the holder. But that's the way it needs to be if you want good electrical connections on a card edge connector.

As for the glow plugs, disconnect the green wire and test each one individually with an ohm meter from the GP tab to a good ground. A good GP will have about 1 ohm of resistance. If you see any that have a high resistance or if they are swollen or broken, replace it.
 

nathus

Member
94
13
8
Location
Waterloo/ BELGIUM
Sounds like your card has failed in a way that has latched the relay to ground. It would be best to get a new card and I would stop using a booster. My shop has seen several two way radios damaged from capacitive discharge type boosters. I would recommend using regular jumper cables from another 24 volt vehicle or disconnect the batteries and charge them individually with a regular battery charger.

Many of the card failures that we see are from reverse polarity or over voltage damage. Some are from persons removing the card with metal tools while the card has power to it. I know the cards are difficult to remove from the holder. But that's the way it needs to be if you want good electrical connections on a card edge connector.

As for the glow plugs, disconnect the green wire and test each one individually with an ohm meter from the GP tab to a good ground. A good GP will have about 1 ohm of resistance. If you see any that have a high resistance or if they are swollen or broken, replace it.

Thanks for your assistance,

Can you confirm the relay is a good one ?

About the GPs , should I remove them from the enigine to test them or they can stay at there place for that ?

About my GP card, have you any idea which value we need to use to replace the burned zener diode ? I would like to repair as well to keep in case of something happens with the new one.

Reagrds
Nathan
 

antennaclimber

Moderator
Moderator
Steel Soldiers Supporter
1,370
962
113
Location
State College, PA
I do not remember the zener diode number or value. But I suspect there are more issues with the card than the zener.

You can test the GP's while still in the engine, remove the green wire from the tab and check the resistance from the tab to a good ground connection.

Keeping the batteries on a trickle charge is a good idea if they are not being used for extended periods of time.
 

nathus

Member
94
13
8
Location
Waterloo/ BELGIUM
I do not remember the zener diode number or value. But I suspect there are more issues with the card than the zener.

You can test the GP's while still in the engine, remove the green wire from the tab and check the resistance from the tab to a good ground connection.

Keeping the batteries on a trickle charge is a good idea if they are not being used for extended periods of time.

Ok thanks a lot for everything !
I've ordered a new card from Hillbilly Wizard ; let's hope that this will solve everything.
I've asked the garage to test the glowplugs like you explained ; I hope they are fine and not swollen inside the engine :(

If somebody else can tell me what number is written on the zener that burned on my card, I could try to rebuilt it and make some more tests in the future.
Could be interesting for other members to know if the cards are repairable or not...

For the ones who are interested and with the hope that this topic will help other people in the future ; I'll will give you my feedback as soon as the new GP card is arrived :)

Thanks to all of you !

Nathan
 

cucvrus

Well-known member
11,475
10,444
113
Location
Jonestown Pennsylvania
I always remove the glow plugs and bench test them. 1 reason is I seen them glow up further on the shaft instead of the tip. And also I get a chance to get a visual of them and evaluate the condition of the glow plug entirely. Do as you wish. 10 minutes they are out and 10 minutes later you can have them back in. Use a little never seize and live happily ever after. I use A C Delco 13G same as original. I buy them at the local GM dealer. Good Luck Take Care.
 

nathus

Member
94
13
8
Location
Waterloo/ BELGIUM
I always remove the glow plugs and bench test them. 1 reason is I seen them glow up further on the shaft instead of the tip. And also I get a chance to get a visual of them and evaluate the condition of the glow plug entirely. Do as you wish. 10 minutes they are out and 10 minutes later you can have them back in. Use a little never seize and live happily ever after. I use A C Delco 13G same as original. I buy them at the local GM dealer. Good Luck Take Care.
Hi Cucvrus,
Thanks for sharing your advise.
I agree with you, it’s off course better to check them entirely.
But I’m a little scared because I’ve seen some videos of glow plugs who where stuck because they were swollen inside. Or worse, a part of the tail that brakes inside the engine.
I don’t have the specific tool they sometimes use to get them out. I would like to do things as good as I can but I’m afraid to create a new, tuff problem starting from a glow plug that was maybe still doing his job.
Can you confirm that we can remove them easily on this truck where the glow plugs were probably Not remove since 5-10 - 15 years ?
 

cucvrus

Well-known member
11,475
10,444
113
Location
Jonestown Pennsylvania
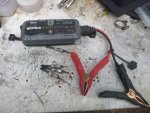
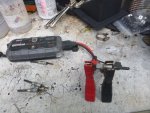
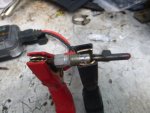
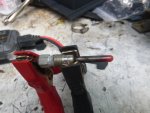
OK. I use a 3/8" deep socket on a short 3/8" drive ratchet. All you can do is try and remove them. I have removed hundreds if not thousands of them. I NEVER broke one off and had it fall into the engine. If you encounter resistance and they are swelled to the point that you can not remove them report back and we will come up with a strategy to get the swelled plug out. It is not impossible and requires no special extracting tools. But give it a try first before we pull the alarm. Remove all 8 and get them in front of you. I posted a few pictures of how I bench test them out of the truck. Wear safety glasses and when they start to glow stop testing. They could explode. I seen that happen. Report back on your findings. If they don't all come right out don't panic. Remain Calm. You can do it. P1000301.JPGP1000302.JPGP1000303.JPGP1000304.JPG
 

nyoffroad

Well-known member
946
696
93
Location
Rochester NY
I'll add that if the glow plugs are swollen, they have already failed and need to be replaced anyway.
Unfortunately your right, I've had good luck with swollen plugs by spraying them with Castle Thrust (penetrating oil) and let it sit and soften any soot then grasping the hex wit a pair of Vise Grips and CAREFULLY turning the plug back and forth in a twisting motion while pulling DO NOT PUSH THE PLUG OFF TO THE SIDE OR YOU'LL BREAK IT OFF! Take your time and keep it wet with oil, once removed if you look closely you can see where material was scraped off the plug coming out the hole. Why the engineers didn't make the threaded portion larger I have no idea. Maybe I've just been lucky or never had any swollen real bad but it woks for me.
 

dependable

Well-known member
1,720
188
63
Location
Tisbury, Massachusetts
I have removed plugs in similar fashion, spray lube then hold spade w needle nose vice grips and twist w thread while pulling out, it takes a while, but usually works. I have since bought an extractor tool, which I don't have to use much any more. This is mainly due to fact I change whole set when they start to fail, and use of AC 60s seems to help too.

Remember, If you do break off a tip while trying to remove, you can usually get it out by removing injector and using a magnet.
 

cucvrus

Well-known member
11,475
10,444
113
Location
Jonestown Pennsylvania
Remember, If you do break off a tip while trying to remove, you can usually get it out by removing injector and using a magnet.

That statement is not true. The glow plug tip is NON ferrous alloy. And the glow plug hole is a tapered seal to seal the compression in. Thus the tight tolerances.
Non-ferrous metal
In metallurgy, a non-ferrous metal is a metal, including alloys, that does not contain iron in appreciable amounts. Generally more costly than ferrous metals, non-ferrous metals are used because of desirable properties such as low weight, higher conductivity, non-magnetic property or resistance to corrosion. Some non-ferrous materials are also used in the iron and steel industries. For example, bauxite is used as flux for blast furnaces, while others such as wolframite, pyrolusite and chromite are used in making ferrous alloys.

I done a quick study of the glow plug to reaffirm my knowledge. I used a strong magnet. P1000374.JPG
The spade and hex drive of this AC Delco 13 G are strongly attached to the magnet. P1000375.JPG
The alloy tip is non ferrous metal and has no attraction to the magnet. P1000376.JPG
Even when forced to the magnet the hex drive and spade are the only part of the glow plug attracted firmly to the magnet. If all else fails remove the fuel delivery nozzle and attach a curved needle nose clamp/vise grips to the tip and gently break the tip with the socket end of the glow plug. It is safe in the pre chamber and should come right out. I had an engine digest a failed glow plug at about 60 mph one time. It was a loud tapping and it lasted a few seconds and that was it. It sent the tip out the exhaust system. It did no harm and at the time I was unaware of what happened. The next day at cold start the problem was obvious when I diagnosed a hard start as glow plug failure and one glow plug had threads and upper body drive section only. No tip. Good Luck. Break the glow plug as a last resort. And the pullers the make are not the golden egg to solve all problems. Try that tool on the back 2 glow plugs on each side. I have removed inner fenders and the steering shaft on a few already that all 8 glow plugs were swelled. All in a days work. be Safe and Be Careful. It's a jungle out there.
 

dependable

Well-known member
1,720
188
63
Location
Tisbury, Massachusetts
You're right, it has been about 15 years since I had to deal w all the broken tips. I used a grease covered paint brush or something when removing though the injector hole. This will work if tip is still in pre ignition chamber anyway.

My first few 6.2s used the 6-7 volt "fast glow " plugs, when the controller failed, which it did often, the current went right to 12V and cooked the whole set. I guess at GM they were afraid people would not be used to waitiong for glow plugs, and this set up was used in the infamous 5.9 Olds engines and the earlier 6.2s.
 

nathus

Member
94
13
8
Location
Waterloo/ BELGIUM
Hi again,

Thank you for the update guys !
@cucvrus Thanks a lot for the explanations and taking time to share your pictures !!!

Since last time we spoke : My new controller card is arrived in Florida and has been shipped yesterday to Belgium. Can't wait ... :)
My orignal controller card was "repaired", they have replaced the burned zener with a 6v zener. They were not sure about the value of that component but we gave it a try.

In the evening I've tried the card in the truck :

- the wait light went "on" and then "off" after 7-8 sec.
- I could start the truck perfectly
- first minutes I had 24V
- 10 minutes later I had still 24 V and the smell of burned plastic was back.
- this time I could clearely see that the smoke was coming from the glow plug controller card.
- while the engine was running, I removed the card and I had 28 - 30 V on the voltmeter.
- the card was hot and the new component is not completely burned but not far from ... :(

Two main questions starting from there :

- the card was badly repaired or couldn't be repaired at 100% and is the cause of all my troubles.

- the burned card is a consequence of something else. This is the scenario I'm scarred of because I don't want to burn a new 150 dollar controller card...

Is there any chance that the temparture sensor (which sould be somewhere on the engine if I understood it right) , could give a wrong information to the card and cause this troubles ?
 

dependable

Well-known member
1,720
188
63
Location
Tisbury, Massachusetts
A bad temp sensor can cause the system to remain on past the point it is needed. If the wait light is working, I think you would see it light up for brief periods even after truck is warm. That could wear on system, but not sure it would cause the failure you have described.

If wait light does not come on, you would still hear the relay cycling.
 

Jake59

Active member
170
103
43
Location
Kaggevinne, Flanders, belgium
Hi All,

I know this subjet has been discussed a lot but I was not able to find a solution for my issue.

My truck had low batteries last monhts so I was starting it with a booster. After a couple of times, I realised that the GP relay was "staying on" and he was almost burning.
It became crazy hot and made some smoke while the engine was turning...

I decided to replace the relay and bought some new batteries ;
when that was done, no more "wait" light in the dash, but I can clearly hear the noise of the relay.
The truck is starting well but after a couple of minutes, I can smell a "burning plastic or a bruning electrical wire smell".
Something else unusual : in the past, the voltmeter showed 28V after 2-3 min running ; now he's giving me only 24V and a little bit more if I push on the throttle.

I know a lot of issues comme from the Glow Plug card / module but I don't know if mine is working like it should or not. And I don't know how to test it.
It had one of the small resitors which was burned; a guy from an electroshop replaced that component and told me that he checked all the other ones. But he can't guarantee that the card is working like it should. He can just test all the small components (not the processor) individually without knowing what they are doing in the truck's system.


Does somebody had an idea ?

Appolgies for English, this is not my native language.

Regards
Nathan
Hi Nathus,

Understand your frustration and concerns, been there ... unfortunately some of the previous owners of our CUCVs seem to have abused them without any regard... but that cannot be changed, so we need to fix things as good as possible, without taking the fun out of it nor going bankrupt...

Great advice from CUCVRUS and all here, so you did well by following them; I have also been so lucky to learn from all here and very much appreciate their spontaneous help; when working on my M1009 it has gotten me out of a bind already more than a few times.

I have done a quick read here, so I may have missed a few details but your 24V reading when running and the smell made me think of following (which may have already been suggested):
Could it be that your GP relay is sticking, I mean that only the actual internal contact plate of the relay sort of stays connected to the 2 contacts inside and this causes the smell and continuous voltage drop? In this situation, your GP relay will still "click" or make noise, as the electromagnet is activated, but it would not make any difference for the GPs as they would be heating constantly... although this would then drain your batteries in a very short time once you park and shut off the engine, right... but I believe you did mention your batteries would drain and you had to jump start constantly...

With a voltage meter, or test light check the GP side of the relay contact with ignition on and off and see what you have then.

Just sharing a thought, but perhaps it can help.

Additionally, Waterloo is less than 2 hours away from me, so if you need any help, let me know.

Best,
Jake
 

nathus

Member
94
13
8
Location
Waterloo/ BELGIUM
Hi Everybody,
I have finally received the new Gp module from Hillbilly !!! 🎉🎉🎉
Such a long story. @antennaclimber please, try to find an easy way to send them to Europ 🙏
It was a real nightmare for me. Whole process took me more or less 4 weeks.

The good news is that the new card solved all problems ! Thanks to the lights on the new version I can compare and understand what happened before.
The poor 24v I had, was indeed because de Gp process who was continiously using power.
The relay was remaining « on » and the smell came from him and from the card itself.

unfortunately the restoration of the old card didn’t work. But i’m not sure we used the right value for the diode zener. Hard to tell if something else was burned inside...

Now everything works like it’s suppose to be.

Many thanks to all of you !
especially @cucvrus and @antennaclimber
 

Jake59

Active member
170
103
43
Location
Kaggevinne, Flanders, belgium
Hi,

Been running my M1009 for over an hour a few days ago, as I wanted to flush and clean the cooling system from any rust, crud and dirt build-up.
Then drained the radiator and let it cool down. Re-filled and wanted to start again to flush with plain water now, but no success... doesn't start any more. I did not hear the GP relay clicking either, so took it of and disassembled it. Totally fried and locked inside, coil burnt as well. This is the 3rd relay I installed for the GPs. One I ordered from RockAuto and 2 others were starter relays from riding lawn mowers I purchased brand new from a local garden equipment center.

Been studying the issue and reading various pages here and have learnt following: the GPs require a strong and continuous duty relay, as the total current draw is over 120A and it does take quite some time when it is cold before the Wait light goes out and one can start... up to or beyond 1 minute!?
The relays I had installed were "starter" relays, which are fairly powerful but good for short bursts only.
Unfortunately that last GP relay burn out incident - once again - burned my GP controller card, so I had to search and replace a few components... hopefully it will work again, but the PCB is really beginning to look quite messy now and patched up beyond recognition...

So as a fix, now I am looking at installing a 12VDC 150A continuous duty relay, but then it appears that such relays may require quite often a fairly strong "signal" from the GP controller card to activate the coil. These kind of relays are often found in golf carts from what I read, if that can help anyone here.

Thus, my final solution to that, while at the same time protecting the "fragile" GP controller card, is to actually rewire the light blue and pink/black wires from the GP controller card to activate the coil of a small relay (e.g. those with spade connectors; 10 to 30A rated), which in turn will activate the coil of the GP relay.

Yes, this adds a device to the system, which can break down, but it will also allow to use a sufficient heavy GP relay and prevent from frying the GP controller card in future, which is an issue to repair/replace with an original.

Additionally, this also allows me to maintain the well known push button back up system to activate the GP relay by feeding power directly to the GP relay coil and without interfering with the GP controller card circuit.

Any comments and thoughts to the above welcome.

Anyone have a fried GP controller card lying around you plan to trash? Trash it my way please... perhaps I may be lucky and manage to revive it, always welcome!!

Thanks,
Jake
 
Last edited:
Top
AdBlock Detected

We get it, advertisements are annoying!

Sure, ad-blocking software does a great job at blocking ads, but it also blocks useful features of our website like our supporting vendors. Their ads help keep Steel Soldiers going. Please consider disabling your ad blockers for the site. Thanks!

I've Disabled AdBlock
No Thanks