• Steel Soldiers now has a few new forums, read more about it at: New Munitions Forums!

  • Microsoft MSN, Live, Hotmail, Outlook email users may not be receiving emails. We are working to resolve this issue. Please add support@steelsoldiers.com to your trusted contacts.

goldneagle's M923 plus M109 Camper hybrid mod thread...

zout

In Memorial
In Memorial
7,744
154
63
Location
Columbus Georgia
Camping World will get your juices flowing as well just to look around at some of their available items.
Lyons RV restroom products out of Lyon's Michigan makes nearly almost all the rv surround walls and tubs - that is where
we sent out specifications to to have them custom made to fit the 109's.

As a thought - if you look at your back door to your 109 - our shower tub assemblies are on the left rear corner running
lengthwise along the back wall - the head of the tub is on the left rear outter corner. The tub itself extends about 3/4 of an inch
into the doorway but this is hidden all by solid red oak trim.

I will try to get them pics back up onto my gallery as Clinto posted how to add them without having to make a new thread.

The RV toilets that are plumbed into the holding tanks is in front of the tub with a divider wall and mounted on a small pedestal
to aide in the plumbing adapters through the flooring.

Not trying to steal your thread - just giving you the layout. After speaking with you on the phone I know the tub set up
would not fill your needs.
 

goldneagle

Well-known member
4,510
1,007
113
Location
Slidell, LA
Glad to!
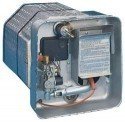
The water heater is a suburban 6 gal, these units are common and come in a few different configurations , electronic ignition, lp and optional electric heating rod ect. The pump I used Is a sureflo 2.9 gpm, it seems to work well.
I typed in rv parts on ebay and thers tons of parts!
Ill be watching your thread!


This helpful PM came from RAYZER

I have already looked into some of the parts he recommended. I will probably go with the same water heater, but with the electronic ignition.
Suburban SW6D Direct Spark Water Heater 6 Gallon Trailer Camper RV
Part Number Suburban SW6D
thumbnail.jpg
I also looked into a water pump and have this one saved in my AMAZON Wish List. It cuts off when not in use by sensing the pressure in the line. That will save on battery usage.

Flojet 03526 144A Triplex Diaphragm 3526 Series Automatic Water System Pump

41B95D9quVL._SX300_.jpg
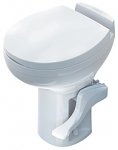
For the toilet I went with this item after some research and pricing. I called the manufacturer to find out which toilets had the largest parking area as well as weight capacity. All their toilets are rated 350#. I had to go with the 3rd best toilet due to price and fragility. The best toilet was over $600 and all porcelain. The 2nd best was $289 and partially porcelain. I decided that porcelain is too fragile for an MV. My 5 ton has a tendency to bounce due to bumpy roads (lack of weight on the springs when empty). I chose an all plastic toilet. $203.48 delivered and there is a $25 rebate from the manufacturer. I chose the low profile so I can mount it on a platform. It gives me 5-1/2" of platform height to hide the plumbing.

Thetford RV Toilet - Residence Style

thetford-residence-toilet.jpg
 
Last edited:

RAYZER

Well-known member
3,380
59
48
Location
sanford/florida
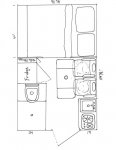
I like your floor plan GE! Its just my opinion but, if you go with one black water holding tank (toilet only), 20 or 30 gal will give you a few days of use untill dumping is necessary.
And one grey water tank (sink and shower), this tank can be of the same size of the black water, or perhaps a little smaller.
Reason being: on the grey water, (depending on where your camping), you can leave the dump valve open and drain the grey water into the woods via a garden hose.
The black water tank will have to be dumped into an approved facility, usually found available at truck stops, rv parks, rest areas, or a home made septic tank in the back yard made from a 55 gal drum.
These holding tanks are usually abs plastic, come in all different configurations and allow for the inlet and vent locations to be placed as needed.
 
Last edited:

RAYZER

Well-known member
3,380
59
48
Location
sanford/florida
Also, I tried in my build to use as many parts and pieces for plumbing fittings that can be bought from the local hardware store instead of using specialty parts and fittings from the rv suppliers(for ease of replacement).I used some threaded fittings in Strategic areas for ease of disassembly if necessary.
Also, it seems that sced 40 pvc plumbing fittings are more durable than the black in color abs plastic rv fittings.
 

RAYZER

Well-known member
3,380
59
48
Location
sanford/florida
I think placing the refrig under the kitchen countertop would open up some room,maybe for a closet,and the compressor wouldn't be buzzing in your ear all night.:D
 

goldneagle

Well-known member
4,510
1,007
113
Location
Slidell, LA
I think placing the refrig under the kitchen countertop would open up some room,maybe for a closet,and the compressor wouldn't be buzzing in your ear all night.:D
Thank you for the helpful suggestions.
Actually the Fridge is on the Feet side of the bed. Also I still have to decide where to put the water heater, batteries, fresh water tank and pump. The black water tank will either go directly under the toilet or under the fridge area. (or both) with access to the drain cut out of the side of the M109 box. (because location is over the wheels)

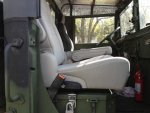
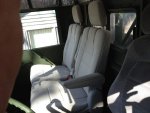
Should I assume the hot water heater can be installed inside a wood box and accessed from the outside? There is room for hidden stuff under the entire right side of the camper. The seats are bucket seats on top of a platform. Same seats that i installed on the other M923 over the battery box.


Seat_mount_1a.jpgSeat_mount_1c.jpg
 

goldneagle

Well-known member
4,510
1,007
113
Location
Slidell, LA
You could elevate the bed a good bit and have room underneath to install a few things out of the way. Just a thought.
Already planning to install the batteries along with fresh water tank and other items under the bed. Batteries will be vented to the outside.
 
748
5
18
Location
Woodstock, GA
Staying with current tire setup. They are in like-new condition. Correction: There will be approximately 4 feet of space behind the cab. (the existing space plus 2 feet) Already have solar panels on the roof. They came with the camper.
Considering that amount of space, if you were to slide the camper all the way forward, you could have a nice porch off the back. Heck, with the tailgate down you'd have nearly a 6' wide porch. That would be my preference, but to each his own. I really look forward to watching this build come together.
 

goldneagle

Well-known member
4,510
1,007
113
Location
Slidell, LA
Considering that amount of space, if you were to slide the camper all the way forward, you could have a nice porch off the back. Heck, with the tailgate down you'd have nearly a 6' wide porch. That would be my preference, but to each his own. I really look forward to watching this build come together.
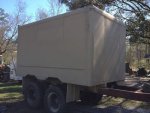
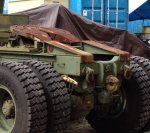
The only problem is that the wheel-weals on the M109 box would not line up with the rear axles. The M109 box has a floor joist that goes all the way to the side of the truck right between the two axles. To match that on the 5 ton i would end up with 1 foot on each end of the M109 box. I will figure out how to put all that into good use.


Camper_1f.jpg
 

RAYZER

Well-known member
3,380
59
48
Location
sanford/florida
The water heater can be mounted in a box as long as the wh door faces out for venting purposes.
I have seen plenty of fresh water holding tanks installed inside. (if you run out of room underneath).
 

goldneagle

Well-known member
4,510
1,007
113
Location
Slidell, LA
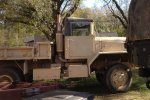
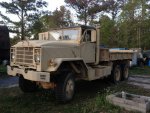
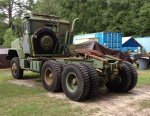
Had a little time today so we installed the hardtop on the truck. All went pretty smooth and the door glass seems to line up fairly well. The top did not come with the J-bolts (idiots burned them off when they removed them from the truck). I went to the local hardware store and got some 5/16" J-bolts. Had to shorten them, but they worked fine. As with the other hardtop the corners are slightly raised. I plan to use a c clamp to pull the top down to the windshield frame and insert a screw in the outside corners to hold it in place.

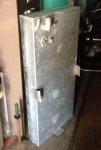
I also installed the replacement data tag that I purchased from Dataplates.net. It arrived quickly and looks great. I also include pictures of the fuel tank I may install for the generator set on the camper project.
 

Attachments

194
2
16
Location
Norfolk, VA
Good info there. I am going with those LED light strips since they only pull about 24 watts of power per 16 feet. I want to test them to see how much light they put out so I can plan accordingly. If you don't mind I will keep you in mind if I need advice on the 12 volt setup. :driver:
Yep send me a message anytime I'm still learning, but if I don't know something I have two master electricians within ten feet of me at work.
 

goldneagle

Well-known member
4,510
1,007
113
Location
Slidell, LA
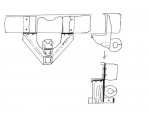
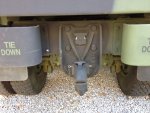
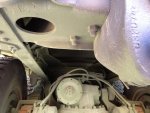
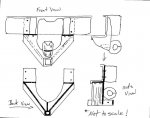
Here is a sketch for a hitch assembly for my M923 truck that I came up with. It utilizes 8 existing bolts already on the cross-member of the truck (2 bumperett bolts and 2 bolts under the cross-member on each side of the pintle mount). It is designed to fit around the existing Pintle mount.
 

Attachments

4x4e350

Member
292
5
18
Location
Vestaburg, Mi.
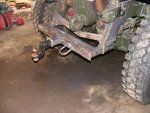
Here is what I did for a hitch assembly. I wanted it removable, and best of all, I use the hitch on other trucks. I used existing holes on the frame to mount the other two receivers. Just to give you different ideas.
 

Attachments

goldneagle

Well-known member
4,510
1,007
113
Location
Slidell, LA
Here is what I did for a hitch assembly. I wanted it removable, and best of all, I use the hitch on other trucks. I used existing holes on the frame to mount the other two receivers. Just to give you different ideas.
I think I saw your design in another thread. I am not sure you are aware that the holes that hold the mud flaps on the M931 are not there on all M931 nor on the M923 trucks. I had to add the holes and the mud flap mount brackets on my M931.M931_1e.jpgM931_closeup_1.jpg

Here is an updated drawing in which i added a back view of the hitch assembly:

Hitch_2.jpg
 
Top