• Steel Soldiers now has a few new forums, read more about it at: New Munitions Forums!

  • Microsoft MSN, Live, Hotmail, Outlook email users may not be receiving emails. We are working to resolve this issue. Please add support@steelsoldiers.com to your trusted contacts.

goldneagle's M923 recovery and modification thread

Scarecrow1

New member
1,355
1
0
Location
Florence , S.C.
You have really done work to be proud of . If I may ask why did you go to the trouble and expense of 4 batteries instead of just two. I down sized mine to just two and so far haven't had any problems. Don't get me wrong I still have all the clamps and cables to reverse it if I do have problems . Again a great job thanks for the pictures .......
 

goldneagle

Well-known member
4,563
1,112
113
Location
Slidell, LA
You have really done work to be proud of . If I may ask why did you go to the trouble and expense of 4 batteries instead of just two. I down sized mine to just two and so far haven't had any problems. Don't get me wrong I still have all the clamps and cables to reverse it if I do have problems . Again a great job thanks for the pictures .......
I went with 4 batteries in case I need the extra capacity for tools or accessories while parked. Also, I bought them as reconditioned from the distributor and only paid $40 plus tax each. So i paid less than it would have cost me for 2 new ones locally! It was actually fun doing all the wiring work.
 

goldneagle

Well-known member
4,563
1,112
113
Location
Slidell, LA
Today I went to the local ACE Hardware store to pick up some 5/16" x 1-1/2" round headed bolts for assembling my bows. I tried Home Depot but they didn't have any. The ACE HWR store had them in regular and stainless steel. $0.33 for the regular steel and $0.40 for the stainless steel. I got 24 of the stainless steel ones.

When I go home I stated to assemble the bow corners to the staves. Had to drill a 1/2" hole on the side of one for the slide bolt in the back of the drop bed. Once I got the bows installed I dragged out the cargo cover and spread it out in the back of the cargo bed. Had to find which end was the front. I then stretched it out over the bows. Had to maneuver it into place, but could not get it right from inside the bed on my own. Called my son to help me. Took a few tries to get it all aligned.

Once I got it where i needed it I noticed that one of the vent flaps (about 4" x 4") was missing from the back end curtain. Oh well, will have to fix that later!

Grabbed the super rope I purchased on-line and started to install it on the cargo cover. The old stuff was all broken and missing pieces. managed to weave most of the rope into the holes. Tight fit requiring a lot of effort! After a while my fingers were sore. My forearms felt like they were on fire. My thumb stated to luck up requiring me to use my other hand to release it! Got all but 4 pieces (2 in front and 2 in back) installed. By then it was dark out so no pictures were taken. Tomorrow I plan to finish the super rope (if my fingers survive) After that i will drag the pressure washer out and wash the cover off. It is still dirty from the mud that was on it while it was stored in the back of the truck. I will take pictures tomorrow.

Also got new safety triangles and fire extinguisher for the truck off AMAZON. The door lock handles did not make it today. No USPS tracking since they left Dallas, TX yesterday. So much for Priority Mail... The shipment of yellow LED marker light came today. Truck can use 4 of them. i want to test the brightness of them. I may use 3 of them as dome lights in the cab.

IF ANYONE HAS A SCRAP CARGO COVER THAT I CAN GET THE VENT DOOR FROM PM ME...
 

goldneagle

Well-known member
4,563
1,112
113
Location
Slidell, LA
I started out today by finishing installing the super rope on the front and back corners of the cargo cover. While i was working on that the mailman came with the package containing the door locks I ordered. Installed the door locks. Now I can lock the cab! I was going to pressure-wash the cargo cover, but decided to finish securing the hard-top.

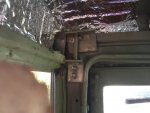
I needed to fabricate custom brackets to attach to the hard-top on the left and right corners in order to pull the front corners down on the front edge of the hard-top. (the hard-top was bowed in the center -which made the 2 front corners wing up and leave an opening between the top of the windshield and hard-top.) The J-bolts were too far from the corners to pull the corners down! The idea is to mount 1 L-bracket on the edge (inner lip) of the hard-top and another L-bracket on the top of the of the windshield side frame. Then connect the 2 L-brackets with a 1/4" bolt and tighten -pulling the hard-top corners towards the windshield.

I had some scrap 2" U-channel laying around. (the same stuff I used for the battery support brackets) I cut the U-channel down the middle to make to make two L's facing each-other. I then sliced two 1" L-brackets and two 2" L-brackets. Prepped them, drilled them, primed them, painted them.

Installed the 2" L-bracket to the edge of the hard-top and the 1" L-brackets to the windshield frame using self-tapping screws. Inserted a long 1/4" bolt and tightened it down. Once installed I applied touch-up paint.

Jeff Davis came down to visit from Mississippi. He brought the 4 LED headlight we ordered from a fellow SS member. Looks like I will be installing LED headlights on the truck tomorrow! LED marker lights are my next addition. I am also gong to replace the tail lights with LED's. Got to remove them from the M931 I decided to sell.

Pictures of brackets attached.

Brackets_1.jpgBrackets_1a.jpgInstalled_bracket_1.jpg
 

goldneagle

Well-known member
4,563
1,112
113
Location
Slidell, LA
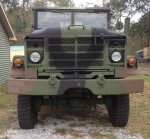
Today was LED day. Went out this morning and replaced my stock headlights with the new LED headlights we ordered from an SS member. Very easy installation! (Removed 3 wires, 3 nuts, replaced fixture, installed 3 nuts, installed wires in the same pattern and test.)

The marker lights in the front were a pain! The wire ends were buried inside the metal protective cover and were hard to extract. I am glad I decided to upgrade those lights! They were dry-rotted and rusty inside. I had to cut the wire to remove the fixture. To install the new one I took apart the end connector so i could get the wire through the small gap in the wires. Reinstalled the connector once i got it through to the inside of the hood. The rest of the process was easy. Reinstall 4 bolts and nuts and plug the wire into the other connector.

The other amber marker lights were easy to replace. Unplug, remove 4 small bolts, install new fixture, reinstall 4 small bolts, reconnect wire. DONE.

Very nice lights. Very good quality and look awesome!

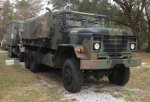
I did find out the reason my ABS light was on! It was off when we left the base on recovery but came on shortly after. It has stayed on ever since! I drove the truck to my friend Billy's hous to show him the LED lights. Decided to turn off the truck so we could talk (too much noise). As we stood by the truck talking I heard air escaping. Tracked it to the front driver's side glad hand. The **** valve was on! Turned it off and all was quiet! On the way home the ABS light stayed off. WOOHOO!

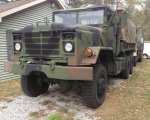
Pictures attached!

Cargo_Truck_1c.jpgCargo_Truck_1b.jpgCargo_Truck_1a.jpgCargo_Truck_1.jpg
 

SLOrazorsedge

Member
415
5
18
Location
San Luis Obispo, Ca
FYI brother, I just upgraded my M936A1 to the LED headlights which initially worked fine. I now get an intermittent headlight flashing on and off without the lights being activated with the power switch on. Let me know if you have any-similar issues. I also bought LED clearance lights and getting ready to buy the LED turn signals. I just read that they wont work without changing the flasher unit to a LED flasher as well, about another $130 bucks. Your ahead of the curve from me, please advise how yours goes changing out to all LED. Thanks.
 

goldneagle

Well-known member
4,563
1,112
113
Location
Slidell, LA
FYI brother, I just upgraded my M936A1 to the LED headlights which initially worked fine. I now get an intermittent headlight flashing on and off without the lights being activated with the power switch on. Let me know if you have any-similar issues. I also bought LED clearance lights and getting ready to buy the LED turn signals. I just read that they wont work without changing the flasher unit to a LED flasher as well, about another $130 bucks. Your ahead of the curve from me, please advise how yours goes changing out to all LED. Thanks.
Maybe you have a faulty light switch. We'll see if other members have the same problem.
 
524
1
18
Location
Hamilton, NJ 08690
I did find out the reason my ABS light was on! It was off when we left the base on recovery but came on shortly after. It has stayed on ever since! I drove the truck to my friend Billy's hous to show him the LED lights. Decided to turn off the truck so we could talk (too much noise). As we stood by the truck talking I heard air escaping. Tracked it to the front driver's side glad hand. The **** valve was on! Turned it off and all was quiet! On the way home the ABS light stayed off. WOOHOO!
I am quite new to this whole MV world but I've been reading a bit in the TM's. I also have an ABS light (solid on). From what I've read, the air system has nothing to do with the ABS light. Please correct me if I'm wrong and please, please point me in the right direction.
 

goldneagle

Well-known member
4,563
1,112
113
Location
Slidell, LA
I am quite new to this whole MV world but I've been reading a bit in the TM's. I also have an ABS light (solid on). From what I've read, the air system has nothing to do with the ABS light. Please correct me if I'm wrong and please, please point me in the right direction.
I just report as i see it. I am not an ABS expert. Not even a mechanic. All I know is the ABS light is out for the first time since I got the truck!
 

goldneagle

Well-known member
4,563
1,112
113
Location
Slidell, LA
I was hoping for more feedback but I don't see much here. Am I wasting my time posting details of the work done on my MV? Am I full of hot air? Do I bloviate?

Today was a lazy day for me. All I did was finally adjust the round convex mirror on the passenger side. (both convex mirrors were loose when we recovered the truck.) Tomorrow, weather permitting, I want to remove the rubber mat and check out the condition of the floor. I am going to clean the floor, then prime and paint it with some real high quality paint. I want to protect that metal floor before I reinstall the mat.

I also intend to install my air-ride seat for the driver and 2 folding bucket seats for the passengers. I already have the seats. I was going to install them in the M931. Just got to find a good place to attach the air line to feed the air-ride seat.
 

doolest

New member
86
1
0
Location
Fort Worth, Texas
goldneagle - great work i am enjoying seeing your work on my M923's sister truck from the same auction. we aren't going to do too much to ours since it will remain off road at the ranch....but I am curious about the headlight change out...do you see the LED making a considerable improvement over the regular? ours appear somewhat dim...and we have the same low beam/bright issue mentioned before...those are likely the only lights we will change out...but we may add a light bar...ours came with the hard top...but it has some rust issues on the cab where the top makes contact and is attached...wish ours was camo and not just od....keep up the good work and i hope you keep posting your progress
 

BradBMI

Member
142
0
16
Location
NYC/NY
Nice Truck. Sometimes they come out of "Defense Reserve" which means they were referb'd and ready for deployment. Looks like you got one on them. Enjoy they are great trucks!

I dought one in DE and drive it back to NY. Same thing happened the stitching was rotted on the plastic strap along the windshield. Dam thing tore open when i was driving back in the rain also. I needed a bath anyhow..HA!

Enjoy! Nice Xmas Present to yourself
 

goldneagle

Well-known member
4,563
1,112
113
Location
Slidell, LA
goldneagle - great work i am enjoying seeing your work on my M923's sister truck from the same auction. we aren't going to do too much to ours since it will remain off road at the ranch....but I am curious about the headlight change out...do you see the LED making a considerable improvement over the regular? ours appear somewhat dim...and we have the same low beam/bright issue mentioned before...those are likely the only lights we will change out...but we may add a light bar...ours came with the hard top...but it has some rust issues on the cab where the top makes contact and is attached...wish ours was camo and not just od....keep up the good work and i hope you keep posting your progress
Thank you for your feedback. i have not run the truck at night yet so i don't know how the light look. I promise to add info about my finding when i can.
 

goldneagle

Well-known member
4,563
1,112
113
Location
Slidell, LA
Nice Truck. Sometimes they come out of "Defense Reserve" which means they were referb'd and ready for deployment. Looks like you got one on them. Enjoy they are great trucks!

I dought one in DE and drive it back to NY. Same thing happened the stitching was rotted on the plastic strap along the windshield. Dam thing tore open when i was driving back in the rain also. I needed a bath anyhow..HA!

Enjoy! Nice Xmas Present to yourself
That's cool in the fact that you had a similar experience as i did driving the truck as a convertible in the rain! I am guessing that the tops are defective. The rest of the seams on mine are good, just the front strip that came off. They didn't glue it, just stitched it. If they did both the top would not come apart there! I plan to use Pliobond to repair mine for reuse in the M931 truck.
 

SLOrazorsedge

Member
415
5
18
Location
San Luis Obispo, Ca
Keep up the posts, we all like to see new ideas and solutions that we all experience with these trucks. If you want to deal with the floor, use the POR 15 paint and rust conversion system. It's bullet proof if you do the necessary prep using their system. I've done mine and you can hit it with a hammer, it's pretty indestructible. The nice thing about the system is the metal cleaning and metal conditioning is simply sprayed on from a spray bottle. The paint can be sprayed or brushed. I brushed it and it smoothes out like glass. Just be sure you have decent weather, no water and at least 70F.
 

Scarecrow1

New member
1,355
1
0
Location
Florence , S.C.
I have to say I am jealous, I haven't had more than two or three hours since I brought the truck home. And it was to fix the soft top yep you have a number three to add to the crappy stitching . The guy who delivered the truck just ripped it off and destroyed the front rubber clip. So I had to rebuild it with gorilla glue and siding and duct tape .... I will post some pictures later of the repair . I didn't run into any rain but it was cold as the dickens and it turned out to be 18 hours in the truck .
 

jonesal

Mission Specialist
Steel Soldiers Supporter
413
69
28
Location
Brookings, SD
Keep up the posts! Look at your "views" count. People appreciate what you are doing.

Al Jones
'84 M923
 
Top
AdBlock Detected

We get it, advertisements are annoying!

Sure, ad-blocking software does a great job at blocking ads, but it also blocks useful features of our website like our supporting vendors. Their ads help keep Steel Soldiers going. Please consider disabling your ad blockers for the site. Thanks!

I've Disabled AdBlock
No Thanks