• Steel Soldiers now has a few new forums, read more about it at: New Munitions Forums!

  • Microsoft MSN, Live, Hotmail, Outlook email users may not be receiving emails. We are working to resolve this issue. Please add support@steelsoldiers.com to your trusted contacts.

Hard top seals?

oddshot

Active member
781
119
43
Location
Jasper, Georgia
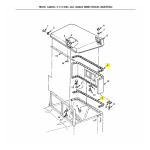
1. I am repairing a 2 part hard top for my Deuce. Checking the maintenance diagram, I see that there are 2 seals needed to do the install. They are numbers 7 and 17 in the diagram below. The prices I've seen run to $149 per each. I think I'd rather make my own. Does anybody know how wide these things are, or more importantly, how thick they have to be?

2. Is there a seal between the front of the top and the windshield? I don't see one on the diagram, but it don't hurt to ask.

3. I'm guessing some sort of "rubber" material, with an adhesive on one side should do it. I have a hole punch and will make holes for the hardware before I put it in place. Any suggestions would be appreciated.

4. The insulation on the inside of the hard top is shot, old and crumbling. I'm thinking of scraping it out, cleaning the area and replacing it with some type of Dynamat or similar heat and sound deadening. Again, any suggestions would be gratefully appreaciated.

Thanks in advance.


seal diagram.jpg
 

oddshot

Active member
781
119
43
Location
Jasper, Georgia
I found an old thread on this site. Someone suggested using 3M Ultrapro Autobody Sealant #8300 for both rear seals, and gave a description of how he did it. The tube of sealant runs about $40.00 and seems to work well. I'm going to do this for the seals in the rear.

Unfortunately I still have a bit of a mystery. Try as I might, I have not been able to locate any reference to a front top to windshield seal ... except on a Worth Point ad: click here and some parts outfit in Italy. They have some sort of diagram that shows it ... Photo and diagram below.

rUBBER FRONT SEAL hardtop-seal-military-truck-m35-m275-m35a2-.jpg

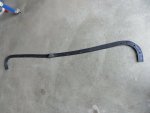
The photo seems to show a flat seal made up of rubber tubes. In the diagram below, it appears as item number 15.

m35a2-hard-top-rubber-seal-7085352.png
Anybody got any ideas what to do here?
 

ToddJK

Well-known member
1,321
4,518
113
Location
Sparta, MI
Tactical Repair has a video about these seals. I'll see if I can find it.

You'll want to watch Tactical Repairs video series, weatherproofing the cab (M35 series).
For the front top windshield weatherstripping, that rubber piece will probably work the best or be the easiest to work with, but I've seen similar styles at the hardware store but not sure if the thickness is correct. That said, you still use sealer on the front in replacement for the rubber weatherstripping, but you'll need to make sure the thickness of the bead is adequate, or use sealer in conjunction with some rubber weatherstripping from the hardware store, but you'll have to determine the thickness as I don't remember.
As far as the back panel and the rear of the top, you can caulk it but make sure the caulk or silicone sealer is dry before assembling as you may not get it apart again if needed. I've used black adhesive permatex to do my seals on my hardtop before in the past and it worked fine, but I let it dry before assembling and once it was all adjusted correctly and tightened down, I added clear silicone around all the seams in the rear of the hard top. Only issues doing things this way vs using the rubber seals, when adjusting the hard top or even installing the top itself, it's easy to tear off your sealant that was applied, so have some help reassembling it and gently assemble and adjust until it's correct. The added sealer on the outside around the seems was just an extra measure to make sure there would be no leaks there.
 
Last edited:

oddshot

Active member
781
119
43
Location
Jasper, Georgia
Hey Todd, thanks for the reply.

In doing research into this project, I found that a long time member (sorry, I forget his name just now) suggested putting down a layer of Saran Wrap (or similar) first, and then putting down a bead of sealant. This would allow the formation of a good seal while keeping the two pieces from getting glued together thereby making adjustments possible.

I'm thinking that putting some painters tape on areas I don't want a mess might be a good idea as well.

A while back I used that 3M Ultrapro Autobody Sealant #8300 to install a sliding rear window in a Ford Pickup. This product dried nicely, and where you could see it, it seemed to take the shape of a nice seal. I never had a leak ... but would hate to be the guy who took it apart for any reason.

I am not familiar with the "Tactical Repairs video series". Where might I find this?

Thanks for the help!

T.
 

Mullaney

Well-known member
Steel Soldiers Supporter
Supporting Vendor
7,769
19,877
113
Location
Charlotte NC
Hey Todd, thanks for the reply.

In doing research into this project, I found that a long time member (sorry, I forget his name just now) suggested putting down a layer of Saran Wrap (or similar) first, and then putting down a bead of sealant. This would allow the formation of a good seal while keeping the two pieces from getting glued together thereby making adjustments possible.

I'm thinking that putting some painters tape on areas I don't want a mess might be a good idea as well.

A while back I used that 3M Ultrapro Autobody Sealant #8300 to install a sliding rear window in a Ford Pickup. This product dried nicely, and where you could see it, it seemed to take the shape of a nice seal. I never had a leak ... but would hate to be the guy who took it apart for any reason.

I am not familiar with the "Tactical Repairs video series". Where might I find this?

Thanks for the help!

T.
.
A quick search on YouTube:

The actual video that you are looking for:
 

oddshot

Active member
781
119
43
Location
Jasper, Georgia

Gypsyman

Well-known member
Steel Soldiers Supporter
333
741
93
Location
Quincy, FL
I went through this a while back. It was brought to my attention that you can use the cab seals from an M939. You need to remove a few inches from the center and use sealant on the seam where the two halves will meet. I liked this idea better than using permanent sealant all the way across. The windshield sealant can be a nightmare to remove should you ever need to pull the hardtop for repairs or some other reason.

Keep in mind that the factory rubber seals can trap water if you do a lot of wet weather/winter driving. Personally, I don't. Occasional rain only and I don't wash the truck like I do my daily driver so I'm not concerned about water intrusion or retention.

I only paid $25 each for the M939 seals listed below. I think that I bought them through Kublo's Suplus.

Cab Seal for M923, M923A1, M923A2, M925A1, M925A2, M927, M927A1, M927A2, M928A2, M929, M931, M931, M936, etc.

NSN 5330-01-120-8454
P/N 12256106

s-l1600.jpg
 

oddshot

Active member
781
119
43
Location
Jasper, Georgia
Thank you gypsy man ... I'll sure keep this in mind!

That said, I went down to the shop to check the top ... and it does have a FRONT seal in place ... and it's in pretty good shape! Just clean it up and I should be good.

The more I think on it, the more I am inclined to use the Autobody sealant and saran wrap method. I am working with an old and somewhat beat up top. My thinking is that the autobody stuff will work sort of like Poligrip Denture stuff ... and fill in the gaps that other seals might miss. BTW ... I don't like the pink stuff all that much ... its REAL gooey and hard to get off my gums. I generally go "commando", but if I think I'm going to be eating something that might require a little more hold, I just use the powder ... and I'm good to go ... but I suspect NONE of you needed or wanted to hear all that.

BTW ... the top is in much better shape then I originally thought. Yeah ... like all of them, somebody danced on the top, but the back wall is bent about 3 inches out of being straight. Also, at some time somebody stored the top part outside and upside down, I guess to make a pool for his ducks. In a number of places the water (and probably duck poop) got under the insulation and there is a bit of rust. When I bought this thing, I thought I was going to have to do the "cut, grind, butt, weld and etc." method of rot repair. I am going to cut and grind, but I'm just going to glue the patches on and run sealant into the edges, inside and out. This will be a good repair and save a lot of time and work.

Now that I know how the top mounts to the windshield, I am going to have to weld in a couple of "re-inforcment-patches" where the screw goes through.

I'm not sure what that "frame-work" on the inside of the top is for, but I'm going to try to make it a bit stronger to keep the top popped out.

Thank you all for the kind suggestions ... they all help a lot.

T.
 

ToddJK

Well-known member
1,321
4,518
113
Location
Sparta, MI
Thank you gypsy man ... I'll sure keep this in mind!

That said, I went down to the shop to check the top ... and it does have a FRONT seal in place ... and it's in pretty good shape! Just clean it up and I should be good.

The more I think on it, the more I am inclined to use the Autobody sealant and saran wrap method. I am working with an old and somewhat beat up top. My thinking is that the autobody stuff will work sort of like Poligrip Denture stuff ... and fill in the gaps that other seals might miss. BTW ... I don't like the pink stuff all that much ... its REAL gooey and hard to get off my gums. I generally go "commando", but if I think I'm going to be eating something that might require a little more hold, I just use the powder ... and I'm good to go ... but I suspect NONE of you needed or wanted to hear all that.

BTW ... the top is in much better shape then I originally thought. Yeah ... like all of them, somebody danced on the top, but the back wall is bent about 3 inches out of being straight. Also, at some time somebody stored the top part outside and upside down, I guess to make a pool for his ducks. In a number of places the water (and probably duck poop) got under the insulation and there is a bit of rust. When I bought this thing, I thought I was going to have to do the "cut, grind, butt, weld and etc." method of rot repair. I am going to cut and grind, but I'm just going to glue the patches on and run sealant into the edges, inside and out. This will be a good repair and save a lot of time and work.

Now that I know how the top mounts to the windshield, I am going to have to weld in a couple of "re-inforcment-patches" where the screw goes through.

I'm not sure what that "frame-work" on the inside of the top is for, but I'm going to try to make it a bit stronger to keep the top popped out.

Thank you all for the kind suggestions ... they all help a lot.

T.
From what I understand, all that frame work helps provide some rigidity but also holds up the rubber or foam padding that usually goes on there. Is it really needed? Probably not, but it would help to hold up insulation and other little do-dads,lol.
 

oddshot

Active member
781
119
43
Location
Jasper, Georgia
So last night I was lying in bed and I commenced to start to begin thinking about stuff ... and that ain't never good.

The first thing I was thinking on ... was that I didn't include a link to the thread where some member suggested using sealer in a tube to seal his top parts up. Now I find that I can't find the thread. Fortunately, I save ALL good instructions, tips and hints, so I can copy and paste his instructions below:

SEALS FOR M35A2 TOP.


... but before I get into all of that, I haven't checked the news yet this morning. Does anybody know if them dang fools managed to hit that there assteroid with that damn rocket? Are we all still alive? I wish them fools wouldn't mess around with stuff like that. Nothing good will come from it. Years and years ago back in the 19 and 50s I remember my old Grandmother noticing it seemed to be rainy and cold more often and she remarked that we never used to have "weather" until they started putting them damn astronauts up there. anyoldways, now we got some assteroid bouncing around up there like its in a pinball machine ... and now that they done it ... you KNOW their gonna want to keep at it until they get good at it. Probably a good time to start thinking about going back to church. But I digress.

SEALS FOR M35A2 TOP.

What appears below is a copy of some members procedure on sealing his top. Hopefully he'll step forward and identify himself, because I just cannot remember who he is:

QUOTE:

I decided to replace the two leaky rear hardtop rubber seals on my deuce today. 3M Ultrapro Autobody Sealant #8300 is what I used.

A single tube from O'Reilly Auto Parts was $30. I can't believe it, but a single tube was more than enough to complete the job.


There are upper and lower gaskets on the rear of the hardtop. I talked to m-35tom today and he recommended 2 passes on each level of the hard top mating surfaces.

To start I removed all of the bolts on the top rear gasket of the hardtop. I left the 2 bolts in the front windshield frame alone. A few 4x4 blocks were stacked on top of the transmission tunnel, and I capped it off with a scissor jack and a 2x2x24" block that pressed against the insulated hardtop roof. For reference it was ~50 inches from the top of the transmission tunnel to the underside of the insulated roof. I cut the sealant tube at the 5/16" mark and made a nice fat bead on the back edge and then a second pass on the inner side of the bolt holes. Work as fast as you can because this stuff sets up pretty quickly. I slowly lowered the roof back to the top mating surface and I installed/tightened all of the bolts. 1/4" drive ratchet with a short 7/16" socket on top and 7/16" box end on the bottom.

After I removed all of the lower mating surface bolts I raised the roof (slowly) again as I loosened the factory gasket with a flat blade screwdriver. The scissor jack and 4x4 blocks pushed the hardtop towards the bed as I raised the roof from the lower section. I removed the lower gasket and cleaned the mating surfaces. After I made 2 more beads of the sealant I slowly lowered the scissor jack. Just before the hardtop touched the sealant beads I pulled it into place at each bolt location (from inside) and dropped in a bolt/washer. Some tugging is required at all spots to align the hardtop lower section. Not much tugging required when you are doing the upper section first. Finish the job by lowering the hardtop and tightening the lower bolts.

No pictures this time because I was trying to beat the rain. After I came back from dinner it started raining pretty hard. No leaks to speak of. Wooo who!

END QUOTE.


So ... when I re-read his post, I started thinking (again, sigh) this procedure looks like something that has the potential to get me REAL sticky, especially on my hands. And I HATE getting stuff on my hands, especially sticky stuff or oil or grease and suchlike ... it almost makes me sick to my stomach. Which is odd because I was a mechanic since I came home from the Army in the 19 and 70s to about 35 + years later. I didn't intend to be a mechanic ... but when I got out of the Army, I didn't have a car or any money so I needed to find a job I could walk to. The only thing I could find was working as a mechanic at an International Truck (and farm implements) and Checker Automobile dealership ... which kind of led me to working on and owning somewhat weird automobiles until about now.

So anyoldways, I'll share what I've been thinking about in another post below. I'm trying to get my post count up.
 

Mullaney

Well-known member
Steel Soldiers Supporter
Supporting Vendor
7,769
19,877
113
Location
Charlotte NC
So last night I was lying in bed and I commenced to start to begin thinking about stuff ... and that ain't never good.

The first thing I was thinking on ... was that I didn't include a link to the thread where some member suggested using sealer in a tube to seal his top parts up. Now I find that I can't find the thread. Fortunately, I save ALL good instructions, tips and hints, so I can copy and paste his instructions below:

SEALS FOR M35A2 TOP.


... but before I get into all of that, I haven't checked the news yet this morning. Does anybody know if them dang fools managed to hit that there assteroid with that damn rocket? Are we all still alive? I wish them fools wouldn't mess around with stuff like that. Nothing good will come from it. Years and years ago back in the 19 and 50s I remember my old Grandmother noticing it seemed to be rainy and cold more often and she remarked that we never used to have "weather" until they started putting them damn astronauts up there. anyoldways, now we got some assteroid bouncing around up there like its in a pinball machine ... and now that they done it ... you KNOW their gonna want to keep at it until they get good at it. Probably a good time to start thinking about going back to church. But I digress.

SEALS FOR M35A2 TOP.

What appears below is a copy of some members procedure on sealing his top. Hopefully he'll step forward and identify himself, because I just cannot remember who he is:

QUOTE:

I decided to replace the two leaky rear hardtop rubber seals on my deuce today. 3M Ultrapro Autobody Sealant #8300 is what I used.

A single tube from O'Reilly Auto Parts was $30. I can't believe it, but a single tube was more than enough to complete the job.


There are upper and lower gaskets on the rear of the hardtop. I talked to m-35tom today and he recommended 2 passes on each level of the hard top mating surfaces.

To start I removed all of the bolts on the top rear gasket of the hardtop. I left the 2 bolts in the front windshield frame alone. A few 4x4 blocks were stacked on top of the transmission tunnel, and I capped it off with a scissor jack and a 2x2x24" block that pressed against the insulated hardtop roof. For reference it was ~50 inches from the top of the transmission tunnel to the underside of the insulated roof. I cut the sealant tube at the 5/16" mark and made a nice fat bead on the back edge and then a second pass on the inner side of the bolt holes. Work as fast as you can because this stuff sets up pretty quickly. I slowly lowered the roof back to the top mating surface and I installed/tightened all of the bolts. 1/4" drive ratchet with a short 7/16" socket on top and 7/16" box end on the bottom.

After I removed all of the lower mating surface bolts I raised the roof (slowly) again as I loosened the factory gasket with a flat blade screwdriver. The scissor jack and 4x4 blocks pushed the hardtop towards the bed as I raised the roof from the lower section. I removed the lower gasket and cleaned the mating surfaces. After I made 2 more beads of the sealant I slowly lowered the scissor jack. Just before the hardtop touched the sealant beads I pulled it into place at each bolt location (from inside) and dropped in a bolt/washer. Some tugging is required at all spots to align the hardtop lower section. Not much tugging required when you are doing the upper section first. Finish the job by lowering the hardtop and tightening the lower bolts.

No pictures this time because I was trying to beat the rain. After I came back from dinner it started raining pretty hard. No leaks to speak of. Wooo who!

END QUOTE.


So ... when I re-read his post, I started thinking (again, sigh) this procedure looks like something that has the potential to get me REAL sticky, especially on my hands. And I HATE getting stuff on my hands, especially sticky stuff or oil or grease and suchlike ... it almost makes me sick to my stomach. Which is odd because I was a mechanic since I came home from the Army in the 19 and 70s to about 35 + years later. I didn't intend to be a mechanic ... but when I got out of the Army, I didn't have a car or any money so I needed to find a job I could walk to. The only thing I could find was working as a mechanic at an International Truck (and farm implements) and Checker Automobile dealership ... which kind of led me to working on and owning somewhat weird automobiles until about now.

So anyoldways, I'll share what I've been thinking about in another post below. I'm trying to get my post count up.
.
Well... Seems like you had to do what had to be done.
On your truck and in life too.

Nicely presented!
 

oddshot

Active member
781
119
43
Location
Jasper, Georgia
So anyodlways, what I was thinking about was not getting sticky ... and what about using the closed cell foam that they sell to pickup truck owners to seal a camper top (or other) on to their pickup bed? It should still seal all those spots other stuff can't like that pink denture stuff. Also ... some of it has a "double bulb" portion. if you aim that "douple bulb" properly, it shouldn't catch and hold water. And "double cell foam is water proof. I'll show you what I mean, but I gotta pee and go get lunch first.
 

oddshot

Active member
781
119
43
Location
Jasper, Georgia
.
Well... Seems like you had to do what had to be done.
On your truck and in life too.

Nicely presented!
And it goes a long way to explain the Hillman Minx (Mk. III), the Rover 2000 TC, and the many, many MGBs I've owned over the years.

How many guys can say that they worked at a International Harvester/ Checker dealership?
 

oddshot

Active member
781
119
43
Location
Jasper, Georgia
So I'm still working out my choices. The price of a manufactured seal over something out of a tube isn't all that much.

I keep thinking if I use something out of a tube, when it tighten down the bolts, I'm going to squeeze out the sealing goodness, and get left with metal against metal. I thought of putting a couple lock washers between what I'm trying to seal to hold a gap for the sealant when I tighten down the bolts, but then I might as well just buy something manufactured.

My choices seem to be something flat (A) and something with "double bulbs", see the diagram below to learn what double bulbs are (B & C). Some folks say that something with a bulb on it can catch and trap water ... and yes, I can see that (C). I think the cure for that might be just flipping the flippin' seal over (B). Think of the blue arrows as rain. The problem with the double bulbs is that I haavn't yet found any with the space between the bulbs to fit the top yet.


seals and rain.jpg


I could just go with a flat seal, glue it down with some 3M Super Weatherstrip adhesive (aka "gorilla snot") and put a bit of sealant along the top/outside edge (D). The total cost of the seal, snot and sealant would probably be about $50 to do the whole job, snot counting the panel adheisive and rust stabalizing primer I need to do the rest of the job.

Still thinking ...

T.
 

ToddJK

Well-known member
1,321
4,518
113
Location
Sparta, MI
I would go with the tube sealant. Let it dry for a period of time before assembly and no juices will be squeezed out so to speak. Honestly any silicone will do the job, but I wouldn't assemble with the sealant being wet (just applied) or you may never get it apart again, that and it may make a mess. If you use the closed cell foam stuff, that will rot out in a decade or less unless the truck is kept housed a lot, the sun is what degrades it. This is also another reason why I'm just being lazy and sticking with the soft top. It leaks some yes, mostly around the windows, but plugging up gaps with foam usually cuts it down enough that it isn't a big deal and the cab stays plenty warm enough in the winter.
 

oddshot

Active member
781
119
43
Location
Jasper, Georgia
If you use the closed cell foam stuff, that will rot out in a decade or less unless the truck is kept housed a lot, the sun is what degrades it.
At 72 years of age, I don't think of things in terms of "decades". For example, there is NO WAY I would ever put a 30 year roof on my house.

On a serious note, however, I live in Georgia and the sun and heat really beats the crap out of anything left out side, so that IS a valid consideration. I don't want to have to do this again when I'm 77.

T.
 

Mullaney

Well-known member
Steel Soldiers Supporter
Supporting Vendor
7,769
19,877
113
Location
Charlotte NC
At 72 years of age, I don't think of things in terms of "decades". For example, there is NO WAY I would ever put a 30 year roof on my house.

On a serious note, however, I live in Georgia and the sun and heat really beats the crap out of anything left out side, so that IS a valid consideration. I don't want to have to do this again when I'm 77.

T.
.
We need a better icon.
Thumbs up seemed the most appropriate.

AGREED! At 62, I am looking at things these days with an eye for "this fix will outlast me" as I work on projects...
 

SCSG-G4

PSVB 3003
5,379
3,413
113
Location
Lexington, South Carolina
AGREED! At 62, I am looking at things these days with an eye for "this fix will outlast me" as I work on projects...
Most any fix I do 'these days' should outlast me, or at least my ownership of MV's. Neil Hendrix 'retired' from MV's when he was 75, I'm past that age. Larry R just changed a head gasket at age 78, and wants to do all his crank ,pistons and mains this winter.
 

oddshot

Active member
781
119
43
Location
Jasper, Georgia
Most any fix I do 'these days' should outlast me, or at least my ownership of MV's.
And you are the "long time member" who suggested the saran wrap seal method a while back. Sorry I couldn't bring your screen name to mind. It is a pretty slick trick.

The other fella had something about "red" in his screen name ... or maybe his photo, like maybe he had red hair. This stuff goes back at least 10 or so years.
 
Top