

spectre6000
New member
- 96
- 3
- 0
- Location
- Broomfield, CO
I just wrapped this little jewel up this afternoon. My radiator was trashed and needed to be rebuilt, so I figured my heater core wasn't far behind. While it was at the radiator shop, I tackled this project. First off, the whole first day's photo set seems to have disappeared, so I attempted to recreate them. The box was REALLY dirty and gross, and was just blowing fine dust everywhere. It was really gross. All the photos are of the restored box though, so use your imagination.
First off, drain your coolant. If this is the only thing you're really doing, it's probably worthwhile to get it draining while you're unhooking everything from the inside. If you're lucky, someone has already dealt (gracefully) with the stupid crush clamps, or maybe someone in the military thought they were a good idea for mine. Either way, you'll likely have to re-round the inlet and outlet tubes on your heater core and you'll definitely want to get some not-stupid hose clamps for re-installation. I found it convenient to have the glove box removed for all of this. It's held in place by 4 or so 7mm bolts. It's pretty self explanatory and I didn't think to photograph it.
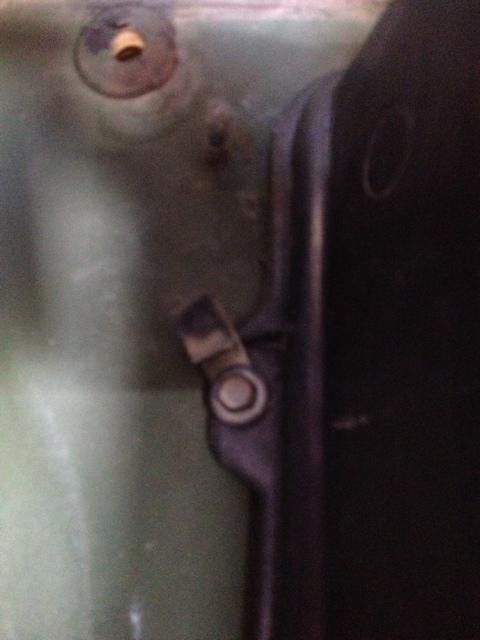
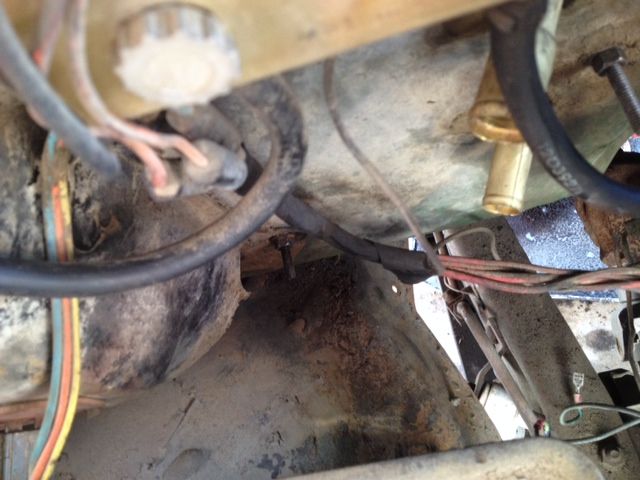
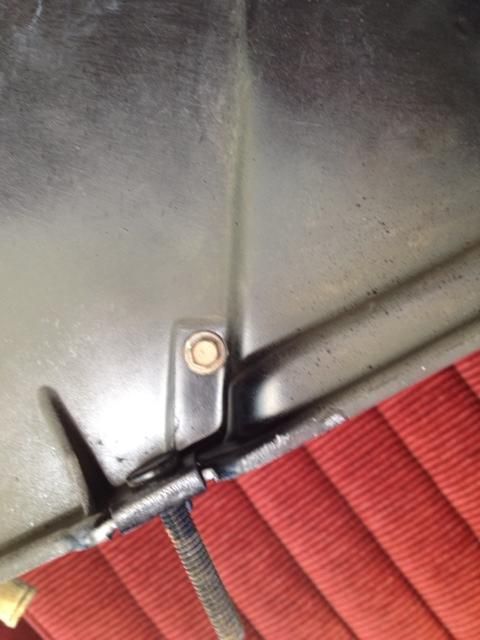
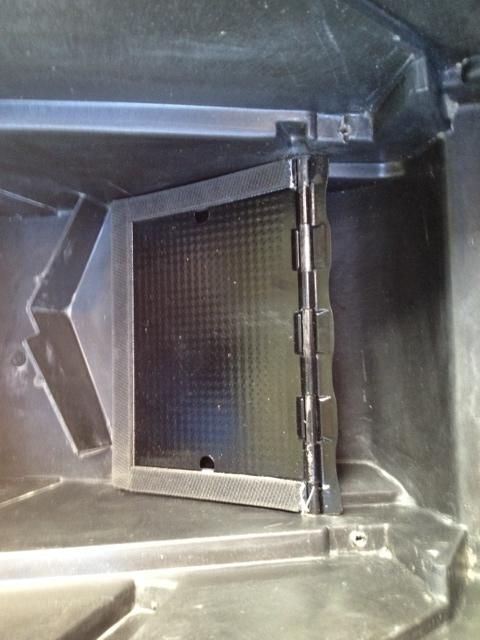
First, undo this bolt that may or may not have a wire retainer. It's to the far right between the heater box and the passenger side floor kick vent. It didn't have anything running through it, and there was nothing nearby that seemed like it might have at some point, so I imagine it held something associated with the military radio that was mounted on the dash (no longer present). I believe it was 11mm.
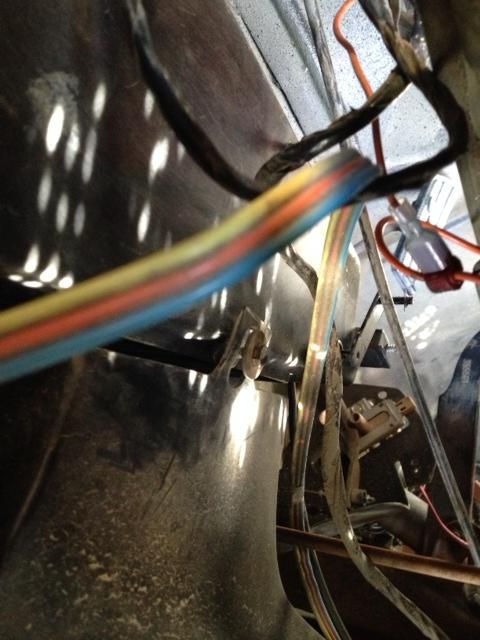
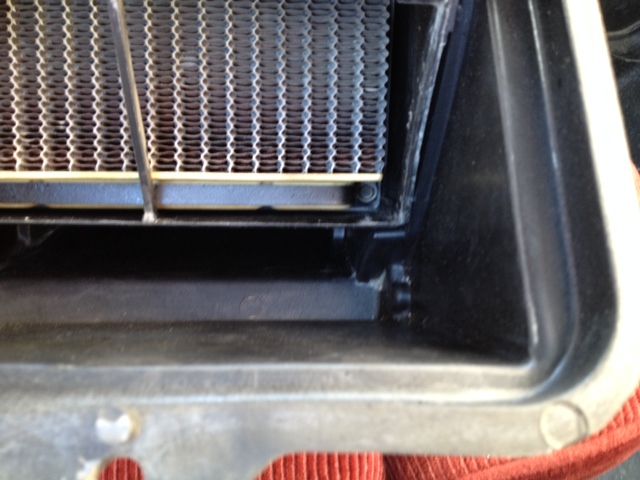
Then you'll want to undo this bolt that connects the heater box to the defrost vents. I recall this one being 8 or 9 mm. Directly below that is a screw that holds the directional vents that aim the hot air between the driver and passenger sides. It is held on with a phillips head screw. It's either hiding behind the wires of many colors, or just not present in this photo (already removed).
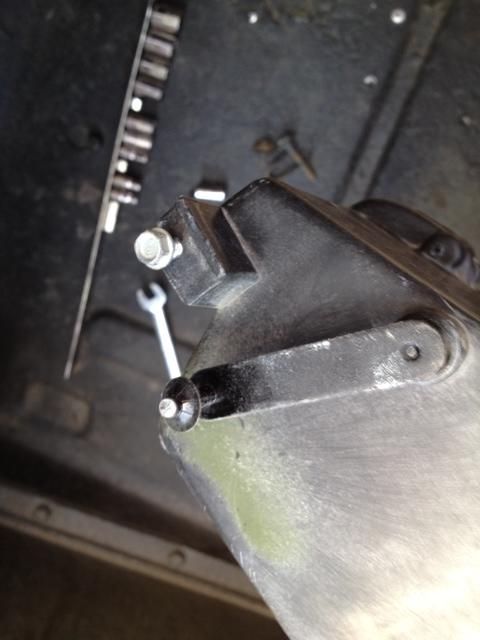
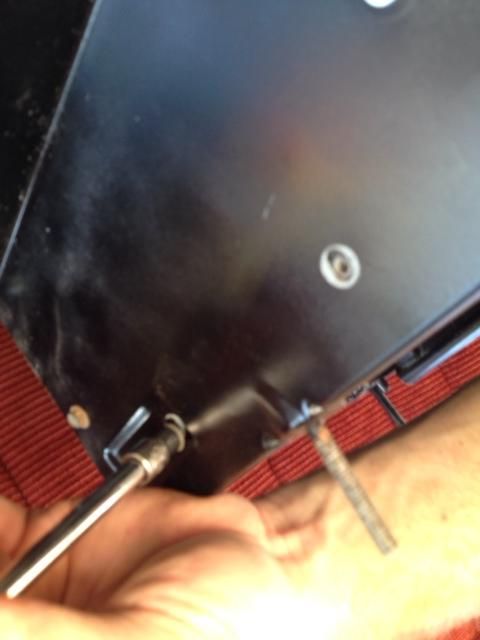
The control cables connect to these arms on top of the passenger side of the box and at the rear (front is front) of the drivers side of the box. They are held on with speed nuts (just slide them off) and the sleeves are held in place by 7mm screws. Neither of the above photos are from the angle you're likely to be looking at them, but you'll see what's up when you're under there.
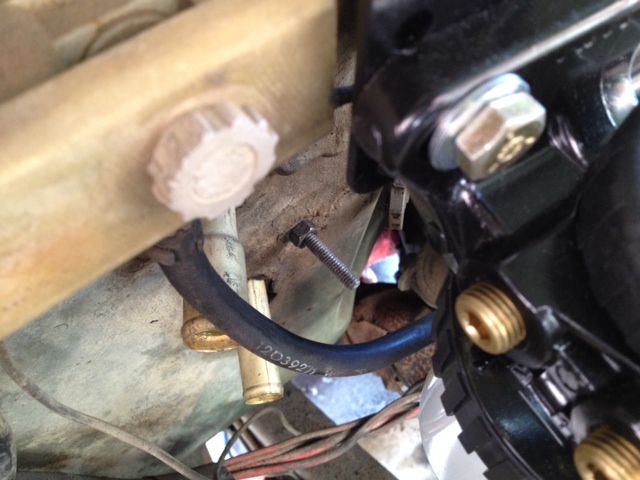
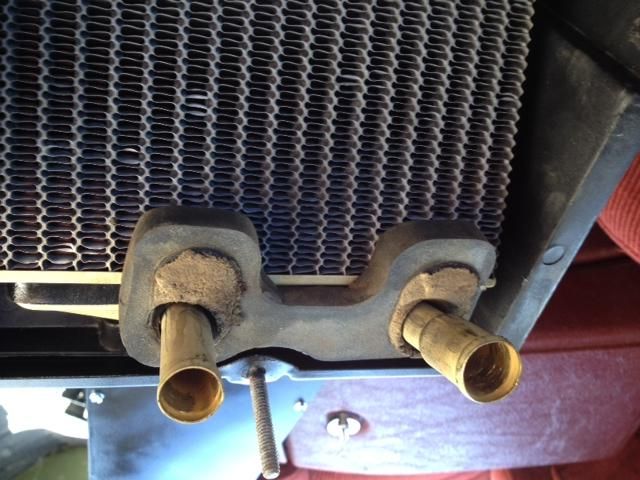
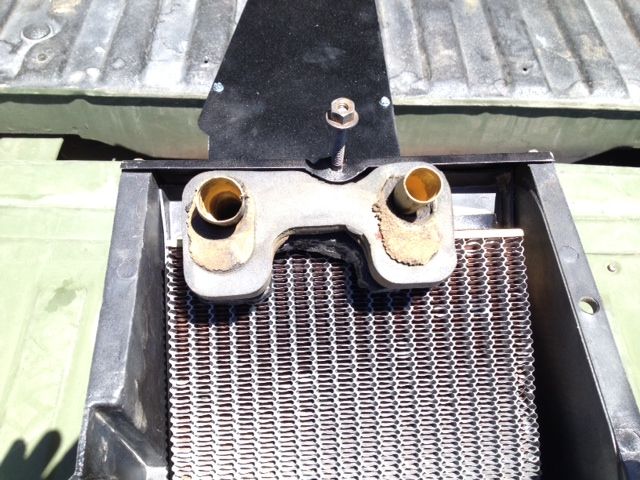
Once all that has been disassembled, pop the hood and jump up on the passenger side fender. Disconnect the hoses that connect the heater core to the crossover and radiator. Now is a good time to buy new ones because you can bet good money they're old and stiff. The heater assembly is now connected to the body with nuts on studs here (down low between the battery and the firewall below the junction box):
here (immediately adjacent to the heater core inlet/outlets):
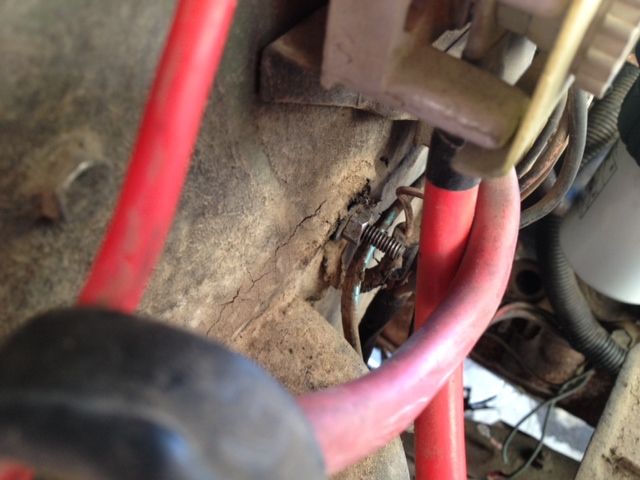
and here (below the terminal block):
All three of these nuts were thoroughly buried under tar insulation stuff and required digging to even locate. Have fun with that.
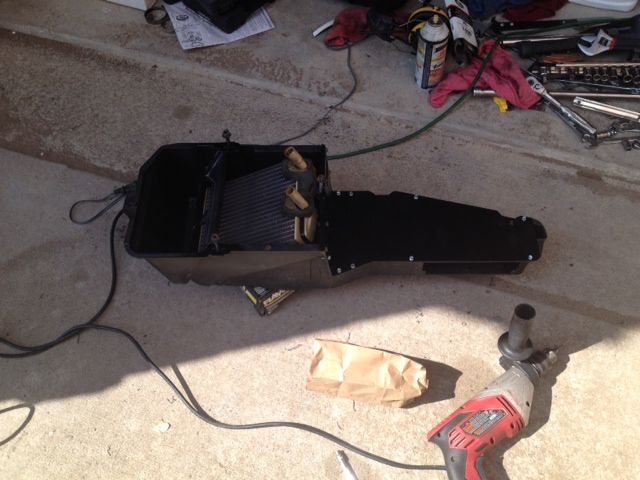
The heater box assembly will now gracefully (or not) pull out from under the dash. If it doesn't come out, don't force it; it's not at all unlikely that you or I may have forgotten a fastener or something somewhere.
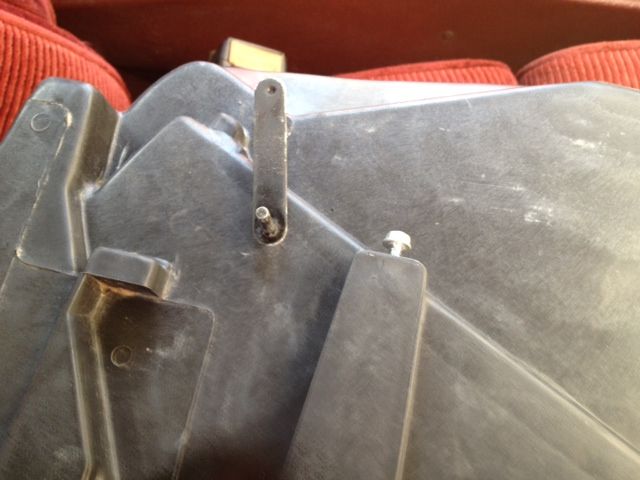
Once it's out, carefully remove this crapnasty. You'll need it in tact one way or another. It seals the assembly against the firewall and keeps junk from the engine compartment from clogging up your heater core.

The heater core is held into the heater box by way of two metal straps. You'll need a 1/4" 1/4" drive socket (got that?) and a 6" extension. If you're mostly metric (this is my first American hobby car), that's a 6.5mm socket.
Don't pull the core yet! You'll still find you want to remove the inner plastic structure from the box, and there are two 1/4" (6.5mm) screws holding the top of the structure in. They're sneaking around on the sides of the box.
Once they're removed, the heater core and the inner structure will come out (again, unless one or both of us forgot a fastener or something). Now, go around the box and remove every other fastener you can find. There is a metal cover that is perma-assembled to the box in the sort of fashion that is why I don't usually play with cars this new. It is patently obvious that the engineers designed the box to be able to be rebuilt (as they **** well should have!), and the bosses for the screws are even present in the casting... Unfortunately, some ******* accountants got their hands on the thing and decided to mess it up for everyone down the road (planned obsolescence!). Instead of easily disassembled/reassembled screws, they just melted some plastic like crappy rivets. Dumb. We're going to fix what the accountants messed up! This is where things get a little tricky (only a little)...
You're going to need some fret pullers. You are all luthiers right? Just me? Well that's lame. You guys need a hobby...
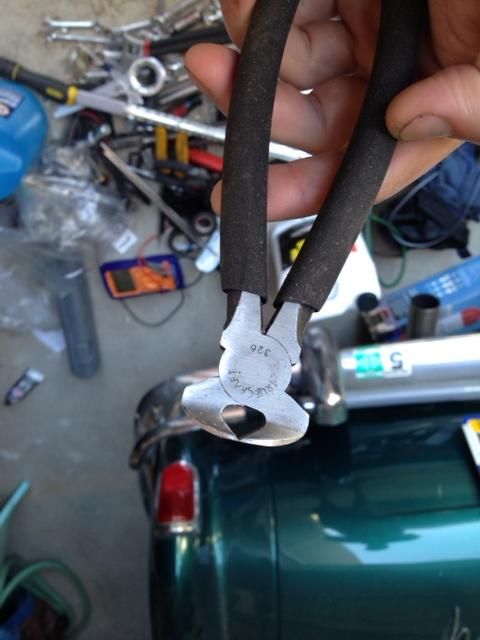
Seriously though, they're just end snips that have been ground flush (so they'll easily fit between the shoulders of the fret wire and the fretboard of course). Really, anything that will cut fine and flush without a lot of marring (or with marring, I guess no one will ever really see it again once it's all back in) will do.
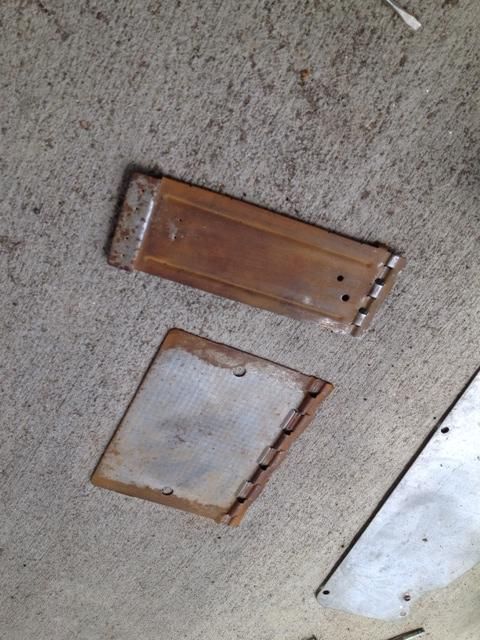
Once you've fixed the accounting errors, the metal plate comes off and you're left with the flaps just hanging out in there unwilling to come out (this is the finished product since these were among the photos that disappeared, yours will undoubtedly look very different). This is the other kind of tricky part because you have to not be a gorilla about it. The shaft has a "D" profile, and the flaps are fairly thin and fit very tightly to it (moreso with the foam residue and any corrosion that has occurred). I was able to CAREFULLY twist the shaft while holding the deflectors and loosen up the fit. You really need to be careful, because if the control arm snaps you're going to have a bad time. If you bend it too much it won't go nicely back together and you're going to have a bad time. If you go gorilla on it (big hammers, ripping, tearing, cutting, general impatience, etc.) you're going to have a bad time. BE CAREFUL HERE. It's also worth noting which direction the control arms go in relation to the box for reassembly (I didn't and had to do parts of this twice).
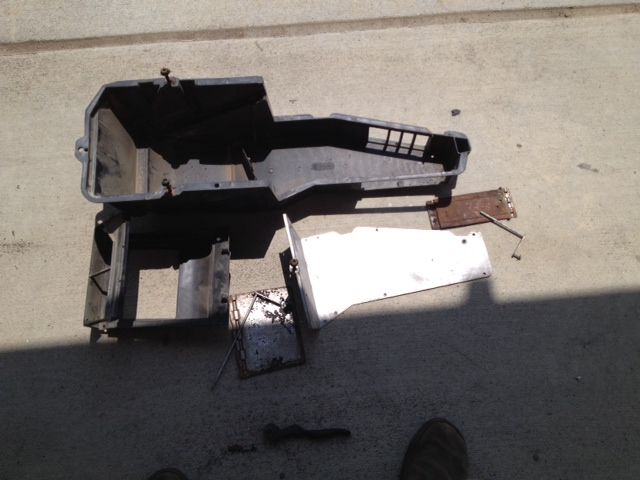
You should now be presented with roughly this scene. Have a beer. You've earned it. You may have some remnants of foam (note how mine had been blown all throughout my truck), rodent nests, dirt, grime, and all manners of crapnasties. Clean everything and zen out.
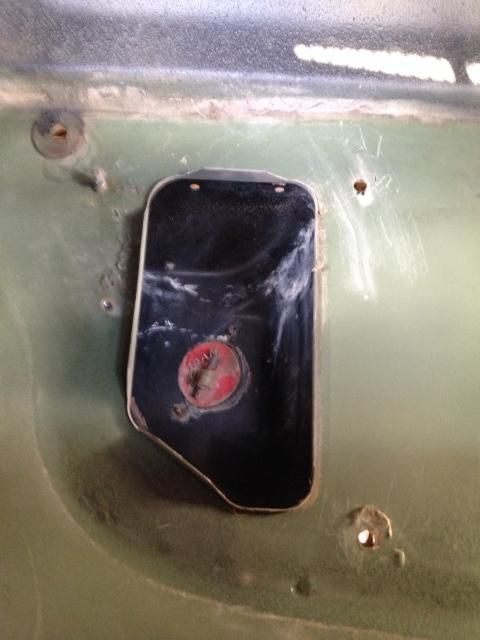
While you're at it, it's a good time to clean the rest of the cab. Clean this guy out (leave the springs alone, they're actually an electrical component). Maybe pull the dash pad off and remove the defroster vents too (they're going to be just as grungy). I removed the insulation from the firewall because it was doing nothing save serving as a dust repository/generator. You'll have to figure all of these things out for yourself though, because that's a lot of boring photos that I didn't take.
Remove and treat rust. I used a stainless brush and some phosphoric acid solution, but whatever commercial rust remover you have at hand will do (most commercial rust removers are just some form of phosphoric acid, and you'll find it's cheaper when it's not labeled as such).
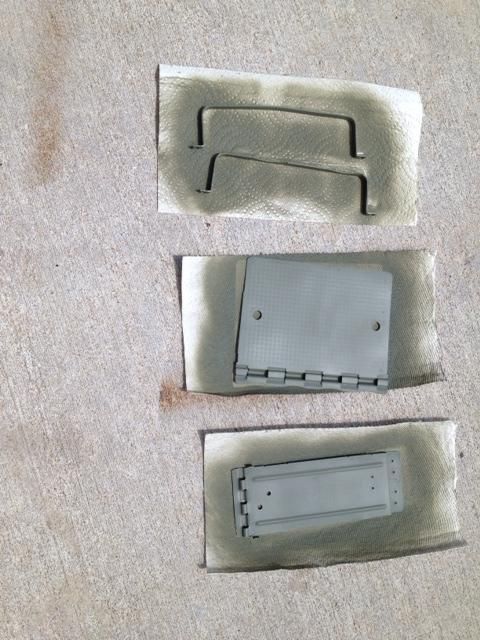
Prime.
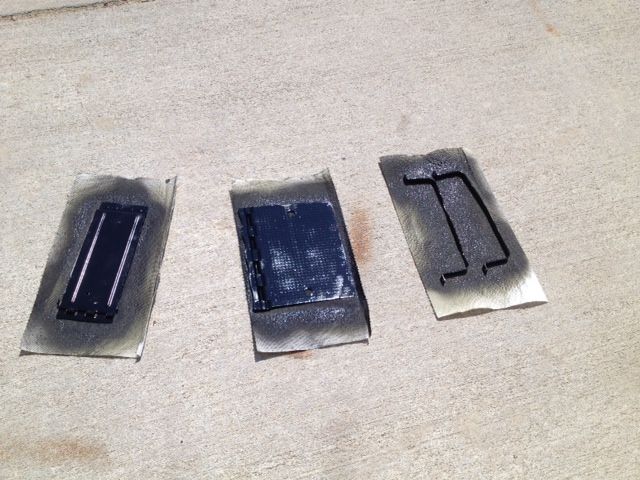
...And paint. Or don't. No one will probably every see this again. I'm just super anal and if I didn't paint it all nice and pretty, I'd know it wasn't painted all nice and pretty.
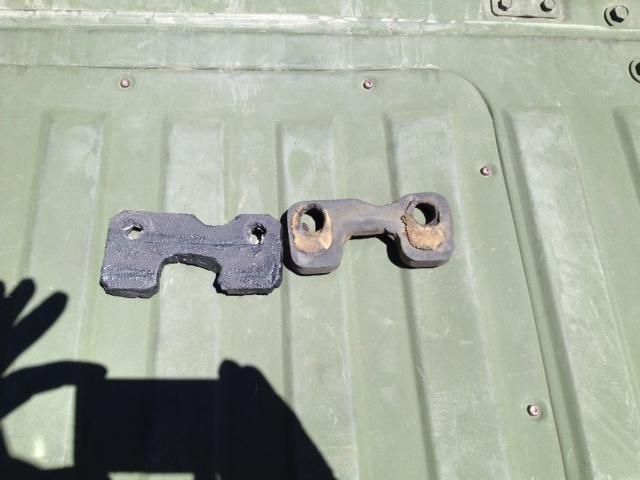
GM built these with an open celled foam pad covering the entirety of the larger deflector for some reason. For all the cost cutting, you'd think they would just use strips around the sealing surfaces, but who said accountants were always so clever. I used a closed cell rubber foam (like what I think wet suits are made of) that seems much more durable and up to the task than the typical open cell stuff you see. It was sold by the foot at my local hardware store, and had just about zero labeling so I can't tell you much more about it. The smaller deflector had some staples in it that I think held more of a flap that extended past the end of the metal part of the deflector... There was nothing left of it, and I applied the same foam material to the end of it across the lip, but it didn't fully seal that way... Pay attention during disassembly to this detail and plan accordingly.
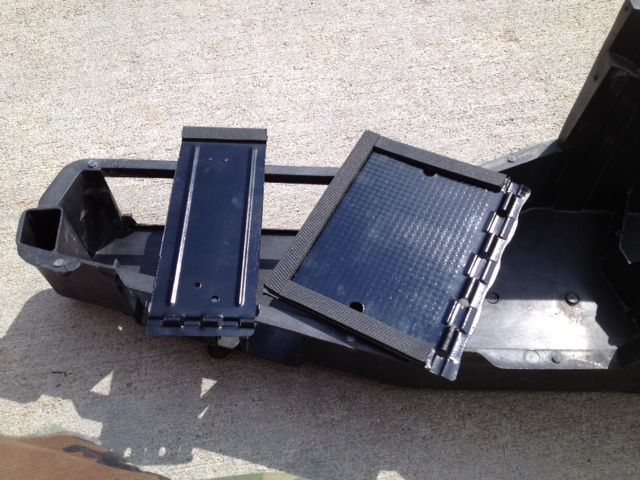
Get some screws similar to the others for the rivets du save-a-buck, drill some appropriately sized pilot holes, and throw the hole mess back together. Nice and purty like.
This last part was a little tricky. Remember that crumbly bit of ugly foam nastiness that you carefully removed back toward the top? You can reuse that if it's in good shape (or you're lazy), or make a new one. My hardware store didn't have any suitable materials for a simple reproduction, so I had to get a little creative. I ended up using a wider version of the same foam tape stuff that I used on the deflectors and laid it up on itself on 90°s to the approximate dimension as the original piece, then used some black 3M weatherstrip adhesive to sort of glue the laminations together. Then I cut it to approximately the same shape/size as the original, like so:

I swear it looks better in person, but you'll never know (nor will anyone else, because this thing will likely never be seen again). Regardless, it's much more pliable and less crusty than the original, so it'll at least do a better job. There's a bit of a trick to this one as well. Foam doesn't drill out very easily, and I don't have any punches lying around that are quite that big. I ended up clamping the new piece between two flat pieces of scrap wood (single-use pallet salvage), lining the original up to the new piece and laying everything out on the wood. I drilled a pilot hole to make sure things stayed centered (and to test how the foam would play with the drill), then used the largest bit I had that wasn't too big for the final piece. Note: DO NOT DRILL THE FINAL DIMENSION!!! The foam will tear out and do all sorts of crazy stuff on you. It doesn't work cleanly. Drill the hole big enough so that you have something to work with (or don't even try the drill), then I cut the rest out with a very (beyond surgical) sharp 1/4" chisel (remember the luthiery bit?). I couldn't get a razor blade to do any positive damage, the drills were no good, I tried a coping saw blade (the saw broke, or that might have maybe worked), and a number of other things, but the super sharp 1/4" chisel did the trick nicely.
Then just throw the whole mess back into the truck and have another beer.
First off, drain your coolant. If this is the only thing you're really doing, it's probably worthwhile to get it draining while you're unhooking everything from the inside. If you're lucky, someone has already dealt (gracefully) with the stupid crush clamps, or maybe someone in the military thought they were a good idea for mine. Either way, you'll likely have to re-round the inlet and outlet tubes on your heater core and you'll definitely want to get some not-stupid hose clamps for re-installation. I found it convenient to have the glove box removed for all of this. It's held in place by 4 or so 7mm bolts. It's pretty self explanatory and I didn't think to photograph it.
First, undo this bolt that may or may not have a wire retainer. It's to the far right between the heater box and the passenger side floor kick vent. It didn't have anything running through it, and there was nothing nearby that seemed like it might have at some point, so I imagine it held something associated with the military radio that was mounted on the dash (no longer present). I believe it was 11mm.
Then you'll want to undo this bolt that connects the heater box to the defrost vents. I recall this one being 8 or 9 mm. Directly below that is a screw that holds the directional vents that aim the hot air between the driver and passenger sides. It is held on with a phillips head screw. It's either hiding behind the wires of many colors, or just not present in this photo (already removed).
The control cables connect to these arms on top of the passenger side of the box and at the rear (front is front) of the drivers side of the box. They are held on with speed nuts (just slide them off) and the sleeves are held in place by 7mm screws. Neither of the above photos are from the angle you're likely to be looking at them, but you'll see what's up when you're under there.
Once all that has been disassembled, pop the hood and jump up on the passenger side fender. Disconnect the hoses that connect the heater core to the crossover and radiator. Now is a good time to buy new ones because you can bet good money they're old and stiff. The heater assembly is now connected to the body with nuts on studs here (down low between the battery and the firewall below the junction box):
here (immediately adjacent to the heater core inlet/outlets):
and here (below the terminal block):
All three of these nuts were thoroughly buried under tar insulation stuff and required digging to even locate. Have fun with that.
The heater box assembly will now gracefully (or not) pull out from under the dash. If it doesn't come out, don't force it; it's not at all unlikely that you or I may have forgotten a fastener or something somewhere.
Once it's out, carefully remove this crapnasty. You'll need it in tact one way or another. It seals the assembly against the firewall and keeps junk from the engine compartment from clogging up your heater core.
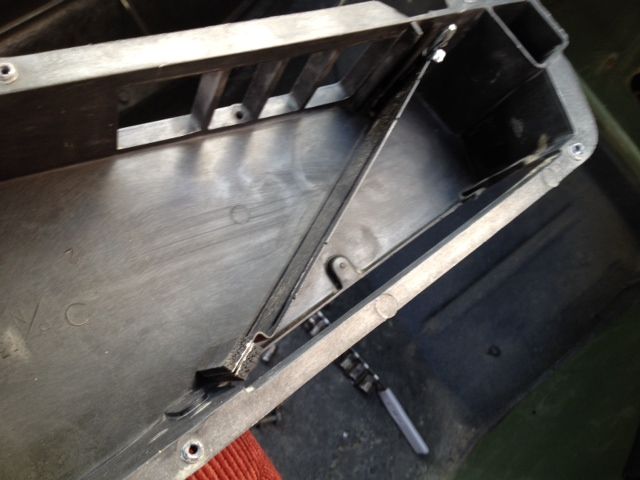
The heater core is held into the heater box by way of two metal straps. You'll need a 1/4" 1/4" drive socket (got that?) and a 6" extension. If you're mostly metric (this is my first American hobby car), that's a 6.5mm socket.
Don't pull the core yet! You'll still find you want to remove the inner plastic structure from the box, and there are two 1/4" (6.5mm) screws holding the top of the structure in. They're sneaking around on the sides of the box.
Once they're removed, the heater core and the inner structure will come out (again, unless one or both of us forgot a fastener or something). Now, go around the box and remove every other fastener you can find. There is a metal cover that is perma-assembled to the box in the sort of fashion that is why I don't usually play with cars this new. It is patently obvious that the engineers designed the box to be able to be rebuilt (as they **** well should have!), and the bosses for the screws are even present in the casting... Unfortunately, some ******* accountants got their hands on the thing and decided to mess it up for everyone down the road (planned obsolescence!). Instead of easily disassembled/reassembled screws, they just melted some plastic like crappy rivets. Dumb. We're going to fix what the accountants messed up! This is where things get a little tricky (only a little)...
You're going to need some fret pullers. You are all luthiers right? Just me? Well that's lame. You guys need a hobby...
Seriously though, they're just end snips that have been ground flush (so they'll easily fit between the shoulders of the fret wire and the fretboard of course). Really, anything that will cut fine and flush without a lot of marring (or with marring, I guess no one will ever really see it again once it's all back in) will do.
Once you've fixed the accounting errors, the metal plate comes off and you're left with the flaps just hanging out in there unwilling to come out (this is the finished product since these were among the photos that disappeared, yours will undoubtedly look very different). This is the other kind of tricky part because you have to not be a gorilla about it. The shaft has a "D" profile, and the flaps are fairly thin and fit very tightly to it (moreso with the foam residue and any corrosion that has occurred). I was able to CAREFULLY twist the shaft while holding the deflectors and loosen up the fit. You really need to be careful, because if the control arm snaps you're going to have a bad time. If you bend it too much it won't go nicely back together and you're going to have a bad time. If you go gorilla on it (big hammers, ripping, tearing, cutting, general impatience, etc.) you're going to have a bad time. BE CAREFUL HERE. It's also worth noting which direction the control arms go in relation to the box for reassembly (I didn't and had to do parts of this twice).
You should now be presented with roughly this scene. Have a beer. You've earned it. You may have some remnants of foam (note how mine had been blown all throughout my truck), rodent nests, dirt, grime, and all manners of crapnasties. Clean everything and zen out.
While you're at it, it's a good time to clean the rest of the cab. Clean this guy out (leave the springs alone, they're actually an electrical component). Maybe pull the dash pad off and remove the defroster vents too (they're going to be just as grungy). I removed the insulation from the firewall because it was doing nothing save serving as a dust repository/generator. You'll have to figure all of these things out for yourself though, because that's a lot of boring photos that I didn't take.
Remove and treat rust. I used a stainless brush and some phosphoric acid solution, but whatever commercial rust remover you have at hand will do (most commercial rust removers are just some form of phosphoric acid, and you'll find it's cheaper when it's not labeled as such).
Prime.
...And paint. Or don't. No one will probably every see this again. I'm just super anal and if I didn't paint it all nice and pretty, I'd know it wasn't painted all nice and pretty.
GM built these with an open celled foam pad covering the entirety of the larger deflector for some reason. For all the cost cutting, you'd think they would just use strips around the sealing surfaces, but who said accountants were always so clever. I used a closed cell rubber foam (like what I think wet suits are made of) that seems much more durable and up to the task than the typical open cell stuff you see. It was sold by the foot at my local hardware store, and had just about zero labeling so I can't tell you much more about it. The smaller deflector had some staples in it that I think held more of a flap that extended past the end of the metal part of the deflector... There was nothing left of it, and I applied the same foam material to the end of it across the lip, but it didn't fully seal that way... Pay attention during disassembly to this detail and plan accordingly.
Get some screws similar to the others for the rivets du save-a-buck, drill some appropriately sized pilot holes, and throw the hole mess back together. Nice and purty like.
This last part was a little tricky. Remember that crumbly bit of ugly foam nastiness that you carefully removed back toward the top? You can reuse that if it's in good shape (or you're lazy), or make a new one. My hardware store didn't have any suitable materials for a simple reproduction, so I had to get a little creative. I ended up using a wider version of the same foam tape stuff that I used on the deflectors and laid it up on itself on 90°s to the approximate dimension as the original piece, then used some black 3M weatherstrip adhesive to sort of glue the laminations together. Then I cut it to approximately the same shape/size as the original, like so:
I swear it looks better in person, but you'll never know (nor will anyone else, because this thing will likely never be seen again). Regardless, it's much more pliable and less crusty than the original, so it'll at least do a better job. There's a bit of a trick to this one as well. Foam doesn't drill out very easily, and I don't have any punches lying around that are quite that big. I ended up clamping the new piece between two flat pieces of scrap wood (single-use pallet salvage), lining the original up to the new piece and laying everything out on the wood. I drilled a pilot hole to make sure things stayed centered (and to test how the foam would play with the drill), then used the largest bit I had that wasn't too big for the final piece. Note: DO NOT DRILL THE FINAL DIMENSION!!! The foam will tear out and do all sorts of crazy stuff on you. It doesn't work cleanly. Drill the hole big enough so that you have something to work with (or don't even try the drill), then I cut the rest out with a very (beyond surgical) sharp 1/4" chisel (remember the luthiery bit?). I couldn't get a razor blade to do any positive damage, the drills were no good, I tried a coping saw blade (the saw broke, or that might have maybe worked), and a number of other things, but the super sharp 1/4" chisel did the trick nicely.
Then just throw the whole mess back into the truck and have another beer.
Last edited: