• Steel Soldiers now has a few new forums, read more about it at: New Munitions Forums!

  • Microsoft MSN, Live, Hotmail, Outlook email users may not be receiving emails. We are working to resolve this issue. Please add support@steelsoldiers.com to your trusted contacts.


HMMWV A2 Project

TedG

Well-known member
1,133
38
48
Location
MI USA
Thanks dunedigger! Enjoy your cucv! oh, and I see a M35A2 in your future!


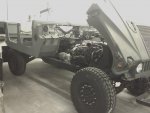
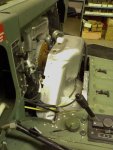
I have been neglecting the project due to work load and travels (make hay while the sun shines!). I thought Thanksgiving weekend would be productive but before I knew it, it was over. Had a door company show up Saturday and they worked all day. I then had to do the electrical for the drive mechanism and lighting. Now I need to get propane for the shop and get it up to temp so I can go back to work on it in between my travels.

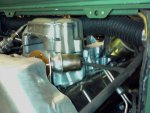
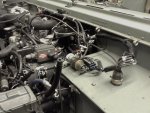
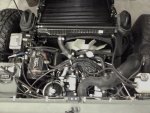
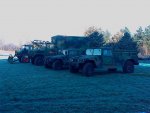
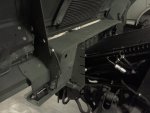
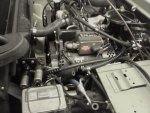
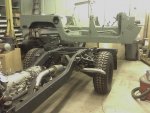
Since they were working in the barn, I had to move some of the trucks out which made for a good photo op!
 

Attachments

ida34

Well-known member
4,117
30
48
Location
Dexter, MI
The door only took about two months, right? What about the other trucks. Don't tease us. He also did rework his whole shop and is organizing for maximum efficiency.
 

TedG

Well-known member
1,133
38
48
Location
MI USA
HI Chuck, apparently there are two companies busy here in MI; mine and the overhead door guys! Yes, 2 long months to get the doors...arrg! But now everything but the mog is indoors (poor thing just got +6" snow dumped on her). Hopefully the one hmmwv will sell soon which will free up space for the mog.
 

TedG

Well-known member
1,133
38
48
Location
MI USA
I had 3 awesome days, going on 4, working on the project!!! I removed the tub again after marking an area that needed to be notched for turbo assembly clearance. Then while the tub was off, I did a bunch of things; I installed my mud flap body fillers, my new tailgate, wired the 100amp alternator, installed the brake limiting assembly, installed the turbo inlet duct, removed glow plugs & added mystery oil in each cylinder, plumbed the power steering cooling loop & fan clutch, plus a bunch of small things!

I then permanently set the tub & Joel showed up to help bolt the tub down with a factory 0.5'' lift kit. We then connected the rear trailer plug to bumper, & connected e-brake cables [pia].

Hopefully by tomorrow night the engine electrical will be connected & I can then work on the dash assembly. Once that is done, I'll have to prime engine & cross my fingers!

Pictures to be posted on Monday.
 

TedG

Well-known member
1,133
38
48
Location
MI USA
Here are some progress pictures. I did up the hood harness (just need some screws to fasten in the connector), bolted the tub down and started connecting the wires, cables, and linkages. It is like a mini assembly line...

Enjoy!
 

Attachments

TedG

Well-known member
1,133
38
48
Location
MI USA
Chuck, you are more than welcome to stop by for a chat...I might even hand you a wrench!

I was slowed down on my progress by some linkage! I turn a few more wrenchs and found that I had the wrong tranny linkage on. This made the shifter linkage not connect properly. In the picture, the left one is correct. I grabbed the correct linkage out of my boxes of goodies and now it is all together and synchronized. Now I connect the TISS, TOSS and tranny harness then on to the engine.

I forgot to mention that I have the new longer speedo cable which allows it to go out the front of the fire wall above the hydrobooster (and not the side towards the engine). This allows for a smoother bend of the cable and makes it less prone to break.
 

Attachments

TedG

Well-known member
1,133
38
48
Location
MI USA
Mike, depends on my work load. When I started the project, I thought I would go slow with it...but not this slow! It would be a fun and fast trip to take it to Aberdeen. OR come see it at Clare MI this August!!!
 

Bart

Member
110
0
16
Location
Netherlands Europe
almost done Ted:!::p
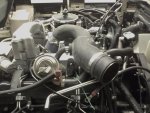
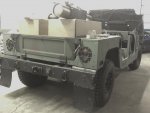
......awesome looking truck mate !!!, although the nose looks not as nice as the "original" model....but who am I to judge......hehe.....
you keep it just Green color....or change it later to NATO camo ...??
what this price of that brushguard Ted....?? looks a LOT like mine actually.
"Humvee's RULE " / Got a Hill , GET a HUMMER !!!
 

TedG

Well-known member
1,133
38
48
Location
MI USA
Hi Bart,
Color will start as what it is, faded CARC. Once the truck is operational, then off to the paint booth for Green CARC. The brush guards can be had from $250 to $400 dollars with mounts, depends on if someone needs to sell one in hurry...

Today was get a deuce day so no wrench turning until the weekend.
 

TedG

Well-known member
1,133
38
48
Location
MI USA
I re-read my thread here on SS and in remembering ARMYMAN30yearsplus (David), he had some very kind words on my project. See pages 7 & 8! RIP David.


Wrench turning proceeded the last 3 days/evenings with one or two more evenings ahead. No pictures today. The tub is set and engine compartment connections have begun. So far, the engine harness is connected to the body harness and all other connection points. Working on the grounding and starter area now. I installed the deep water fording tubing, connected the air horn and the big air filter housing/cap (I am not installing the tall intake pipe at this time). I also connected the overflow tank. Things are moving along quite nicely and it should not be long before the engine turns over and starts!!!
Items left to do: dash wiring, control box, blinker relay, brake switch, battery box (last but not least), fuel tank install, rear propellor install, throttle linkage, hood latches and snubbs.

Pictures tomorrow...if the blizzard ends!

Regards,
 

TedG

Well-known member
1,133
38
48
Location
MI USA
Thanks guys! She's coming together quickly. I made a list & items are getting checked off rapidly.

George, I guess I should have organized a businees trip to CA this week! 5f & dropping.

Tonight, Joel showed up and we each wrenched on each side of the fire wall. Four hands are required on some components. Installed throttle cable, throttle lock, control box, & discussed the power steering loop-circuit. We also tied in the grounding harness to fire wall & control box.

Enjoy...pictures tomorrow!
 

dilvoy

Active member
733
25
28
Location
San Francisco, Ca.
Nice job Ted! That last foto looks like it could have been taken on the AMG assembly line.
Ya now would be a good time to come out here, because it is warmer than our summer weather.
 

TedG

Well-known member
1,133
38
48
Location
MI USA
Thanks George. Will plan a trip soon... I need to bring my good camera out to the shop and snap some better pictures. The blurry ones just don't cut it.
 
Top
AdBlock Detected

We get it, advertisements are annoying!

Sure, ad-blocking software does a great job at blocking ads, but it also blocks useful features of our website like our supporting vendors. Their ads help keep Steel Soldiers going. Please consider disabling your ad blockers for the site. Thanks!

I've Disabled AdBlock
No Thanks