• Steel Soldiers now has a few new forums, read more about it at: New Munitions Forums!

  • Microsoft MSN, Live, Hotmail, Outlook email users may not be receiving emails. We are working to resolve this issue. Please add support@steelsoldiers.com to your trusted contacts.


HMMWV Humvee M1123 Build Thread

Vapor Trail

Active member
195
247
43
Location
Kentucky
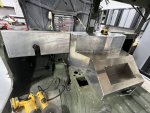
I got most of the dash and center console started. They’ll be two JL marine speakers in the verticals and four stainless cup holders on that flat step. I’ll put a piece of SeaDeck in that tray with some USB ports to charge phones

D11B9A92-D854-439F-AE48-DD1D433ACB63.jpeg

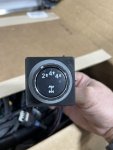
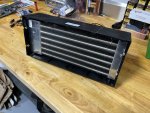
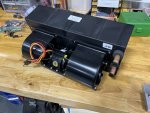
The transfer case controller showed up and the new heater. New one supposed to be way better than OEM based on others reviews

7BD74B12-1089-4CAE-9692-7A3E97EF845B.jpeg
93A03EA2-3845-4904-A3FE-2DC8E8B0BD6E.jpeg7756D6B5-0AD0-493D-8A4B-B87D26052BE8.jpeg
 
Last edited:

Asshart

New member
12
9
3
Location
Miami
I got most of the dash and center console started. They’ll be two JL marine speakers in the verticals and four stainless cup holders on that flat step. I’ll put a piece of SeaDeck in that tray with some USB ports to charge phones

View attachment 888222

The transfer case controller showed up and the new heater. Nuts supposed to be way better than OEM one based on others reviews

View attachment 888223
View attachment 888224View attachment 888225
Utterly consumed with jealousy!
 

Vapor Trail

Active member
195
247
43
Location
Kentucky
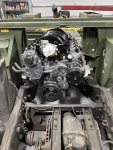
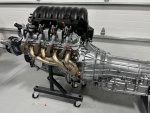
So I got the engine disassembled, painted and detailed. It’s not complete yet because there are still some parts on backorder but I’ll try to get a video of start in the next month or so. I have to figure out a fuel pump situation. Probably do a cheap parts store deal for a temporary startup and an Aeromotive Phantom 340 for the final setup.322FA08F-6D73-451E-B601-1BC10BBDF213.jpeg
 

Vapor Trail

Active member
195
247
43
Location
Kentucky
I made it and just barely. It was a pain in the butt. Several templates made and lots of scrap. I rolled it first so there were no bend lines and the machine barely made it tight enough then several die changes to make that small lip which is still larger than OEM. You have to put a big V bend in the middle of the centerline of the roof or when you're doing the channel the other end hits the ground. After your done you have to press the bend flat again. It took several people to help but mine had to be longer than the ones sold by builders because my cage was long and it’s also thicker probably. If I had to do it over again (thinking about a winter time Humvee next) I’d call up one of the builders that do it properly and just pay what they were asking to do it custom the way I wanted. If I do a wagon next I’ll buy two of them and seam them together.
 
Last edited:

Vapor Trail

Active member
195
247
43
Location
Kentucky
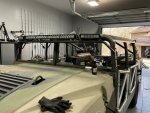
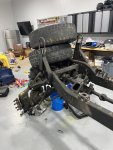
So I looked for a set of corner scales to rent or borrow or buy but never could come up with any so I guess I’ll be springing this thing by guesswork and probably more than once. I started taking it apart last night. I got this light bar mount started. It’s really the last thing to fabricate I think except some of the trailer hitch bracing.

84D737F8-B5B7-44AE-A1C2-396CC1A253E8.jpeg
 

Vapor Trail

Active member
195
247
43
Location
Kentucky
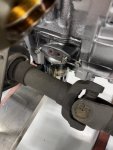
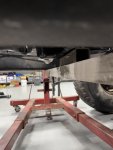
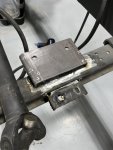
I got the engine mounts fab’d up and installed using Hooker Blackheart Poly mounts and plates I made, worked really well. The motor and diff have the same 3 degree pinion angle. I set the body back down on it and everything cleared well. The drain plug is recessed above the frame and I’ll probably make a big skid plate there. The fuel tank and transfer case seem to fit also. I just have a little fab work to do on the rear tow hitch and I’ll be able to bust this whole thing down and start sandblasting.

D3A0D536-D828-438B-8D54-DD94F28480F4.jpegA948C722-FAB9-4FE7-9CEE-9AB2A71E174B.jpegC7B73984-0A6A-4479-8C1A-8A03C33678FB.jpegD37C3A44-D71B-4207-A73F-BD5364B35FD9.jpegDD6F8BA4-9B50-48B6-AB3D-B66347D51F95.jpeg
 

Vapor Trail

Active member
195
247
43
Location
Kentucky
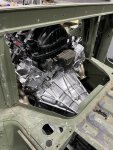
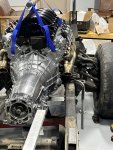
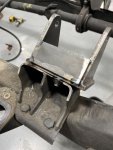
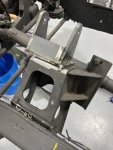
So this is what the engine and transmission mounts look like. For times sake I chose to add onto the existing mounts instead of taking them off and starting from scratch. I’ll probably add some more gussets in there. Also, pro tip: if you’ve removed the body and you need to jack up your a arms to get the shock bolts out put the tires and wheels back on top and that’ll give you enough pressure to compress the spring.
61E47B95-10F3-4E52-8BF1-0E57DF1F8F66.jpeg61BE2865-3E46-42E6-AC63-B5A742342204.jpeg640B1654-BFB6-4E32-B36F-48BD8502B990.jpeg3EFBDBCB-15E6-4B37-9ECB-5F10ECD87806.jpeg
 
Top
AdBlock Detected

We get it, advertisements are annoying!

Sure, ad-blocking software does a great job at blocking ads, but it also blocks useful features of our website like our supporting vendors. Their ads help keep Steel Soldiers going. Please consider disabling your ad blockers for the site. Thanks!

I've Disabled AdBlock
No Thanks