• Steel Soldiers now has a few new forums, read more about it at: New Munitions Forums!

  • Microsoft MSN, Live, Hotmail, Outlook email users may not be receiving emails. We are working to resolve this issue. Please add support@steelsoldiers.com to your trusted contacts.


In-tank fuel pump anatomy

3rdmdqm

Active member
430
101
43
Location
Woodbine Maryland
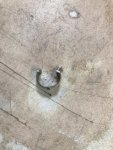
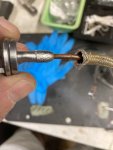
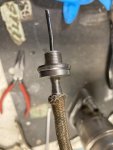
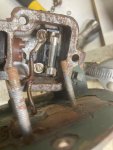
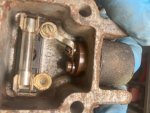
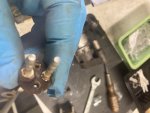
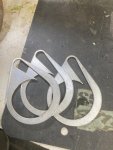
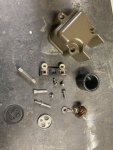
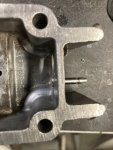
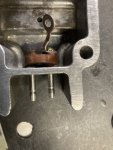
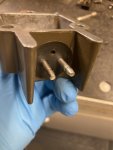
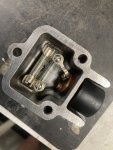
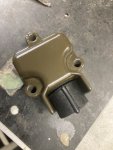
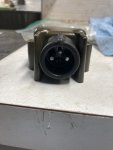
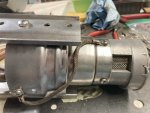
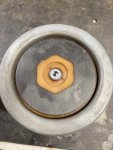
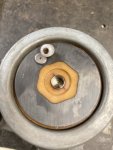
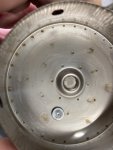
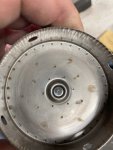
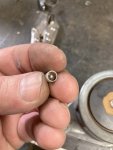
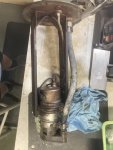
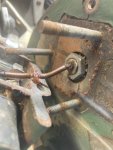
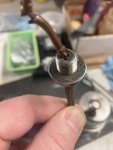
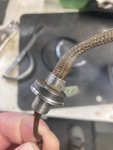
Need help. I have read thru most, if not all, of the threads on the in-tank pump, however none cover this specific question. I have removed the pump from the tank and cleaned it up. The metal braided wire goes up from the pump, up into and thru the bottom of the cover plate and attaches to the fuse assembly in the small box on top. The wire needs to be replaced or repaired, the insulation is brittle, cracked and exposed. However, I cannot figure out how to get the metal braided wire out of the threaded port in order to repair the wire. Does anyone know how this comes apart? The pump itself works, really would rather repair the wire than spend money on a new one if possible. Thanks.
 

Attachments

3rdmdqm

Active member
430
101
43
Location
Woodbine Maryland
Ok, I've pretty much figured this out. Hopefully this helps someone else in their endeavors. To get to the wire, you have to cut off the aluminum clamp ring where the braided wire hose meets the fitting. The braided hose then slides back (it stretches and contracts) exposing the wire. The wire was good with no visible cracks or exposed wire from the fitting down to the pump. I had to cut the wire off at the bottom of the fitting and use a nail punch to get the wire inside the fitting out because it's crimped. Gently tapping a nail punch thru the hole opens the crimp and you can then clean out the hole. You can then feed the undamaged wire back thru the fitting, re-crimp the sheathing onto the nipple and add a new ring terminal fastener on the end. Good as new.
 

Attachments

3rdmdqm

Active member
430
101
43
Location
Woodbine Maryland
And for anyone that is curious to know, there should be 6 of the aluminum shims (called volutes) inside the bottom well of the pump. If you do not have enough shims/volutes to create a proper well that covers the impeller, the pump will run but you will not pump fuel because the impeller just spins free and is not directing the fuel up into the fuel line thru the directional well. First pic has several volutes in the pump bottom. Second pic all volutes have been removed to clean everything up. The shims/volutes are aluminum, so you cannot fish them out of your tank with a magnet. Now that I have cleaned all the gunk out of the well, pump tube and fuel line, I will be reattaching the bottom plate with screws or rivets.
 

Attachments

3rdmdqm

Active member
430
101
43
Location
Woodbine Maryland
These are all the components for the fuse box in the first pic. Note the pin in the second pic. This your ground connection pin. Make sure the hole is free of rust and paint before you you place it in. It is a press fit, I used channel locks to seat it fully. 3rd pic is assembled pins. Next pic shows a rubber gasket that goes on the exterior between the rubber wire connector and the housing. The pins have to go in the correct holes same as they came out. The third pin goes in the top hole of looking at the front of the housing. It screws in with a tiny lock washer. The rubber wire connector goes in place with the rubber ridge on the top. After placing the rubber gasket on the face, feed the inner pin assembly through the housing and gasket. Then place the rubber connector on the face. There is a round metal disk plate that goes inside the rubber connector and the holes have to line up properly (sone larger than others). Then a screw attaches that plate thru to the inner assembly, then the small threaded pin gets screwed into the top hole with a tiny tooth washer on bottom. Last two pics are completed and repainted assembly. It’s now like brand spanking new!
 

Attachments

3rdmdqm

Active member
430
101
43
Location
Woodbine Maryland
In case anyone was curious about some of the internal parts of the in-tank pump, see below. The metal clip that was spot welded to the side of the pump housing which secured the ground cable from pump to bracket came off. I decided to utilize one of the screws that secures the bottom of the pump that houses the impeller to the top of the pump which houses the workhorse portion of the pump. They are one way security screws, however, came off fairly easily with a small pair of vice grips. As easily as the first came off I removed all of them to inspect the internal components. Inside there is a magnetic wheel on the top of the lower housing that spins with the impeller. In the center of both halves are very small round metal discs that sandwich a ball bearing housed in a plastic cover. Both halves were cleaned up and put back together. The pump is a fairly simple device. The upper casing is the motor that spins and drives the lower impeller assembly from magnetic force.
Pic 1 - Reassembled fuel pump with ground wire secured to safety screw on housing after everything was cleaned up. You can also see the stainless-steel safety wire added to secure the pump bottom from falling off.
Pic 2 - Lower half of pump after being taken apart. Note in center the ball bearing encased in plastic jacket. The darker wheel disc is a magnet that rotates and spins the impeller.
Pic 3 - Note the small middle disc after removing ball bearing. It seated/goes in first under the ball bearing. The side with the indent in the center goes towards ball bearing. Ball bearing rides on this when halves are put together
Pic 4 - Top half of pump motor housing. There is another small round metal disk that goes in the center. Indent faces towards ball bearing when halves are placed together.
Pic 5 - Metal disc replaced and centered. Had to put a small dab of grease on back side to get it to stay in place when reassembling.
Pic 6 - Underside of ball bearing in its white plastic jacket
 

Attachments

Last edited:
Top
AdBlock Detected

We get it, advertisements are annoying!

Sure, ad-blocking software does a great job at blocking ads, but it also blocks useful features of our website like our supporting vendors. Their ads help keep Steel Soldiers going. Please consider disabling your ad blockers for the site. Thanks!

I've Disabled AdBlock
No Thanks