• Steel Soldiers now has a few new forums, read more about it at: New Munitions Forums!

  • Microsoft MSN, Live, Hotmail, Outlook email users may not be receiving emails. We are working to resolve this issue. Please add support@steelsoldiers.com to your trusted contacts.

Interior light for my M1008A1

aboonski

Member
722
8
18
Location
West Melbourne Florida
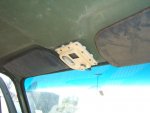
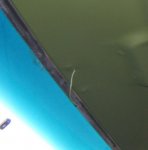
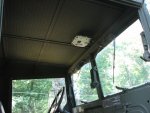
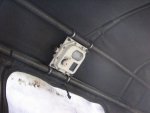
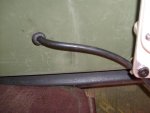
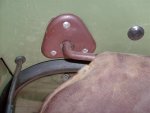
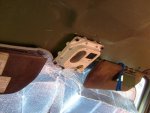
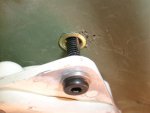
Just finished installing an interior light in my truck but still have to run power to the thing to complete the job - it does work though (I tested it after the installation). I used "Quick Thread" inserts for a place to run the screws (threaded rivet inserts). Can't wait until it gets dark out tonight so I can see what kind of light the subdued portion puts out (it has the blue colored lense). I bought this off of Ebay for $25.00 and have another one for my deuce which is green - oh well....I can always paint this one later.
 

Attachments

Recovry4x4

LLM/Member 785
Super Moderator
Steel Soldiers Supporter
34,012
1,806
113
Location
GA Mountains
I have one of these lights ready to go for the M1008, just never find the time to install it. Allan, how are you planning to run the wires?
 

aboonski

Member
722
8
18
Location
West Melbourne Florida
Wiring the interior light

KENNY!!!! Great to hear from you first of all! Probably will run the one wire (+) across the top of the windshield - possibly exposed but using those nylon wire hangers that utilize a screw (they look like a cupped hand in miniature). When I get over to the windshield pillar on the driver's side I may run the wire inside of the pillar and use a grommet to protect the wire once it is in place. I'll hook into the fuse box and will use one of those fuse holders to prevent a short from catching the cab on fire. One nice thing about those fasteners that I used to install the light fixture - they are very user friendly and you can make adjustments in the angle of the bolts once the fasteners are in place simply by pulling a long bolt in the direction that it need to be to get the bolt to start biting into the threaded portion of the fastener. When I first installed the hardware the bolts would not grab threads so I manipulated each one at the proper angle and they work perfect. I ran a hot wire (+) to the lead-in electrical post and the light works fine - it has a good ground with the securing hardware because I sanded off the surface around the heads of each bolt to ensure the circuit would be complete. I bought the special fasteners and the tool to install them at Northern Tools. Originally I bought the tool to install my new electric wipers in the deuce but still have that to do (one of these days).


Midnight Rider

New member
530
3
0
Location
Sesser, IL
HA! I have that exact same sunshield and mine is folding in on the passenger side exactly like yours is. It will hardly stay up in the windshield at all anymore without something stuffed underneath it.

Nice install on the light by the way. I was thinking of installing some sort of LED lights inside my 1009.
 

lavarok

Well-known member
1,119
33
48
Location
Fellsmere, FL
On my M1031, they ran the wire up the side pillar and inside the roof. The wire for the spot light on the M1010 is done the same way.

If you remove the visor, you can work with the wire easier and feed it across to a hole. A thin fish tape will help as well.

Edit: those threaded rivets are REALLY cool.
 

Attachments

Last edited:

aboonski

Member
722
8
18
Location
West Melbourne Florida
LAVAROK!!!!! I never thought about pulling the visor to fish the wire through but that is what I will do thanks to you! Tactical6 I like the applications - especially the soft top setup. Really neat interior lights in any vehicle and sometimes they go pretty cheap on Ebay depending on whether they are new or used. Yeah Midnight rider, I am about due for a new sunshade for sure. I put throw pillows behind mine to keep it in place.
 

McCluskey

Member
189
0
16
Location
Anytown, USA
Can someone give me some specifics as to what light that is? It looks BAMF, and I must havez one!

Perfect light for the roof of the bed in an m1009.
 

aboonski

Member
722
8
18
Location
West Melbourne Florida
Interior light finished!

Finished wiring the light today and took Lavarok's advice by pulling the visor off to make it easier to thread the wire over to the driver's side of the truck. I had previously bought some male to male military wires which were about two feet long. I cut one of the connectors off so that I could thread the wire through an existing hole in the roof that was made by an undercoating shop when the truck was "owned" by the military. I drilled one hole for the wire to exit next where the visor mounts into the roof. Grommets were used to prevent chafing of the wires. I spliced another section of wire onto the military stuff and used shrink tubing over the solderless connector then ran the wire alongside of the windshield pillar. I still need to get some velcro to keep the exposed wire in place along the pillar but that's no big deal and can be done at a later point in time. Rather than mess with the fuse box I ran the wire through an existing hole in the firewall that already had a grommet in place and tied into the 12 volt line that provides the 12 volts for the truck's 12 volt side - I already had an in-line fuse set up here so all I had to do was splice in with one of those "quick splice" things that you get with trailer wiring kits. The interior light is now functional!
 

Attachments

Top