• Steel Soldiers now has a few new forums, read more about it at: New Munitions Forums!

  • Microsoft MSN, Live, Hotmail, Outlook email users may not be receiving emails. We are working to resolve this issue. Please add support@steelsoldiers.com to your trusted contacts.

Issue with MEP 804B just occurred

RockHild

New member
24
3
3
Location
Greenville/Tx
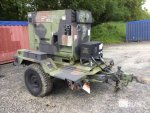
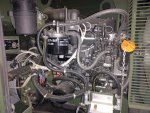
I have been using my 804B for quite some time and has been working well for me, however yesterday, I fired 'er up and the S1 Switch when placed to Start Position seemed normal, but once released after a few seconds in start position, the hertz gauge and the voltage gauge dropped to "0". I have never experienced this before. The unit has been working great with the hertz gauge sitting at about 60.5 hertz and voltage at about 208. What is weird is that, the day before worked like a champ as usual. Yall have some good forums here so I am reaching out to someone for some aid in troubleshooting this issue. She's really in good shape, and have maintained the fluids to keep 'er kicking! I use the unit to power my place in the hills of Arkansas, cuz where I am, can't get power due to National Forest prohibitions of running power. Please advise with any help that you might have concerning this issue ! She goes quite well with My Humvee n Trailer
Semper Fi,
RockHild
 

Attachments

Last edited:

RockHild

New member
24
3
3
Location
Greenville/Tx
Looks like the AC Voltage Regulator may have died. Quite common.
Grab the -24 TM and run thru the appropriate VR tests and report back you findings for each step.
There were two different VRs and associated parts used in the sets. Be sure to use the correct test procedure.

Thank You Sir
 

RockHild

New member
24
3
3
Location
Greenville/Tx
KLOPPK,
I am not in Arkansas at this time, but will be later this week, I do remember that the unit is Blue in Color mounted on the back wall of electrical control cabinet up top, does that give you a clue as to which brand is installed on this unit ?
 

kloppk

Well-known member
Steel Soldiers Supporter
2,205
3,762
113
Location
Pepperell, Massachusetts
The blue box is probably the Governor Controller.
The VR is the rightmost box on the back wall. If it black it's a Technology Research Corp (TRC) VR. The other VR possibility is a Libby. It's dark green.
 

RockHild

New member
24
3
3
Location
Greenville/Tx
kloppk,

Looked at the TM -24 manual, Chapter 4 - 1. 1 - 4 -1.2, shows to be VR Testing for a P/N 1-21501-1 or -2, for MEP804A/B, I did see some other comments on other strings, that gave me some good clues as well, my unit has the Yanmar engine
 

RockHild

New member
24
3
3
Location
Greenville/Tx
I reckon the 1st order of testing is to determine which p/n of VR is installed, then proceed as directed;

Testing (AC Voltage Regulator, P/N 01-21501-1, for MEP-804A/MEP-804B)
a. Shut down generator set
b. Open output box access door
c. Note position of voltage reconnection terminal board and set FREQUENCY SELECT switch to 60

Hz position
d. Start generator set and turn VOLTAGE adjust potentiometer to ensure adjustment ranges on

Table 4-1 are met,

Table 4-1. Voltage Adjustment Range – MEP-804A/MEP-804B.
Voltage Reconnection Terminal Board Position Adjustment Range
120/208 197-240 volts
240/416 395-480 volts

depending on position of voltage reconnection terminal board

e. Shut down generator set.
f. If no voltage or low voltage was indicated or voltage adjustment range could not be achieved,
perform the following steps. Otherwise, AC voltage regulator (2, Figure 4-1) is serviceable.
g. Disconnect wire 141A from terminal 1 of AC voltage regulator.
h. Set multimeter for DC volts and connect positive lead to wire 141A. Connect negative lead of
multimeter to terminal 3 of AC voltage regulator. Start generator set and operate at rated
frequency. Move and hold MASTER SWITCH in START position. Multimeter should indicate
between 4 and 12 VDC.
i. Shut down generator set. Isolate wire 141A.
j. Set multimeter for AC volts and connect to terminals 10 and 11 of AC voltage regulator. Start
generator set and operate at rated frequency. Move and hold MASTER SWITCH in START
position. Multimeter should indicate 210 to 280 VAC.
k. Shut down generator set.
l. Disconnect wire 137A from terminal 5 of AC voltage regulator. Set multimeter for ohms and

connect positive lead to wire 137A and negative lead to terminal 4 of AC voltage regulator. Move

VOLTAGE adjust potentiometer to full counterclockwise (CCW) position. Multimeter should

indicate approximately 3,000 ohms with FREQUENCY SELECT switch in 60 Hz position, and

approximately 0 ohms with FREQUENCY SELECT switch in 50 Hz position. Move VOLTAGE

adjust potentiometer slowly clockwise (CW) while observing multimeter. Multimeter should

increase smoothly to approximately 10,000 ohms
m. If steps h, j, and l are as indicated above, AC voltage regulator is defective and must be replaced
n. Connect all wires previously disconnected. Close output box access door

For p/n 01-2501-2-2 for MEP 804 A/B is as follows;

a. Shut down generator set
b. Open output box access door
c. Note position of voltage reconnection terminal board and set FREQUENCY SELECT switch to 60

Hz position
d. Start generator set and turn VOLTAGE adjust potentiometer to ensure adjustment ranges on

Table 4-1 are met, depending on position of voltage reconnection terminal board
e. Shut down generator set
f. If no voltage or low voltage was indicated or voltage adjustment range could not be achieved

perform the following steps. Otherwise, AC voltage regulator (2, Figure 4-1) is serviceable
g. Disconnect wire 141A from terminal 1 of AC voltage regulator
h. Set multimeter for DC volts and connect positive lead to wire 141A. Connect negative lead of

multimeter to terminal 3 of AC voltage regulator. Start generator set and operate at rated

frequency. Move and hold MASTER SWITCH in START position. Multimeter should indicate

between 4 and 12 VDC
i. Shut down generator set. Isolate wire 141A
j. Set multimeter for AC volts and connect to terminals 10 and 11 of AC voltage regulator. Start

generator set and operate at rated frequency. Move and hold MASTER SWITCH in START

position. Multimeter should indicate 110 to 160 VAC
k. Shut down generator set
l. Disconnect wire 137A from terminal 5 of AC voltage regulator. Set multimeter for ohms and

connect positive lead to wire 137A and negative lead to terminal 4 of AC voltage regulator. Move

VOLTAGE adjust potentiometer to full CCW position. Multimeter should indicate no more than 2
ohms with FREQUENCY SELECT switch in 60 Hz position or 50 Hz position. Move VOLTAGE
adjust potentiometer slowly CW while observing multimeter. Multimeter should increase smoothly
to approximately 20,000 ohms.
m. If steps h, j, and l are as indicated above, AC voltage regulator is defective and must be replaced.
n. Connect all wires previously disconnected. Close output box access door.


Are These the instructions you are referring to Sir ? These are what I have located in the TM -24 regarding the VR Testing Depending on P/N
 

RockHild

New member
24
3
3
Location
Greenville/Tx
Thank you GuyFang,
I would like to be clear about instruction m, which states "If steps h, j, and l are as indicated above, AC voltage regulator is defective and must be replaced", which is saying to me that after performing those tests h, j and l, that the readings requested match the values stated, that the regulator is defective and should be replaced. What if the values are other than stated ? Confusing, should it say for step "m" that if the values do NOT match what is stated, that the regulator is defective ?
 

RockHild

New member
24
3
3
Location
Greenville/Tx
The blue box is probably the Governor Controller.
The VR is the rightmost box on the back wall. If it black it's a Technology Research Corp (TRC) VR. The other VR possibility is a Libby. It's dark green.
kloppk,
I would like to be clear about instruction m, which states "If steps h, j, and l are as indicated above, AC voltage regulator is defective and must be replaced", which is saying to me that after performing those tests h, j and l, that the readings requested match the values stated, that the regulator is defective and should be replaced. What if the values are other than stated ? Confusing, should it say for step "m" that if the values do NOT match what is stated, that the regulator is defective ?
 

RockHild

New member
24
3
3
Location
Greenville/Tx
kloppk,
I would like to be clear about instruction m, which states "If steps h, j, and l are as indicated above, AC voltage regulator is defective and must be replaced", which is saying to me that after performing those tests h, j and l, that the readings requested match the values stated, that the regulator is defective and should be replaced. What if the values are other than stated ? Confusing, should it say for step "m" that if the values do NOT match what is stated, that the regulator is defective ?
Am headed to test unit and want to be clear about instructions, seems Odd that the instructions provide values that should be attained, but if those values ARE attained then regulator is defective ? Doesn't seem to Jive, but if so I would like to know for certain ?
 

RockHild

New member
24
3
3
Location
Greenville/Tx
I wish you luck in the future endeavors to fix this gen set.
Am headed to test unit and want to be clear about instructions, seems Odd that the instructions provide values that should be attained, but if those values ARE attained then regulator is defective ? Doesn't seem to Jive, but if so I would like to know for certain ?
 

kloppk

Well-known member
Steel Soldiers Supporter
2,205
3,762
113
Location
Pepperell, Massachusetts
Step h is not a VR test. The step verifies that the generator is properly flashing the gen head and that the static exciter has continuity from the VR to the static exciter. If this test fails, the issue is NOT the VR. It's a problem with the flashing circuit, wiring to the static exciter or the static exciter itself.

Step j is not a VR test. The step verifies that the generator is properly flashing and that the T1 Transformer is supplying AC power to the VR to power it. If this test fails, the issue is NOT the VR. It's a problem with the T1 transformer not making power for the AC VR to operate.

Step l is not a VR test. The step verifies that the front panel voltage adjust potentiometer is working properly. If this test fails, the issue is NOT the VR. It's a problem with the wiring to the front panel AC Voltage adjust potentiometer or the front panel AC Voltage adjust potentiometer itself.

If all three of the above tests pass it indicates the generator is flashing the gen head, T1 is supplying power as needed to the VR to power it and that the front panel adjust is working properly. If that's the case and there is low or no AC output voltage from the generator then the VR has failed.
 

RockHild

New member
24
3
3
Location
Greenville/Tx
Step h is not a VR test. The step verifies that the generator is properly flashing the gen head and that the static exciter has continuity from the VR to the static exciter. If this test fails, the issue is NOT the VR. It's a problem with the flashing circuit, wiring to the static exciter or the static exciter itself.

Step j is not a VR test. The step verifies that the generator is properly flashing and that the T1 Transformer is supplying AC power to the VR to power it. If this test fails, the issue is NOT the VR. It's a problem with the T1 transformer not making power for the AC VR to operate.

Step l is not a VR test. The step verifies that the front panel voltage adjust potentiometer is working properly. If this test fails, the issue is NOT the VR. It's a problem with the wiring to the front panel AC Voltage adjust potentiometer or the front panel AC Voltage adjust potentiometer itself.

If all three of the above tests pass it indicates the generator is flashing the gen head, T1 is supplying power as needed to the VR to power it and that the front panel adjust is working properly. If that's the case and there is low or no AC output voltage from the generator then the VR has failed.
Thank you kloppk,
So the tests as described only verify that the exciter, transformer and pot are functioning properly ?
 
Top
AdBlock Detected

We get it, advertisements are annoying!

Sure, ad-blocking software does a great job at blocking ads, but it also blocks useful features of our website like our supporting vendors. Their ads help keep Steel Soldiers going. Please consider disabling your ad blockers for the site. Thanks!

I've Disabled AdBlock
No Thanks