- 1,967
- 1,297
- 113
- Location
- Paris KY
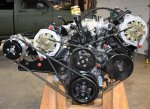
OK I am moving forward with adding AC to my P400 / 700R4 build. After researching all available options, including retrofitting a civilian setup into my M1028, I narrowed my choice down to 2 aftermarket kits - Nostalgic Air and Vintage Air. And after researching both kits, I chose Vintage Air and here is why:
The Nostalgic kit is AC only, and the OEM heater and dash control remain as original. In contrast, the Vintage kit is a complete replacement unit which mounts behind the dash and is fully self-contained with new heater core, blower motor, and new electronic dash control which replaces the OEM dash control. The Vintage kit comes with new ducting and defrost plenums, while the Nostalgic only comes with new ducting. The Vintage self-contained unit allows for temperature and directional blending between heat, cool, cab-directed and windshield-directed air flow. Dry conditioned air directed to the windshield through the Vintage defrost plenums will clear fogged glass faster and more efficiently than the OEM defrost cycle which relies on heater core air only. In my opinion, the Vintage Air design is simply a far superior system with all new components and electronic dash controls.
Having said all that, Vintage Air does not offer a CUCV-specific kit to fit the dual-alternator trucks, while the Nostalgic Air kit does advertise such a kit. To learn more, I called Nostalgic and spoke with someone in their warehouse (nobody answered in their office). When I asked about the CUCV kit and how it mounted on a dual-alternator CUCV vehicle, I was informed that the special brackets were not produced by Nostalgic but were out-sourced from a machine shop in Texas. Ah-Ha! I then resolved to source the CUCV brackets from the machine shop and buy the superior Vintage Air kit.
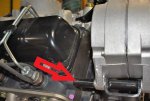
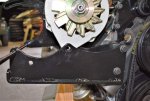
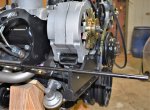
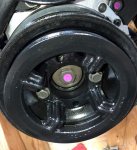
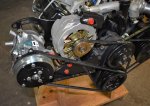
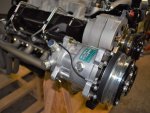
I then got on Steel Soldiers and did a search for CUCV Air Conditioning and found David Roth's (82ABNMP - Southern CUCV Restoration) 2013 thread about his M1009 restoration https://www.steelsoldiers.com/showt...with-A-C&highlight=nostalgic+air,+vintage+air . One of the posters in the thread indicated that Nostalgic was sourcing the CUCV brackets from Component Parts, Inc. in Ft. Worth. An internet search for Component Parts came up empty. Since the thread was 6 years old, I figured the company must have shut down. Another poster in the thread was Barrman in Giddings, Texas, who i then contacted via PM. He confirmed that Component Parts was indeed the producer of the CUCV brackets, and that the machinist who developed the brackets was a fellow named Herb but the lady I should speak with was a Ms. Lillian. Jeez, this story is beginning to sound like an Indiana Jones movie. Anyway, I managed to find the company and called Ms. Lillian. I ordered the bracket kit #5255 for $250 C.O.D. (they don't take credit cards!). The kit was delivered last week. While the machining seemed excellent, the paint was not. So I bead blasted all the parts and repainted them with hi-temp engine enamel. I will post photos of the install as I get into it.
For those of you who are interested, here is the contact info for the machine shop and Ms. Lillian -
Component Parts, Inc.
PO Box 7514
3100 Chesser Boyer Road
Ft. Worth, TX 76111
817-834-4771
After receiving the bracket kit I then called Vintage Air to inquire about what I needed to order to complete the install. I was referred to a Mr. Jason Martinez in their technical department. A nice fellow and we talked a while. He emailed me a quote with what I needed, however he said all the parts can be cross-referenced and purchased from Summit for slightly lower prices and free freight. The Vintage kit includes the Sanden 508 compressor, which is available separately from Summit, so I went ahead and ordered it the same day as I ordered the brackets from CPI so I could easily finish everything that needed to be mounted on the P400 before it went into the truck.
I will post photos and comments as I get to that point.
Hope this helps.


