• Steel Soldiers now has a few new forums, read more about it at: New Munitions Forums!

  • Microsoft MSN, Live, Hotmail, Outlook email users may not be receiving emails. We are working to resolve this issue. Please add support@steelsoldiers.com to your trusted contacts.

M1008 turbo and serpentin swap

CUCV18series

New member
18
0
1
Location
North Carolina
Barrman, thanks for the heads up on those down pipes, I'll start scanning eBay. If I can find one before bringing my truck to the speed shop, it will probably reduce the cost quite a bit.

Thats good to hear about the performeance and fuel mileage after a turbo mod, especially while towing around town, as that is what I'll be using my M1008 for. I agree with you about the new diesel trucks, the price and now the need for blue DEF just doesn't justify owning one.

I'm still at impasse with repairing the instrument panel. After replacing the badly damaged original printed circuit as well as the bulbs, im still not getting any lights or response from the fuel gauge. Additionally, The turn signal dash indicators both light up when the headlights are on, but function properly when I turn on the left or right turn signal. Luckily all the exterior lights function properly. I'm starting to run out of options with getting the instrument panel functioning properly, have any of you had these issues? Would it be possible to wire up a custom female pigtail to attach to the main harness and run new wires to individual indicators/lights to remove this printed circuit from the equation?
 

Barrman

Well-known member
5,277
1,805
113
Location
Giddings, Texas
I went Dakota Digital on my Cowdog project. It was a 12 volt truck from the start and I wanted gauges that were accurate. I also had a passenger side drop NP241 electronic speedo transfer case on that project so that made it easier.

Look at LMC and their analog gauge set ups for the square bodies. Cheaper than the Dakota Digital and probably about the same quality.

Also, I used an A pillar 3 gauge pod on my truck. Very handy place for the boost, EGT and engine oil temp gauges. 73-87 Chevy.com is where I got it.
 

CUCV18series

New member
18
0
1
Location
North Carolina
I'll give it a look, thank you for the references to these parts, and the downpipe. I wish I could keep it stock, but after following different SS threads on instrument cluster maintenance, I am out of options. I'll chalk this up to the butchering that was done by the PO.

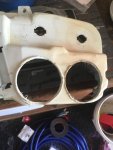
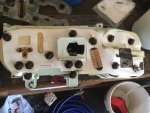
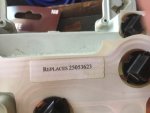
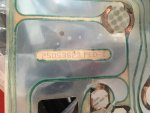
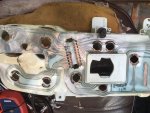
I have attached some photos of the current attempt to rehab the cluster, including the parts numbers for the printed circuit.
 

Attachments

Last edited:

richingalveston

Well-known member
1,715
120
63
Location
galveston/Texas
The circuit board looks good, The plug should work, it does not look damaged. maybe the blinker problem is not in the cluster and somewhere else on the vehicle. have you opperated your blinkers with the circuit board unpluged to see if you get the same result. There may be a problem in the flasher socket or fuse box.
 

CUCV18series

New member
18
0
1
Location
North Carolina
Rich, I isolated everything else prior to installing the new printed circuit. I actually went ahead and just replaced the front turn signal sockets and grounds, because they had become corroded due to age. I also replaced all the fuses, and the hazard and flasher fuses (reversed the polarity on the flasher fuse, as I could not find a surplus 224.) Those remedied the flasher issues externally, however after replacing the printed circuit, now the turn signal indicators on the dash light up,and won't turn off unless I switch the flasher lever on the steering column, in which case the respective side will flash. Also, none of the backlights for the speedo or fuel gauge illuminate when I turn on the headlights, and the fuel gauge, which worked before is no longer functioning.. I'll keep chasing it down and report back in with my findings.
 
Last edited:

CUCV18series

New member
18
0
1
Location
North Carolina
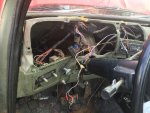
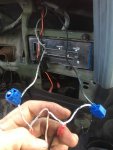
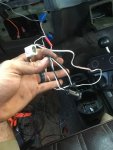
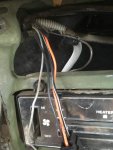
Does anyone have any clue what these wires are? I'm continuing to chase down gremlins in the main wiring harness and keep finding hackjob taps/splices from the PO. I'm thinking that the grey wire that is tapped into is possibly the grey wire from the main harness that powers the instrument panel dash lights? The two wires run to bulbs that ran to the temp and oil gauges that the PO had installed.

The orange red and black wires are running from the 12V ground buss and the positive of the rear battery, and through the firewall beneath the heater box.one of the ground wires is taped off, the red and second ground goes to a cigarette lighter installed by the PO, and the orange was wired into an aftermarket inline fuse holder that also ran to the cigarette lighter (there was a 15 amp fuse installed).
IMG_4761.jpgIMG_4762.jpgIMG_4763.jpgIMG_4765.jpg

Running my multimeter on the main wiring harness to ground, im getting 11.20 volts on the dash lights positive wire (grey #2 pin) and 0.02 volts at the dash lights ground (black #9 pin), 0 volts for the fuel gauge (pink #18 pin) and 0.02 volts at the right turn signal, as well as 11.20 volts at the right turn signal (blue and light blue wires #10 #11 pins) im fairly certain that the ground for the right turn signals are still bad somehow. I'm also not sure why I'm only getting 11 volts unless I have another bad ground somehow. Have you guys run into anything else like this before?
 
Last edited:

richingalveston

Well-known member
1,715
120
63
Location
galveston/Texas
when the wires are hacked, there is no telling what someone did. IF all of the wiring harness is like that then you might consider getting a salvaged interior wiring harness from someone and just replace the entire interior section.
The best thing to do is return it to stock if you can. I am sure you are aware of the diagrams in the stickies.
You may want to remove your interior wiring harness from the truck and then you can inspect it and turn it back to the stock set up whre you can then make any changes you need and will know what was done. With it out of the truck you can then test the continuity and ohm out each wire to see where the problems are. may be the fastest way.
The are pretty easy to get out of the truck.
 

CUCV18series

New member
18
0
1
Location
North Carolina
Rich, it's looking more and more like that's what's going to need to happen in order to get the truck running properly. Probably going to get going on that next weekend.

On a a more upbeat note, I discovered the problem with my turn signals. A Carolina mud wasp had somehow nested in side my passenger side headlight housing. After I cleared the mud nest out of the headlight housing, everything in the circuit is now working as it should be. My thought is that maybe it had insulated the ground terminal, causing some kind of short circuit. The headlight is much brighter now too.
 

Terracoma

Member
334
14
18
Location
Albuquerque, NM
I'm thinking that the grey wire that is tapped into is possibly the grey wire from the main harness that powers the instrument panel dash lights? The two wires run to bulbs that ran to the temp and oil gauges that the PO had installed.

View attachment 768082 View attachment 768083

In the -20 TM under Appendix F, Figure F-13 shows a couple gray wires in the same area as your photos...

Circuit 8E fed the illumination bulb behind the heater controls, while Circuit 8F fed the bulb inside the 24v Voltmeter. The PO may have clipped the second circuit, leaving you with just the one gray wire, feeding the vampire tap on the left in your photo. Circuit 8 gets power (via 8A) directly from the "instrument panel" fuse, and also has a leg (8B) that runs up to the printed circuit board of the instrument cluster - presumably to power the cluster illumination.

There appears to be a black wire going to the vampire tap on the right in your photo, the solid one without a tracer color...this should be Circuit 150, which grounds out the illumination bulbs for the heater controls and voltmeter. I believe 150 runs all the way back to the cab ground bus bar on the driver side (behind the blackout light switches) via some splices with other 150-numbered circuits.


The orange red and black wires are running from the 12V ground buss and the positive of the rear battery, and through the firewall beneath the heater box. one of the ground wires is taped off, the red and second ground goes to a cigarette lighter installed by the PO, and the orange was wired into an aftermarket inline fuse holder that also ran to the cigarette lighter (there was a 15 amp fuse installed).

View attachment 768084

The only stock wiring similar to that (in the same area) connects the heater blower speed control switch to the blower motor resistor, via a factory grommet thru the firewall... But the wire colors are different: light blue, yellow, and orange.

If your heater wiring is still intact, this may be more of the PO's handiwork.


You didn't ask about this, but the orange and black/white wires with the T-connector are for the 24v voltmeter gauge. The orange wire is Circuit 922A and goes directly to the single spade opening above the 10amp "voltmeter" fuse, which is the very bottom fuse on the block... The black wire with the white chaser is Circuit 950, which goes to the voltmeter relay under the dash (near the starter relay), and from there proceeds as a solid black wire (Circuit 150V) to a splice, and then onto the cab ground bus as Circuit 150A.

The above can be found on Figure F-4 in the -20 TM.
 

Barrman

Well-known member
5,277
1,805
113
Location
Giddings, Texas
If you are looking to put a Duramax fan on a serpentine belt 6.2 or 6.5. My suggestion is to get one of the heavy duty fan/clutch kits many of the 6.5 parts sellers offer.

However, none of the 4 bolt flange clutch mount clutches will make the best use of the new bigger fan. To do that you need to get a 2000 -2002 water pump and clutch with the threaded nut type mount for the clutch.

Heath has the best water pump/ clutch/ fan combo out there in my opinion. But unless you have air conditioning. Look at your radiator condition before blowing money and time on the fan and such. No ac and the turbo shouldn’t be causing heat issues for normal driving.
 

wigwag11

New member
9
0
1
Location
Zebulon NC
[Eventually it will have A/C as I slowly acquire all the parts and pieces. Just bought a donor 6.5 motor to get all serp stuff, and turbo off of. I was going to replace all the accessories and wear pieces while doing it and saw your post about the Duramax fan. I was going to replace the clutch anyway so I figured if it fits try it out.
 

CUCV18series

New member
18
0
1
Location
North Carolina
[Eventually it will have A/C as I slowly acquire all the parts and pieces. Just bought a donor 6.5 motor to get all serp stuff, and turbo off of. I was going to replace all the accessories and wear pieces while doing it and saw your post about the Duramax fan. I was going to replace the clutch anyway so I figured if it fits try it out.
WigWag, I used the heath setup mentioned by Barrman. I believe they refer to it as the "desert cooling kit package". I was only able to do this through the conversion to serpentine belt from the 6.5 engine I tore down.
 

CUCV18series

New member
18
0
1
Location
North Carolina
I have some updates to the truck build, my apologies for not updating in almost a year.

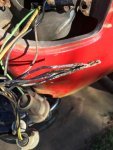
I've had intermittent opportunities to work on the truck, but I've managed to track down my turn signal issue. Turned out to be a badly corroded ground splice on the rear passenger side light cluster (picture included for anyone that may encounter this issue in the future) I had to slice back some of the factory shrink wrapping of the wires and eventually found it. Some solder and shrink wrap cured it after trimming back the corroded connections.

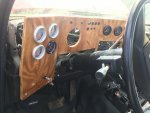
Also, built a custom bezel to the specs of the original dash bezel, because while I was chasing down the previously mentioned issue with the turn signal lights, I managed to destroy my original 30 year old one. I threw in some a tiny tach diesel tachometer and autometer gauges (boost, egt, temp, oil pressure, voltage, fuel, and speedo), and I removed the pigtail for the printed circuit and wired in some aftermarket indicator lights that had corresponded to the original printed circuits indicator lights (thanks to Richingalveston, I used his breakdown chart of the pigtail/corresponding wires to accomplish this).

I built out a secondary fuse box with 5 IGN switched/5 12v constant circuits, 12 slot negative buss bar, and utilized 2 Bosch relays and a breaker. I'm using this to power the gauges, a CB, the radio, auxiliary fuel pump, and hopefully a future 10,000lbs winch.

While I was building out the new gauge bezel, I also created an exciter circuit for my CS130 alternator. I connected a 12V indicator light to the Gen 1 wire and then a second wire to the fuse block IGN hot slot. This allows the alternator exciter sensor to detect 12V and begin charging on start up.

The good news is that everything works properly and safely so far, but a little embarrassed that the corroded ground wire had me stumped for 8 months. Lesson learned.

That's about all I've gotten to so far, still have yet to get it to the exhaust shop to build out my turbo exhaust flange crossover. Will keep you posted when I get this done.

Hope everyone is doing well amid the pandemic and staying healthy.
 

Attachments

Top
AdBlock Detected

We get it, advertisements are annoying!

Sure, ad-blocking software does a great job at blocking ads, but it also blocks useful features of our website like our supporting vendors. Their ads help keep Steel Soldiers going. Please consider disabling your ad blockers for the site. Thanks!

I've Disabled AdBlock
No Thanks