• Steel Soldiers now has a few new forums, read more about it at: New Munitions Forums!

  • Microsoft MSN, Live, Hotmail, Outlook email users may not be receiving emails. We are working to resolve this issue. Please add support@steelsoldiers.com to your trusted contacts.

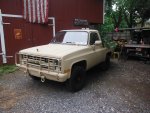
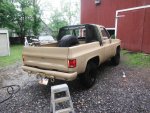
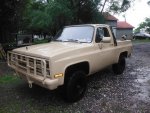
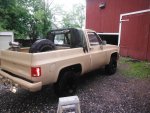
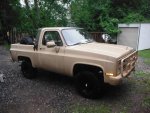
M1009 converted to small pickup (The Mule M1009) very handy little vehicle

cucvrus

Well-known member
11,473
10,427
113
Location
Jonestown Pennsylvania
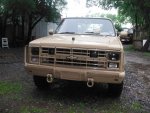
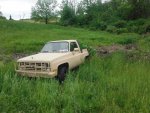
Thank you for your interest in my project. I was beginning to think I was boring you to sleep. Anyway I started with a M1009 that had just been repainted in the 383 CARC paint a few years before I bought it. Needless to say they did a very poor job. They sprayed this truck in the summer time and used MEK thinner. The paint was so dry it hardened before it adhered to the metal. It had rust spot from the thinner eating thru the OEM paint. Also they laid the paint on way to heavy. The grille, window rubbers , headlamps and everything were covered in a heavy sagging coat of paint and that was listed as one of the reasons that it was being sent to DRMO. Dead batteries and no start were also listed on the sheet from CSMS. It spent some time in a can point. And also at a crane training site where I think it was lifted and dropped several times. Oh yea it did have the one wheel on the left front. Only because someone had used a hammer to take the lock out apart as i show in the picture the end was egg shaped and the wheel did not fit off the left front. Well on to the paint. I had all the panels removed and I sanded them as little and as much as possible just to apply a good paint job. Well I was low on CARC and with the being the case. Remember we are on a low budget. I went to the hardware store for the Krylon Camo paint in a can. I sprayed the areas that were to be green and then followed with the black and then the brown. The black and brown are always the colors that you want to finish with. They blend best and look better on overlaps. Green not so well when it overlaps the black or brown. The Krylon Camo paints are very forgiving. If you error and run/sag the paint wipe it with an acetone rag and do it again. I was looking for the restique look not the restored look. Remember this is the all go no show vehicle. I wanted it to be nice but far from perfect. I reassembled the body and sandblasted the bumpers and brush guard after some sldge hammer and welding adjustments to all 3 of them. The rust pits on the bumpers were just the patina I was looking for it matched the rest of the truck. I epoxy sealed the bumpers , grille, headlamp bezels and brush guard. The grille had massive coats of paint and I spent 2 hours sanding it. Good enough. As I stated I painted all the parts that I removed prior to assembly. I bolted it all back together. I did not replace any rubbers with new. I went and took some door rubbers from used doors the sash runs I left alone to dry and brittle. Rememeber the budget dioes not allow. And i saw a grille on the scrap pile from a dump truck I had repaired it had the quad headlamp system with the turn signals in the grille. I went to work. The 2" Rolok grinder does wonders when working with plastic. I cut the back side of the grille slats just as the quad grille was cut I rivveted retainer clips to the bottom of the grille to hold the lamps on the bottom and used 3/8" carriage bolts to hold the top of the lamp onto the grille. Should have used 1/2'" just joking. It matched the look I wanted. I then remembered that I had a pair of Bosch halogen driving lights laying around for 25 years and they fir the OEM park turn bezel holes perfectly. To work I went. Whole new look to the once sad face of this 25 year old veteran.(The vehicle) And on we went to the back. With the M1009 tailgate removed I had 2 holes in the treshold to close or use. I choose to use them. A nice set of salvaged trucklite LED clearance lights and I fit them it there on a small bracket and wired them to work on the brake and turn circuits. i used the OEM hinge mounting holes and never ahd to drill a hold in the M1009 only the galvanized brackets that held the LED red lamps. Looked good at night and to people riding behind me in smaller eco box cars. The 4 ways are the trick with the ligtsdown there also. very bright LED's. I will continue tomorrow. If you have any questions feel free to ask. If you don't fine also. I will cover the interior dash pad and the interior paint. We will cover tires next week. Thank you. Enjoy. I am here to help.
 

cucvrus

Well-known member
11,473
10,427
113
Location
Jonestown Pennsylvania
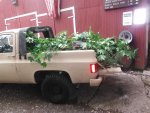
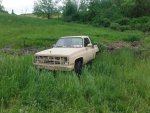
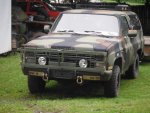
Old thread I thought I would update it. I sort of forgot about this thread.DSCF2846.jpgDSCF2845.jpgDSCF2844.jpgI added some woodland camouflage to the desert tan Mule M1009. This is what you call real tree camouflage. Off to the bush to get some work done. I want to do it in extreme secrecy. DSCF2848.jpgDSCF2847.jpgWell it wasn't blending very well. I was back in the middle of nowhere. It did a nice job of sweeping the underside off. IMHO the green back ground really compliments the 686 tan. I think it may be time to remove the rear tarp for the season and go topless. embarrassed.jpgHave a great day.
 

firefox

General
Steel Soldiers Supporter
1,845
51
48
Location
Berkeley CA
From post#17 " I used the 3/16" HD steel rivets and riveted it over the cut out and prepped hole"

Are these pop rivets or old style rivets?

I need to patch over two holes that are on the rear passenger side lower corner of the M1008 body.
One hole is less than an inch from the actual bottom corner and the other is about 3 inches up but on the side of that column. I don't think I can get in there on the inside of the column to provide a backup for an old style rivet.
Thanks for your terific writeup!
 

cucvrus

Well-known member
11,473
10,427
113
Location
Jonestown Pennsylvania
These are old style 3/16" pop rivets. They have the expandable shank and the expelled mandrill pin. I use a pneumatic rivet gun. You could probably pop them with a good quality hand rivet gun. Do you need some rivets? They have about a 1/4" grip range. I use a 311 drill bit and caulk and rivet everything.
 

firefox

General
Steel Soldiers Supporter
1,845
51
48
Location
Berkeley CA
Thanks! I am assuming that the edge of the body metal is bent down to form a ledge for the patch piece to lay on top. And also the same for the patch piece so that the patch ledge lays on top of the body ledge. Then holes are drilled for the rivets. A little filler is pasted on the mating surfaces and then they are pop riveted together. Filler is then used to cover the joined pieces
and made level with the patch and body surfaces.

As you have figured out, I haven't done this before.
Thanks again!

I think I have rivets. Just have to burrow for them.
 
Last edited:

cucvrus

Well-known member
11,473
10,427
113
Location
Jonestown Pennsylvania
I never cover the rivets with body fill. That will not work to well. I just let the rivets exposed. If you rivet and cover with body filler you are asking for problems. Youi have the rivets and the holes/edges front and back to absorb moisture. Moisture causes rust and that expands the body filler and pop goes the filler. Weld/braze the patches in place or rivet them in a paint over the patch. Under the dash. Who cares?
 

firefox

General
Steel Soldiers Supporter
1,845
51
48
Location
Berkeley CA
Thanks again for your help! The only problem is that this is on the outside of the body
right at the bottom corner rear of the passenger side and a few inches up from that location.
I was thinking of using the pop rivets that are sealed at the end if that helps.

Is my patch prep a good idea?
 

cucvrus

Well-known member
11,473
10,427
113
Location
Jonestown Pennsylvania
You can make it look good. I have had a few CUCV's with patches pop riveted on. I paint them and they look good. Depends what my intended use is. I plan on riveting a left 1/4 panel on Terminus M1009. I am going to cut it off of another K5 blazer and just rivet it fast. I never seen pop rivets that were sealed on the end. Are you referring to soft smash rivets or drive rivets?
 

firefox

General
Steel Soldiers Supporter
1,845
51
48
Location
Berkeley CA
[h=3]18-8 Stainless Steel Domed Head Sealing Blind Rivets[/h]
These rivets have good corrosion resistance. Also known as closed-end sealing rivets, they prevent water and air from passing through or around them. Use them to join materials together when you don't have access to both sides. The low-profile head creates a neat appearance. Rivets may be mildly magnetic.
Make sure the combined thickness of the materials you are joining falls within the rivet's material thickness range. Shear strength is the amount of force it takes to break a rivet from the side and tensile strength is the amount of pull a rivet can withstand without breaking. The strength of the joint is also affected by the space between the rivets, their distance from the edge of the work, and hole size.
A tool (sold separately) is required to pull the mandrel through the rivet, deforming the rivet's body and breaking off the excess mandrel.

For
Material
Thick.
Lg.For
Hole
Size
For
Drill
Size
Head
Dia.
Head
Ht.
Shear
Strength,
lbs.
Tensile
Strength,
lbs.
For
Use
On
Pkg.
Qty.
Pkg.
18-8 Stainless Steel
1/8" Dia.
0.125"-0.188"0.382"0.13"-0.134"No. 300.262"0.039"470490Stainless Steel2597524A040$11.05
5/32" Dia.
0.125"-0.188"0.402"0.161"-0.165"No. 200.338"0.042"740890Stainless Steel1097524A0427.67
3/16" Dia.
0.02"-0.125"0.406"0.192"-0.196"No. 110.375"0.06"850900Stainless Steel1097524A04410.53
0.188"-0.25"0.531"0.192"-0.196"No. 110.375"0.06"850900Stainless Steel1097524A04610.33


From McMaster carr
 

cucvrus

Well-known member
11,473
10,427
113
Location
Jonestown Pennsylvania
That's too expensive for my job. I see no point in using Stainless Steel rivets to hold non stainless steel sheet metal together. It will rust all the material away and the rivets will remain. See my point? Stainless on stainless you are on target. Them rivets are made for more precise work then patching CUCV's. IMHO. I think the welding Brazing work do it. Good Luck. I hope it works out for you.
 

Ordak

New member
79
1
0
Location
Clarksburg, West Virginia
This is very interesting, you have me debating on what I have planned for the Colonel (just lacking the funds right now). I do like utilizing a truck tailgate instead of the original. I might consider getting a soft top and switching out the old clunky one. If it wasn't for that window I would switch it now but I am not sure how redneck it would look with a clear piece as the back window.
 

cucvrus

Well-known member
11,473
10,427
113
Location
Jonestown Pennsylvania
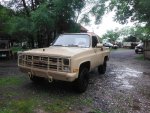
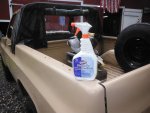
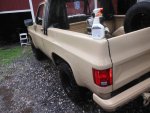
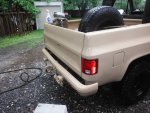
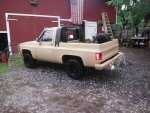
DSCF2884.jpgDSCF2883.jpgDSCF2880.jpgDSCF2879.jpgDSCF2878.jpgDSCF2877.jpgDSCF2889.jpgDSCF2885.jpgToday I took the time to wash/scrub The Mule M1009. I don't wash it very often. It sits out in the weather most times and gets driven year round. It still looks pretty good having been painted 2 years ago. It is fairly straight and clean. The paint is very hard to keep spotless. I use a light 3M scratch pad and the Clorox bleach white to wash it. It really looks good when it is clean. It has a few spots that need some attention in the coming year. I may opt to repaint it again. I like the TAN but it is hard to keep clean so I just gave up on it. I get a lot of thumbs up while driving it and people saying they never seen a short pickup truck like that. Next week is the annual homage to Conowingo Maryland for Cat-fishing. DSCF2886.jpgDSCF2887.jpgDSCF2888.jpgHave a great day and good luck on your projects. I am running a full shop right now.
 

cucvrus

Well-known member
11,473
10,427
113
Location
Jonestown Pennsylvania
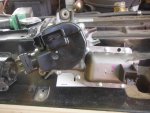
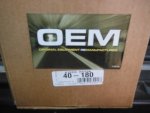
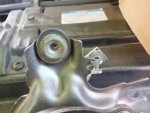
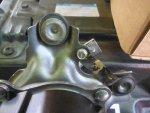
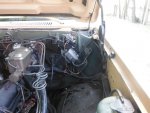
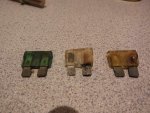
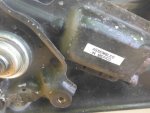
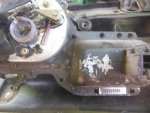
DSCF3011.jpgDSCF3012.jpgDSCF3013.jpgDSCF3014.jpgDSCF3015.jpgDSCF3016.jpgDSCF3017.jpgDSCF3018.jpgDSCF2994.jpgAfter discovering the hot fuse for the wipers. I thought I would take a look at the wiper motor and it was a bit tired. It would not wash anymore and seemed to struggle to keep up in the rain. It was the original GM one. I bought a replacement rebuild and put it on. This wiper motor would wash but it would only stop when the fluid ran out. Also the body of the motor and the tripod mount on the fire wall were loose and wiggled while the wipers were on. My Wife was wanting to ride her motorcycle so away she went back to town for another wiper motor. NAPA was not open. Autozone had one and I installed it. It worked great. All 3 were made in Mexico. The original one, The NAPA OEM one and the Autozone one. Probably the same plant. Greased the ball socket and used a clip nut and a 7 mm drive screw on the ground. Glad I did. i would of had to drill the rivet out like the original one was.
 

48cj2a

Active member
311
34
28
Location
Central, IL
Thanks for resurrecting your Thread - I don't think I ever saw it.:goodjob:

I've mulled over how to do the half cab thing for years and I like the Hummer soft top with the HD Vinyl material, so will have to watch at work for a torn one to reutilize.


About 5 more weeks left on my rotation in the AOR and I can get back to working on mine too.
 

firefox

General
Steel Soldiers Supporter
1,845
51
48
Location
Berkeley CA
I prefer #1, but I tend to be conservative in my old age. #2 definetely
has it's good points though.
 
Top