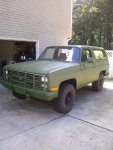
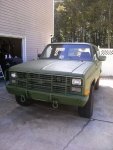
After a successful trip to and fro work I learned of several issues with the truck.
1) the heater fan blows but only Luke warm air flows.
2) the washer fluid squirts continuously whenever the wipers are on,
3) the passenger high beam is inop
4) the fuel guage is stuck at half a tank again.
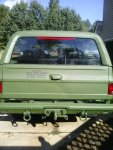
5) there are holes in the mufflers, I knew this prior but driving on the highway magnified the issue.
I have mufflers on order from rock auto so that will be fixed but that darn fuel guage is eating my lunch!
Just need to keep grinding and work the problem. Also need that heater for sure.
Hey I am writing this after reading your 2nd day at work entry.
Lets start at the top of your 1 st day.
1.) The heater.
Make sure the radiator is full and the water is circulating thru the heater core.
Remove the heater hose from the radiator and the engine. See if you can flush clear water through the heater core.
Use a garden hose.
If that is clear reattache the hoses, refill the radiator and run the truck till it is at operating temperature. Do you have a thermometer? Check engine temp. Should be at 190.
If not check themostat and change it. It is like most it has the original one in it.
Refill the cooling system and test it. It should have heat. It is not a bad idea to pressure test the cooling system at this point or before you do anything to make sure you have a tight system. That was just an after thought. Sight unseen diagnostics.
2.) Remain Calm. The wiper motor needs replaced. It is a common issue with this vintage vehicle. Autozone has the 1984 motor with pump less the $50. American. Lifetime warranty AZ PN 40-180. Pay the $10. core and keep the old motor. You can use it for parts or take it apart and fix it. Either way it has a few parts on it that don't come with the new motor. You can take it back for the $10. after you remove the needed parts.
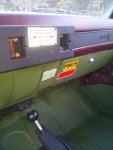
3.) Now the nasty part. The fuel gauge. That can be one of 3 things. Worst case senario the sending unit in the fuel tank. That is a job but also an oppurtunity for you to change the 30 year old rubber fuel lines and cleanup and paint the fuel tank, body and frame up under there. It is all part of the journey to rebuild your fine CUCV.
Next it could be the in dash fuel gauge.
I would drop the tank and manually move the float and see if the gauge goes from empty when down and full when up.
Check the wire for continuity and check the grounds. Pace yourself a little at a time.
The mufflers you got handled. GOOD LUCK. I would help if I was closer.


")
