• Steel Soldiers now has a few new forums, read more about it at: New Munitions Forums!

  • Microsoft MSN, Live, Hotmail, Outlook email users may not be receiving emails. We are working to resolve this issue. Please add support@steelsoldiers.com to your trusted contacts.

M1009 Little Red Riding Hood.

cucvrus

Well-known member
11,474
10,441
113
Location
Jonestown Pennsylvania
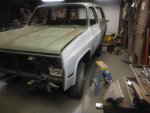
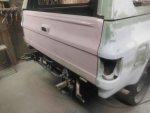
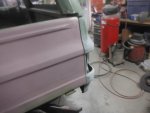
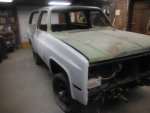
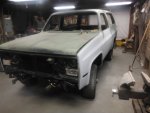
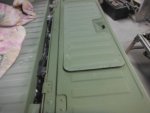
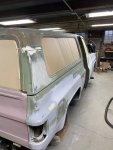
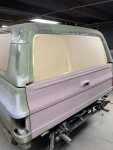
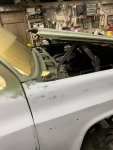
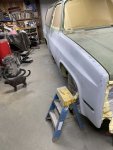
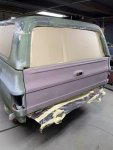
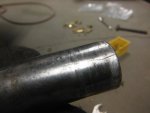
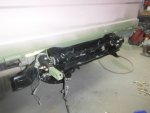
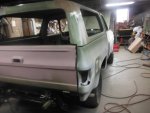
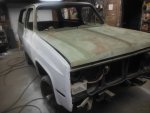
Yesterday and today, I was able to make great progress. I had a minor setback when I was unable to loosen or tighten any of my 1/2" bolts and was perplexed as to what was the issue. DSCF9208.JPG This is a Matco 3/4" socket I have been using for over 40 years. That was the problem. I threw away a few bolts and nuts because they had rounded hex heads. I think the back end is coming along well. DSCF9209.JPG DSCF9210.JPG DSCF9211.JPG DSCF9213.JPG DSCF9212.JPGI have the gate bolted on and I will now adjust it to make it fit as close as possible. These old trucks are not like the new ones when it comes to fitting nice. But they are still acceptable for a 40-year-old truck. DSCF9214.JPG I was sanding the front end and just multitasking as much as I can. I came in for a break and wanted to post my progress. Be Safe and Have a Great Day. DSCF9215.JPG DSCF9216.JPG I must get out and get more completed.
 

WWRD99

Well-known member
Steel Soldiers Supporter
1,138
1,755
113
Location
York Pa
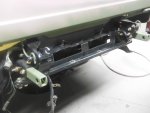
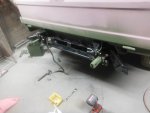
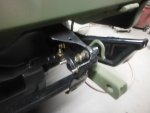
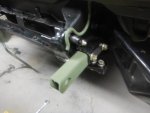
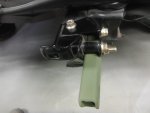
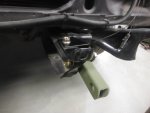
Hey just out curiosity if you want them I have nos pintle mount and the square bar that connects under it if you want new. Mount is painted light green and the bar is black.

Sent from my SM-S906U using Tapatalk
 

cucvrus

Well-known member
11,474
10,441
113
Location
Jonestown Pennsylvania
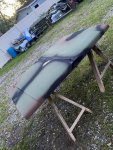
I am back in and have accomplished my goals for the weekend. The gate is on and adjusted as good as I can get it. I did have to use a few shims in the lower under side of the hinge to get the right side of the gate down a bit. DSCF9217.JPG DSCF9218.JPG The entire M1009 is DA sanded and hand sanded. DSCF9226.JPG DSCF9222.JPG This is the look of the CARC on the Line X. DSCF9221.JPG I like it. I was gathering my parts and wanted to install anything that I came across, so I don't have to look for the parts again and besides it is a step in the right direction. I mounted the front frame bumper brackets and D ring tubes. I sed all new grade 8 fasteners. DSCF9219.JPG DSCF9220.JPG DSCF9225.JPG If you notice I added a second steel gusset to the upper bolt bumper bracket. I had them powder coated. I painted the D ring tubes with CARC. I like the look. DSCF9223.JPG DSCF9224.JPG. The entire outside is sanded and ready for sealing and paint. I must now get the wheels off the vehicle and centered in the bay. First, I need to do a thorough cleaning of the entire garage and get the time to do the painting. I have some experimenting to do with the paint to see when it is best to add the black and brown after the green has been applied. I am painting it with all the glass out and trying to achieve the GM OEM look and camouflage pattern. I am going to be making cardboard window fillers and taping them in place. My experience with the plastic tape and mask has not been good. The paint dries on the plastic and flakes when the other colors are being applied. It happened several times to me. No time for errors. Winter is quickly approaching, and the truck can sit inside all winter and allow the paint to dry. Take Care and Be Safe. Thank you for looking and all the positive support. And negative also is welcome. I can learn from it.
 
Last edited:

Mullaney

Well-known member
Steel Soldiers Supporter
Supporting Vendor
7,769
19,877
113
Location
Charlotte NC
I am back in and have accomplished my goals for the weekend. The gate is on and adjusted as good as I can get it. I did have to use a few shims in the lower under side of the hinge to get the right side of the gate down a bit. View attachment 906574 View attachment 906575 The entire M1009 is DA sanded and hand sanded. View attachment 906583 View attachment 906579 This is the look of the CARC on the Line X. View attachment 906578 I like it. I was gathering my parts and wanted to install anything that I came across, so I don't have to look for the parts again and besides it is a step in the right direction. I mounted the front frame bumper brackets and D ring tubes. I sed all new grade 8 fasteners. View attachment 906576 View attachment 906577 View attachment 906582 If you notice I added a second steel gusset to the upper bolt bumper bracket. I had them powder coated. I painted the D ring tubes with CARC. I like the look. View attachment 906580 View attachment 906581. The entire outside is sanded and ready for sealing and paint. I must now get the wheels off the vehicle and centered in the bay. First, I need to do a thorough cleaning of the entire garage and get the time to do the painting. I have some experimenting to do with the paint to see when it is best to add the black and brown after the green has been applied. I am painting it with all the glass out and trying to achieve the GM OEM look and camouflage pattern. I am going to be making cardboard window fillers and taping them in place. My experience with the plastic tape and mask has not been good. The paint dries on the plastic and flakes when the other colors are being applied. It happened several times to me. No time for errors. Winter is quickly approaching, and the truck can sit inside all winter and allow the paint to dry. Take Care and Be Safe. Thank you for looking and all the positive support. And negative also is welcome. I can learn from it.
.
@cucvrus ,

I am not there but the alignment on the body parts sure looks good! That body skill all by itself is amazing. Also see you are back into picture posting again. Glad to be able to see what is going on again. :)

Hate to hear about the demise of your 3/4 impact socket. Kinda like an old friend, maybe that piece of metal needs a spot on the wall or desk in honor of its service...


Tim Mullaney
.
 

cucvrus

Well-known member
11,474
10,441
113
Location
Jonestown Pennsylvania
The broken socket is getting traded for a new one. I know that socket did a lot of tough work over the past 40+ years. But all good things must come to an end just like the wild wood weed.
Last night I made my cardboard cut outs as close to size as possible to close all the window openings. I did not tape them in place yet as I want to do a lot of cleaning and blowing out all the nooks and crannies. I will be washing the entire inside floor out and covering it with a plastic sheeting. I tilted the hood forward on the hinges and removed the cowl screen so that the plastic cowl screen does not get painted. I still have the wiper transmission out and will just set the cowl screen in place and tilt the hood back down for paint. The 24"wheels are off and the M1009 is slammed to the floor like a low rider. This will be the first paint job in the barn with the new LED overhead lighting in place. I used to have 8 200watt incandescent bulbs and a few cheap Harbor Freight LED lights. I tossed all that and have up to date wiring and lighting. With the dark walls and ceiling, it still looks like I need more lights. But now it is all cleanup and get ready for paint. No date planned but I was hoping to have it painted before winter so it can spend the winter drying and getting reassembled at a slow rate, so nothing gets damaged. I am up for the task. I want to clean and recondition each part as I go so no rush. Pictures at a later date. With my iPhone I still don't know how to post pictures. I depend on my Fuji digital camera. Take Care. I will post pictures. I have a lot of cleaning to do. Without my Wife things get done a lot slower. She was a positive influence on many of my projects. I used some shims she bought for me to get the rear gate hinges in alignment with the body. I remember when she bought them, and they were alignment shims for upper control arm shimming. I teased here and used them as body shims anyway. Shims are hims nowadays anyway and vice versa.
 

cucvrus

Well-known member
11,474
10,441
113
Location
Jonestown Pennsylvania
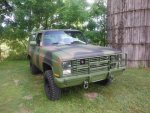
A date has been set. Next Saturday will be paint day. I will spend this entire week getting it prepped for paint. That means cleaning, masking and covering everything I don't want painted or overspray. I suspect it will take the 4 days M-T to get it all ready. Friday, I want to spray the sealer and Saturday do the 3 colors. I am hoping I have the time. I still need a set of mirrors and am going to try and locate some locally. I want new ones so I can paint them with the vehicle. I will post pictures. I am covering the entire inside and underside with plastic. No room for errors or overspray. I am spraying the Sherwin Williams waterborne CARC. More pictures later. Good CUCV.jpgThis M1028 I sprayed in 3-part chemical CARC back in 2008. Take Care and Have a Great Week.
 

cucvrus

Well-known member
11,474
10,441
113
Location
Jonestown Pennsylvania
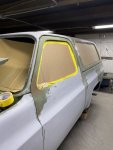
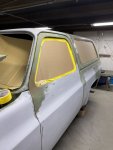
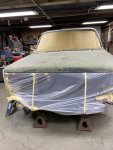
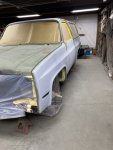
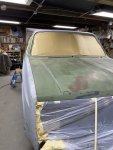
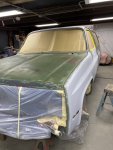
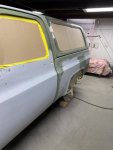
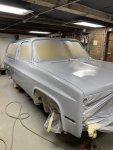
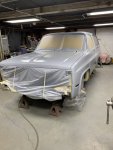
Tonight I began the masking process. Like I mentioned this is they way I like to paint an entire vehicle. No glass and I am assured that the pinch welds are clean and painted and all the window rubbers will be clean and free of paint. This is as close to factory as I can get in an early 1900’s barn. Just a few pictures and I am done for the day.IMG_0118.jpeg IMG_0117.jpeg IMG_0116.jpegIMG_0115.jpeg Notice how I tilted the hood forward so the plastic under the cowl screen is not under there during the painting process,IMG_0119.jpeg Have a Great Day and Be Safe.
 

cucvrus

Well-known member
11,474
10,441
113
Location
Jonestown Pennsylvania
We think alike. The cowl screen has been painted already and I scuffed it again to include it with the overall paint process because of the camouflage colors that will be on the cowl screen. And painting it separately assures all the slatted holes are evenly coated. During an overall things like that can lead to over coating an area, I am not a professional but learn as I go. I like to see details like the grille ,bumpers and fender trim not included in the camouflage paint pattern. Thank you for your input. Now come over and give me a hand.
 

cucvrus

Well-known member
11,474
10,441
113
Location
Jonestown Pennsylvania
Things did not go as planned. I was contemplating the weather as it was pouring down rain most of the day and at 12 noon I pulled the trigger. Trouble was short to come. During the first coat I had a massive drop in air pressure. I was done with the first coat and BAM. Massive air rush and explosive sound. The main pressure line coming out of the compressor broke. Now the troubles begin, it’s the challenge I was not looking for. Tear down a greasy, oily air compressor and get parts on a Saturday afternoon. I had it apart in half an hour and the parts that failed were just standard 1/2” pipe fittings. Less than $10. and back in business making air. A few more issues I won’t mention but onto the second cost I go and the sun is out now. That is a good sign . I had to go decontaminate all the grease and oil from my body and get back at it. IMG_0153.jpegIMG_0153.jpeg
 
Top
AdBlock Detected

We get it, advertisements are annoying!

Sure, ad-blocking software does a great job at blocking ads, but it also blocks useful features of our website like our supporting vendors. Their ads help keep Steel Soldiers going. Please consider disabling your ad blockers for the site. Thanks!

I've Disabled AdBlock
No Thanks