• Steel Soldiers now has a few new forums, read more about it at: New Munitions Forums!

  • Microsoft MSN, Live, Hotmail, Outlook email users may not be receiving emails. We are working to resolve this issue. Please add support@steelsoldiers.com to your trusted contacts.

M1009 rust remediation time (take 2)

SandBar

Full Time Patriot
756
231
43
Location
GA/FL
So after a long 6 month break from working on the CUCV I am back at it. It has its fair share of rust and this is my first rust repair attempt (great combo there).

I ordered up a plasma cutter, a mig welder and all the usual accessories. I already have the replacement rocker panel sheet metal and I am looking at a donor K5 for some of the unavailable sheet metal (around front window etc). Thought is the plasma cutter will make quick work of cutting up the donor K5.

So the rust areas are:

6" section above window, 6" section below window, small section behind doors on both sides and of course the rockers. Previous owners (Florida USDA) has replaced two large sections of the floor with stainless and riveted it in place.

Amazingly the frame is great, bed is solid and wheel wells look good.

To me the toughest places to deal with look like the front window and behind the doors. Will post pictures once I get started. I am thinking I should start from the top down, any advice on what area to go after first?

Next up is what sort of primer/por15/whatever should I paint the fixed areas as i go? When all the rust repair is done I have an HVLP setup to paint it back to CUCV green, but in the meantime I want to keep rust from coming back. Here is the the re-start of this project :)
 

Keith_J

Well-known member
3,657
1,323
113
Location
Schertz TX
For cutting, either an air saw or die grinder with cut off wheels is the best. I've heard Rustoleum red primer is the best, it seems to work great in my experience. POR is good for areas you cannot mechanically prepare (blasting, sanding, wire wheel etc) but I have doubts if the Behr Premium will adhere as it is high gloss. For me, POR is a major pain for small areas. It IS the choice for inside the panels after welding. Don't weld through it, nasty fumes with phosgene. Prep the inside before welding, then hit it with POR after welding. Welds tend to make an area sensitive to rusting, the POR should slow that process.
 

SandBar

Full Time Patriot
756
231
43
Location
GA/FL
Thanks. Got both of those, might be HF brand but they work.

Read a good deal on rocker replacement all over the web and think I can tackle that.

With the rustoleum red primer does the metal need to be 100% rust free or just no loose flakes?
 

Keith_J

Well-known member
3,657
1,323
113
Location
Schertz TX
No loose flakes. Wire wheel is perfect.

The key with MIG welding is to keep the welds short. No longer than 1/4". Just a series of tack welds. Also, most ER70S6 wire is hard to grind. There are some easier to grind filler wires out there, they aren't ER70S6 rated but made for body work. Since the welds are thicker than the parent material, there is no loss of strength.
 

SandBar

Full Time Patriot
756
231
43
Location
GA/FL
I will do some practice welds with spare parts out here first. Thanks for reminding me about the softer weld wire. I believe it is also called "EX weld
"? I had convinced myself that it was too soft for this application based on some googling but anything that makes resurrecting this CUCV easier I am all for as long as it turns out well.

Am I the only one with rust through holes at the top corner and bottom corner of the windshield? I tried searching for an example of someone fixing this type of rust damage but came up empty. I already convinced myself that I am tackling this job come **** or high water :)
 

Keith_J

Well-known member
3,657
1,323
113
Location
Schertz TX
Those areas rust from the outside in. Rockers rust from water intrusion through the kick panel vents.

On grinding welds, heat there is also an issue so don't dwell too long, just a second and let it cool. A wet rag can be used on grinding. Welding should stay dry as any remaining water could spoil the weld.
 

wheelspinner

Well-known member
Steel Soldiers Supporter
3,748
1,521
113
Location
North Carolina - FINALLY !
I am getting ready to do this job also. There is a ton of structure in tha "B" pilliar that I'm still debating how to tackle. I was thinking about peeling back some of the outer sheet metal to complete the welds on the inside then close it up and weld the exterior sheet metal. Good luck!
 

SandBar

Full Time Patriot
756
231
43
Location
GA/FL
Thanks, I saw some rust on those inner b panel supports I need to repair also. IMHO they look pretty easy to weld, I was planning to cut the bad sections out and replace with some tough plate steel if needed. Now I am just waiting on the welder, plasma cutter and other goodies to arrive. Considering I got the M1009 for less than 1K shipped I can't complain much.
 
Last edited:

2002ford

New member
461
0
0
Location
dayton,oh
roof 002.jpgThis is what he meant as a ton of structure in the B Piller. I am thinking about doing it in layers. It take longer but that is the factory roll bar. It has to be welded right the first time. Good luck.
 

SandBar

Full Time Patriot
756
231
43
Location
GA/FL
Oh ok, I was thinking of the area just rear of the doors on the inside that have the thick plates.
 

SandBar

Full Time Patriot
756
231
43
Location
GA/FL
Ok finally progress!

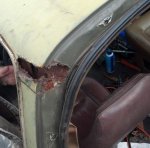
Started at the top and am working my way down. The first issue was a rust through in the roof/b pillar area. Looks as though a scratch down to metal on the roof was left to fester until it finally ate through and allowed water to pour down the b pillar (this cause other rust areas to be dealt with). Here is what I did:

1.) I took needle nose pliers and slowly peeled back the edges of the rusted through area. Why? Because you can easily tell where the bad metal stops and the good metal begins. Really bad metal will break right off, still bad metal will bend too easy then finally you get to robust harder to bend metal. What you end up with looks like a large caliber weapon shot from the inside out. Picture is from mid way through this process. You can see what looks like more trouble inside (dealt with later)

1.jpg
 

SandBar

Full Time Patriot
756
231
43
Location
GA/FL
2.) Once said metal was evaluated with the needle nose pliers, I went went a few inches past the good metal and drew a pattern of where to cut. I had purchased a few sections of the repair panels I would need from someone with a donor vehicle as no aftermarket panels were available for this area. Even at that I had to fabricate an extension as the rusted area went further than I had planned on. Note: Get replacement metal after you know for certain how extensive the rust is. Lickily I had bought an Eastwood patch panel kit with plenty of metal and a small metal brake.

I used an air powered cut off wheel and a dremel with a cut off for the tighter areas. As you can see this is a somewhat complex area (not like a quarter skin). The cut off discs that come with the dremel last about 30 seconds so be sure to have plenty of them. In this picture almost all the bad metal is out, and I have hit the inner structure with a small wire wheel. This was a relief moment when I saw the 2 layers (structural) under this were intact.

2.jpg
 

SandBar

Full Time Patriot
756
231
43
Location
GA/FL
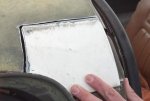
3.) Fitting the patch panel. This takes a bit of time, do not rush. You want this to fit and small adjustments are in order. I ended up with what I thought was to much gap, but in the end it welded up well. You can't see it well but there is a 3" by 2 " section on the rear that this piece does not cover (poor planning). That was alleviated with the spare metal, brake, nibbler and cut off wheel. Note: I plan to use seam sealer on the portion near the drip rail. I think it runs 20.00 a can and is brush on.

3.jpg
 

SandBar

Full Time Patriot
756
231
43
Location
GA/FL
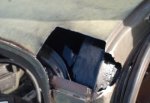
4.) Rust proofing the inside. I wire wheeled as best I could using a few small wheels I had picked up from HF. I then grabbed a can of Rust Encapsulator (Eastwood again), and went to town. I made sure to look as far inside I could with a flashlight and spray way in there. I also soaked the lower portion so it would run down the pillar. It was particularly cold and windy, but it dried to the touch in 15 minutes or so. I also sprayed the inside of the patch panel. Note: I ordered up some more rust encapsulator with a 24" nozzle extension to make some of the upcoming rust repairs easier.

4.jpg
 

SandBar

Full Time Patriot
756
231
43
Location
GA/FL
5.) Welding it in. I bought an Eastwood (again) MIG 135 welder after much searching. A few negative reviews, lots of positives. Most of the negatives are really nit picky or circumstantial (broken on arrival). Mine came intact, and performed great (to me, being a welding noob). Price was right, and it functioned great having the control knobs that allow infinite adjustment. Luckily I had a friend over this day who just happens to be certified in welding. He gave me plenty of pointers. The wind was again our enemy and kept blowing the shielding gas away causing pockets. These were dealt with with a few more passes. My mistake was not stitching around enough, I have some minor metal warping, but that will be handled with a dent puller and a little plastic filler.

Note: There is that missing piece I was describing earlier. Ultimately all sides were made straight and a patch was fabricated and welded in place.

5.jpg
 

SandBar

Full Time Patriot
756
231
43
Location
GA/FL
6.) Nearly done. I ran out of time to grind the last welds down and hurriedly sprayed it with a rust inhibiting primer (note the runs). It looks much better in person. Yes there is a little shrinkage, but it is now waterproof and strong. I will go out and hit it with the flap disc, add seam sealer, and primer. A pretty good experience, I just want to point out that this is my first time doing any body work, welding etc (lots of mechanic experience). 1 down, 7 or 8 more spots to go including rockers, floors and a nasty spot under the front windshield.

6.jpg
 

SandBar

Full Time Patriot
756
231
43
Location
GA/FL
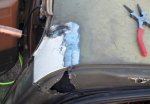
On to the next spot. This is to the right of the drivers door. It is a result of water pouring in from the top of the cab (see above). In this picture I have cut out the bad section, wire wheeled and rust encapsulated. I have the replacement panel rough trimmed (from a donor truck). Next is final fitting of the panel and welding. This project is coming along and I will post updates as much as possible. To think some naysayers told me to junk her :)

1d.jpg
 

Triple C

New member
546
3
0
Location
NAPOLEON MO
Thanks for the detailed post, I have thought about one of these trucks but I don't have body experience either. I will watch this closely!
 

SandBar

Full Time Patriot
756
231
43
Location
GA/FL
If you can follow basic instructions and manage not to get hurt around air/power tools then you can too. I am not looking for a concourse restoration, just a 100% rust proof one so the truck can spend a looonnng time being enjoyed by the family.
 
Top
AdBlock Detected

We get it, advertisements are annoying!

Sure, ad-blocking software does a great job at blocking ads, but it also blocks useful features of our website like our supporting vendors. Their ads help keep Steel Soldiers going. Please consider disabling your ad blockers for the site. Thanks!

I've Disabled AdBlock
No Thanks