wayne pick
New member
- 658
- 2
- 0
- Location
- Valley Cottage NY
top, as said above, Great post and pics. Haynes has nothing on you and "shade tree".![Thumbs Up [thumbzup] [thumbzup]](https://www.steelsoldiers.com/images/smilies/icon_smile_thumzup.gif)
Steel Soldiers now has a few new forums, read more about it at: New Munitions Forums!


did you have to press the outside bearing in or did nut take care of that, I notice you didn't replace or install the chases? thanks Rick
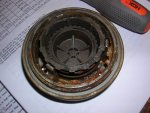
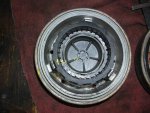
What your referring to is the lockout. There isn't much to them, once you take them apart you'll see what I mean. All the guts of the lockout have to come out in order to get the spindle nut off.I'm in the process of doing this job right now and want to say thanks to OP for the great write up. Reason I'm reviving this thread is cause I've the need to clean/lube inside the cap/dial/cover mechanism and haven't seen anything on how that is done, if in fact it can be. Lot's of crud in there on my set and I believe there is also a small O-ring seal inside as well which may need R&R. Looks like my 1008 went thru some water at some point and Army mechs didn't do a proper bearing/hub service, hence, rust & crud.
Anybody done this?
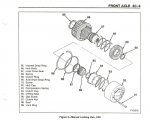
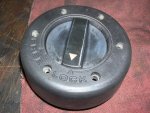
My vehicle is M1008 and I have the lockout body on the bench and apart as far as it goes. What I'm referring to I call the cap/dial/cover mechanism which is the first thing removed and the last thing re-installed when servicing the front axle. Has anyone disassembled this? Looking at exploded view in Helms manual, 91 thru 98, it's called the outer hublock knob assembly, but I can't seem to find a way to get it apart. Have scoured the TM's but maybe I am missing something?What your referring to is the lockout. There isn't much to them, once you take them apart you'll see what I mean. All the guts of the lockout have to come out in order to get the spindle nut off.
Hi Dave,
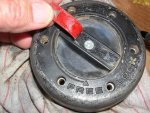
I know what you mean. I had to dismantle my 'knob assembly' as it was not engaging LOCK. It took me ages to realise - you remove the sticker over the centre of the hub - yours has a white arrow on it. If you are careful you can prise it clear with a sharp screwdriver. It is a flexible, probably self-adhesive sticker which if you do not crease it could be replaced with a strong glue/adhesive. Underneath you will find a Phillips/cross head screw, Carefully unscrew this and the lock ring, and notched ring and the spring will come apart. CAREFUL as that spring is under a lot of tension! getting it all back together will rewuire the use of a C clamp to overcome that tension. You will see that the spring assembly is governed by a locking ring whick travels on a coarse thread (it is easier to see than to describe) My only other advice is - WHY are you disassembling this part? I had to as there was/is a problem with it engaging with the lock mechanism inside the hub. I have just left it in FREE for the moment.
I hope this helps,
Steve United Kingdom '85 M1009
Which TM are you looking in? Basic procedures are in the -20, and the more complex ones are in the -34. If it is not in the -20, always check the -34.Im not seeing where this is in the TM...
We get it, advertisements are annoying!
Sure, ad-blocking software does a great job at blocking ads, but it also blocks useful features of our website like our supporting vendors. Their ads help keep Steel Soldiers going. Please consider disabling your ad blockers for the site. Thanks!

