• Steel Soldiers now has a few new forums, read more about it at: New Munitions Forums!

  • Microsoft MSN, Live, Hotmail, Outlook email users may not be receiving emails. We are working to resolve this issue. Please add support@steelsoldiers.com to your trusted contacts.


M135 M211 2 speed transfer case mod

DUUANE

Active member
387
91
28
Location
Vancouver BC
Hopefully over christmas ill have a couple of days to get this closer to completion on the inside..i dont think a full tutorial on making a cover is needed but ill include it. At the end maybe the moderators can clean up the thread and it can be a sticky if everything works out.
 

DUUANE

Active member
387
91
28
Location
Vancouver BC
2019 update

Well..Santa was late with my parts..spent fully half the day diving all over the dark side of surrey and finally found some keys..so i got 4.
Part number 302-091. Best i could do.. Cullen Diesel supplied a genuine effort and dug through the back room for a full 30 mins with no joy..Cat parts guy just gave me a blank stare..the girls ar Raider-Hansen were more interested in talking to their "favorite" regulars and couldnt find any listings for woodruf keys..Gregg Distributors found the right part number..but 4 days out.

Finally Alder Auto parts had them..i should have known it all along..
I also stopped by the USA border to pick up my flywheel and flywheel housing that are going to work perfectly..all thats left is to source the starter part number..1974 c60 366/427 with allison trans.

*rubs hands together and smiles*
 

Attachments

DUUANE

Active member
387
91
28
Location
Vancouver BC
Yes Sir i did. I cant see any yellow metal what so ever in there..its all steel shafting and bearings. Probably why its such a robust unit.
 

DUUANE

Active member
387
91
28
Location
Vancouver BC
Spring ahead..

Well my masters finally gave me a few days off to play in my own shop..i managed to make some new gaskets and start roughing in the new pto cover. Tomorrow ill get onto assembling the gearing and check the fit on those keys i picked up.
If all goes well some more pics and i can start on the shift fork modification.

Thanks for the patience everyone..its been a long winter.
 

Attachments

DUUANE

Active member
387
91
28
Location
Vancouver BC
The meat of the pudding

Okee dokee..so this is the spacer that goes between the back side of the front bearing and the front side of the first gear in the cluster. Its the second hardest part to deal with in reassembling the (former) pto gear cluster on the shaft in the case. Best bet is to load the cluster into the case (all 3 gears together) then rotate them up out of line with where the shaft goes through,then slip the spacer in against the bearing with your left hand and hold it in place while you rotate the cluster back in line. You wont be able to get it in with the cluster in place.
Use your right hand to apply pressure to the front gear to hold the spacer in place while you reach around with your left hand..finger or 2 through the center of the front bearing to support the spacer from outside the case.
Once you are in this position you can slide the shaft in trom the back just far enough so that it supports the spacer, but leaves you enough room at the back to slide in the infamous "key" with a set of long needle nosed pliers..be patient..have a magnetic pick up tool and some reasonably stiff wire..you WILL drop it into the case and gear a few times ..i did..just say a few choice words and keep track of it and victory will be yours. The key is the worst of it..once you get it started you can use a dead blow hammer to gently tap everything home.
GENTLY. Always checking for rotation and that that darn spacer didnt drop down off the land on the shaft because you pulled it too far back while you were fidling with that key.
A good way to check that everything it 10-10 is that the front bearing isnt moving..if it starts to walk forward..stop and check things out. Go slow..sip coffee and all will be as it should.
 

Attachments

Last edited:

DUUANE

Active member
387
91
28
Location
Vancouver BC
Heres the slot in the shaft where the key goes, the key in place in the shaft, and how it looks when the shaft is keeping the spacer in place. Not a lot of room.. but do-able. You could probably do this with the front bearing removed, but this works fine..just be patient and dont force/beat on anything.
 

Attachments

DUUANE

Active member
387
91
28
Location
Vancouver BC
First pic is looking from outside..clearance is fine..second pic is looking back through the top cover..again lots of clearance..its hard to tell but there is more clearance to the case than the stock gears have so we are good. Third pic is how the cluster all stacks up..nice and tidy.
Tomorrow night after the fun in the yard with the crane and the torch dies down ill try and get on the install of the other shaft and the shifter rods..i have more gaskets to carefully remove and copy as well.

Stay tuned.

Cheers
 

Attachments

DUUANE

Active member
387
91
28
Location
Vancouver BC
I'm getting things in a different order than you would do if you were following this step by step..but it has to happen this way. Theres no way to measure for the relief in the cover untill i have the gears assembled in the case. Once i have those numbers i can remove the shafts (again aaaahhhhh!!!) And drill and tap the extra hole for the cover since we eliminated one in enlarging the opening for the new gear.
At the end maybe the moderators can clean this thread up a bit so its more of a straight line.
 

DUUANE

Active member
387
91
28
Location
Vancouver BC
Some time to play in the shop

I got to fitting the mainshafts in the tcase tonight. Things look good. I had the machinist remove .25" from the mainshaft sliding gear ( that engages the drive or the pto) and it looks like that was too conservative. The gear is still too long to allow a safe neutral between ranges with the new gear. I will have to remove another .125" minimum. For an unskilled operator removing a total of 7/16" would be way safe.
Pic 1 low range engaged
Pic 2 where neutral will be
Pic 3 high range engaged
Rotation is good in both ranges so this part is a win.
 

Attachments

Last edited:

DUUANE

Active member
387
91
28
Location
Vancouver BC
The weak link

Im calling this a win also despite being extremely frustrating. Its a win because it fell apart litterally in my hands as i went to slide the rear output shaft through the bearing retainer.
This is the cone that the wedge bolts tighten against to load the rear output bearing. The TM says torque to 20-25 lb/ft..you better hope you've had your wrench calibrated and you only pull it with 2 fingers..the cone is a CASTING ..i cant believe GM would cheap out on a critical part like this. Why would you not machine a piece? I am so glad i found this now before it grenaded under load.
I suggest everyone inspect this part. What a p.o.s. ...you can see in the pics where the load from the wedge bolts split it.
I'm going to have a new one made out of 4140.

I'll try and play with the shift forks and rods tomorrow if time allows.
 

Attachments

Last edited:

rustystud

Well-known member
9,071
2,387
113
Location
Woodinville, Washington
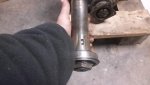
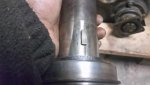
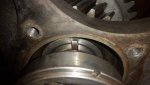
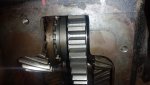
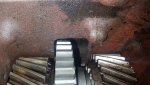
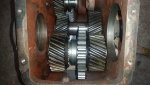
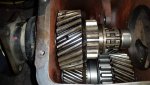
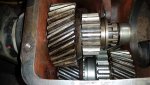
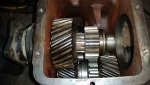
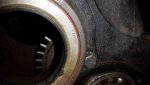
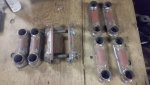
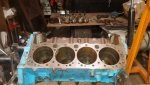
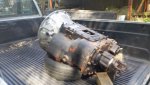
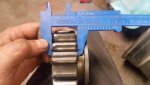
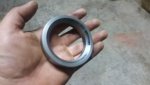
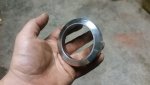
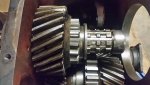
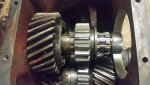
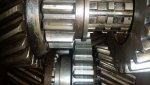
Looking real Good !
It would be nice if you could take pictures of all the new and modified parts you have. Have them layed out next to the old parts if possible. Also how much has this cost you to date ?
Thanks for sharing this great project !
 

DUUANE

Active member
387
91
28
Location
Vancouver BC
I have about 400 Cad plus my time into it so far. A friend is doing the machining on the cuff so it would be higher if he would accept some cash..he enjoys being in on the dark side of restomod lol.

If i was building the next case at shop rate i would figure the hours like this.
Cleaning and teardown - 3 hours
Modify case - 1.5 hours
Machine sliding gear - 2 hours
Machine bearing cone - 1 hour
Cut new gaskets
Re & re seals - 1.5 hours
Make new shift rod - 1 hour
Modify shift fork - .5 hour
Fabricate new cover - 1.5 hours
Assemble unit - 2 hours

Plus the cost of the shift rod stock,new gear and seals. This is assuming that youre starting with a good case with no damage. 14 hours total labour.
 

Ashley P

Member
67
54
18
Location
W. KY
A note to say good work, keep it up. I think I have an excess of back burner projects already, but this sure would be neat...
 

DUUANE

Active member
387
91
28
Location
Vancouver BC
Some pics of the stuff on the back bumper here this week..my life is like a shotgun shell full of rock salt...sprayed some green goodness on the M1028 K30 chassis for my M37 project, built supershackles for same. Picked up a fuller rtf9509A and stuffed it in the shop..picked up a holmes formula 1 boom..and hammered apart a standard bore marine '67 small journal 327 for a future 302 buildup...now on to the transfer case stuff..
 

Attachments

Last edited:

DUUANE

Active member
387
91
28
Location
Vancouver BC
K so i got the sliding gear cut down a bit more..all looks well..there is enough space now so that the two gears can never be engaged simultaeously..that being said a careful hand will be required as there isnt a huge amount of clearance between hi and lo..so if you were in a hurry and pulled hard there is the potential you could bang the gear befor it has time to slow down( as with any case really).
I also have the new spacer/rear bearing preload cone in shiny 4140..just need to find my split bearing pullers and go at it. My kingdom for an induction bearing heater..more to come soon.

Cheers friends
 

Attachments

Top
AdBlock Detected

We get it, advertisements are annoying!

Sure, ad-blocking software does a great job at blocking ads, but it also blocks useful features of our website like our supporting vendors. Their ads help keep Steel Soldiers going. Please consider disabling your ad blockers for the site. Thanks!

I've Disabled AdBlock
No Thanks