• Steel Soldiers now has a few new forums, read more about it at: New Munitions Forums!

  • Microsoft MSN, Live, Hotmail, Outlook email users may not be receiving emails. We are working to resolve this issue. Please add support@steelsoldiers.com to your trusted contacts.

M211 crew cab crusade

Another Ahab

Well-known member
17,991
4,536
113
Location
Alexandria, VA
Finally after several long work sessions the exhaust was off the intake and a trip to the bead blaster made it look almost new.
An excellent narrative, snowyrivers; do you have experience writing reports or something!?

Wondering what kind of shop one goes to to get bead-blasting done; that could be handy to know. Do you go to a body shop, maybe?
 

snowyrivers

Member
138
1
18
Location
Newberg Oregon
Most auto machine shops will have a blast cabinet.

Many years of being on truck forums and working hard to help pass on good info has had a lot to do with it maybe.

Thanks
 

snowyrivers

Member
138
1
18
Location
Newberg Oregon
Ceramic is going to be mighty brittle, and just wondering if vibration won't break it all up no matter where you put it.
The task will be to plug the exhaust port well to keep junk out, then sandblast the pitted area at the top of the port and build it up with the ceramic material (Sort of like JB WELD) then let it cure.

Once cured it can be ground, sanded or ??? to get the port smooth and back to the proper height again.

At this time the gasket and manifold can be replaced and the result should be a good one.

This is just going to be a tedius and time consuming endevour, bu the alternative is to pull the head and machine the entire length of the thing to get the area back to good clean material.

Neither of us are really excited about that way of getting it done.

Once the ceramic is set and captured between the manifold and the head, it should be pretty solid fix.

The stuff is rated at 2300 F and this is waaaaaaaay above anything that will be in the that area.
 

SturmTyger380

Active member
482
30
28
Location
Easley SC
What's the name of that ceramic material?

I have used Lab Metal before and once it sets it acts just like metal. It takes time but I have sanded it down before.

Not sure how Lab Metal does with heat. Might look that up.
 

Another Ahab

Well-known member
17,991
4,536
113
Location
Alexandria, VA
The stuff is rated at 2300 F and this is waaaaaaaay above anything that will be in the that area.
Absolutely; I have no doubt the material can handle the temperatures in that location:

- It was the vibration I was wondering about.

Do you think it'll be okay without breaking up from all the "shaking going on"?
 

snowyrivers

Member
138
1
18
Location
Newberg Oregon
The vibration should not even be an issue.

The material bonds to the surface and is sandwiched between the head and the manifold.

The material is designed to repair castings and such that are subjected to high heat.

Obviously having a clean fresh metal surface would be the best, but when we are dealing with a 60 plus YO machine we just have to make the best of it.

IF (Big if) there were bolts on both sides of the ports as there are on most V8 heads I might consider doing a machine in place sort of thing and clean the areas up and add an insert with a gasket between the head and the insert and then button the manifold on.

Not really workable with the type of clamping arrangement these engines use.

The ceramic goop is worth a go.
 

ThumperTDC

New member
44
0
0
Location
Forest Grove, Oregon
It's been a wet winter out here, really wet. Unfortunately we don't have a shop to work in. So there really is only a 4-5 month window to work on stuff and this all started at the tail end of that window. I am sure this summer we will make more progress on this project. We had the idea of adding onto the hay barn to gain a 30x60 work space, but my wife started talking about a new house and didn't even both with trying to float that idea by her. Should be breaking ground on the new house hopefully next week. Good news is my new garage is almost a 4 car garage so I should have some room to do sheet metal work in the winter, maybe even enough room to stretch the frame, bad new is I will have to truck the parts to my place about 25 miles away.
 

Section8

Member
503
6
18
Location
Little Fort, B.C., Canada
Gonna have to find time to 're read the whole thread to see qhat all i have missed. I am just frothing at the mouth about the 22.5 inch wheel conversion and the air brake set up.
Come on warm dry weather. You guys need to get back at it so we can all drool over your efforts.
 

snowyrivers

Member
138
1
18
Location
Newberg Oregon
Hi troops

Been a long dry spell with a lot going on here at the the home front.

Had to get some serious "home improvement done" and the Son In Law and daughter sold their house and built a new one this summer.

Waaaaaay too much going on to have any time to get much if anything happening on the Deuce project.

But now things have come around and we have started moving a bit, at least in the right direction.

Thumper did a bit of work on our one stock running M211 and had it in the Christmas parade.

The rest of the iron sat over the winter untouched.

Recently started going through the parts and bits that we don't need and selling off the extras.

Our one rig had a fire tank/pump on it (Had been a brush rig with a fire dept over at Ocean Park WA)

The tank and pump was of little worth to us anyway, so it found a new home a couple months ago.

We are doing a contemporary repower on the project rig so the Hydramatic and 302 6 cyl in the parts rig were of no real use to us either.

A Craig's list ad found the 6 cyl a new home as well. (Older gent going to transplant it in a CCKW)

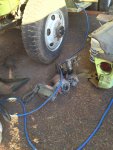
Sooooooooo, started tearing the rig down a few days ago.

Slow slog too due to 60 plus years of rust and corrosion.

Plan is to get the sheet metal all off and that will allow easy access to get the engine and such out of the chassis.

So far the fenders are off, radiator is out and most of the accessories are off the engine (Gen, compressor ect)

The condition of the wiring, hoses etc. is so poor that this is a hack, cut, chop and rip process rather than a careful removal.

Few bolts that have been exposed to the elements came off easily.

4 hours of brute force to get the bumper and fenders off.

Many bolts were so badly corroded that the only way out was to use a die grinder and a cutoff wheel to remove the nuts/boit heads

The hot wrench would have been preferable but the damage to good parts would have been high.

Soooo, slow and tedious dissection.

The plan is to get the cab loose and then lay it over backwards on the rear frame to allow access to the engine/tranny.

The main reason that we even have this truck is that it has a valid title and ID plate
The plan is to use part of this cab to complete the Quad cab project.

Best part is that with the sale of the water tank/pump, the engine and a few other goodies (Tranny etc) we will actually have the one complete running truck and a rolling chassis to build our project on for FREE

Free is a very good price.

Our other scrounging last fall net a complete Turbo setup for the 6.2 diesel we are going to repower with and some goodies plus selling the donor truck we got it from for more than what we paid.

Thumper scared up a 6.2 and I found an Allison 545, so now with the current progress we are at least back to a net expense of minimal $$$$$ to get this project going.

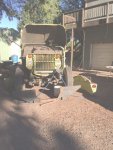
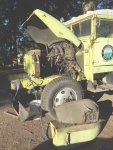
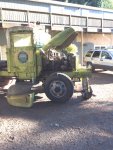
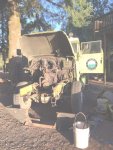
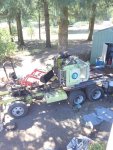
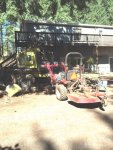
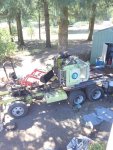
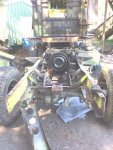
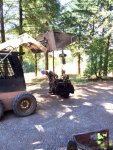
Here are some pix of the tear down as it sits this morning.


One things for sure, with a case of Skunk pizz a good heavy duty impact wrench and a basket of F BOMBS these old beasts will come apart.

I don't want to ruin anything that can be used, even if not by us, there are others out there that can find joy in our left overs.

Heads off to town to get more Deep Creep and Power lube.

Yesterday it was a trip to Harbor Freight to get a socket adapter to allow a 13/16 socket to fit my 3/4 impact wrench.

Lots of odd sized bolt heads on this old iron.

Plus there are many bolts so corroded by the salt air at the coast and 60 years plus since the rig saw "Roll out" that the head sizes have diminished greatly.

So this is where we are at now.
 

Attachments

Last edited:

Another Ahab

Well-known member
17,991
4,536
113
Location
Alexandria, VA
Best part is that with the sale of the water tank/pump, the engine and a few other goodies (Tranny etc) we will actually have the one complete running truck and a rolling chassis to build our project on for FREE

Free is a very good price.

Our other scrounging last fall net a complete Turbo setup for the 6.2 diesel we are going to repower with and some goodies plus selling the donor truck we got it from for more than what we paid.
You got a good point there; it's hard to argue with that one.
 

snowyrivers

Member
138
1
18
Location
Newberg Oregon
FINALLY

Reached the goal of having easy access to the engine in the Deuce.

Fella coming to get it Wed. and he is "Happily" chomping at the bit.

Yesterday was interesting as the cab was finally ready to get relocated.


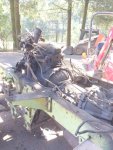
Here are some pix taken just after getting the cab loose.

I doubt the GI motor pool ever did it this way.

The fine threaded bolts with the crimp lock nuts on all the sheet metal cab parts created some ugly moments for sure.

Having been a coastal Brush Rig for many years was quite evident after the cab was laid back, as there was lots beach sand in the nooks and crannies around the Tranny and T case.

Between the salt and age there were many challenging parts that required some nasty alternatives to wrenches.

Plenty of Skunk pee and tenacity.


With the cab off and the complete power pack sitting right in the open made measuring things up for the engine/tranny swap real handy.

We had purchased an Allison 545 for the project, but after seeing what we have for room and some obvious issues it is looking like a Turbo 400 with a LH drop NP 205 (give great crawling gears) behind the 400 and just ahead of the 211 T CASE will be sweet.

400's are plentiful and robust enough to more than handle the task.

Another fact is that these trannies are cheap too.

Using the NP205 from a Ford PU that was Divorced mounted solves a ton of issues as well.

The 205 can be located just ahead of the 211 case and connected using a "morph" of the short drive line thats there now.


Now Thumper and I need to get our ideas on the same page.

This is his baby and I'm the engineering and machining "lacky"

FUN FUN FUN
 

Attachments

Last edited:

snowyrivers

Member
138
1
18
Location
Newberg Oregon
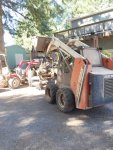
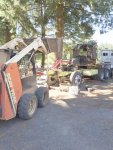
The deck on the south side of the house looks right down on the project.

I thought the high shot was cool.

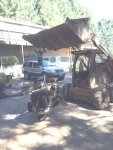
Actually we did not use the Skid steer in the recent work, but it will be used today to lift the engine out.

We used it as a tug to drag the rig over and get it close to tools, air and electrical.

Looked good in the photo shoot though.

I used "Li'l Red to push the cab back on the wooden deck that had the water tank on it.

We need a little drone to capture pix of us working.


Today's update.

After getting the cab off and seeing the clear picture of what we have for room to get the 6.2 V8 diesel, TH400 tranny and a 205 T case all stuffed in ahead of the 6x6 case life took on a far more interesting direction.

Snooped up a TH400 From a mid 80's GM 4x4 and also scared up a LH drop 205 from a mid 70's Ford 4x4

The Ford case is a divorced style, but it easy enough to swap the input gear and bearing retainer and then marry it to the 400.

At present things are in a state of flux and we may mount the 205 in the frame more or less solid using the mounting pads that were used by Ford and connect the output to the input of the 6x6 case using the original 211 shorty shaft.

Possibly leave the TH400 separate and connected to the 205 with a short shaft as well.

The V8 is considerably shorter than old 302 6 cyl so we may be able to do a lot of creative things.

Once the 6 cyl is out today we can steam clean the frame and get things clean enough to get near it without getting FILTHY.

Next we can use published specs of the various components (Length etc) to calculate exactly what we can get away with.

The other big worry was the very shallow angle of the front drive shaft and how close this would get to the pan on the new tranny (Read this as "Will it hit" )


Soooo.

Looking good at present.

I suggested to Thumper yesterday that we use the two forward cab mounts from the donor rig and bolt them to the frame at the rear location of the "Quad cab" floor pan will reside and span the front and rear frame mounts with a box tube on either side.

Utilizing standard early/ mid 80's Suburban body mounts (Easy procurement ) the longitudinal tubes will bolt to the mounts and the cab can be built up from there.

My idea was to get the V8 and related gearboxes all in and situated and then add the floor pan.

A temporary bracket to mount the new steering column (91 Burb 4x4 tilt type ) can be added along with the mountings for at least one seat.

Other temporary items needed can be hooked up to get the beast so we can run the engine and move the truck around under it's own power.

Once the basic systems are proven then the cab can be finished up and built around the new engine and gear boxes.

We are (As stated early on in the thread ) adding full air brakes, so a suitable compressor needs to be added along with the needed mountings.

Once the steering column is located and the driver seat is in a comfy spot the air brake treadle can be located on the floor boards

To me it makes sense to get all the major mods done and then operate the beast with a minimal cab to check it out and then make the needed allowances in the cab assembly to be able to access the new components.


Ahhhhh.

Don't try this at home.


But.... AS I mentioned things are still in a state of flux and Thumper and I will get our heads together and figure out the plan
 
Last edited:

snowyrivers

Member
138
1
18
Location
Newberg Oregon
Engine buyer showed up about 10 am and we got after the last of getting the engine out.

I have never separated any of these engine tranny units before and was not expecting what we found.

The buyer was under the rig removing the lower bell housing cover and I told him he would need to remove some bolts that held the fluid coupling to the flywheel.

Haaaaaa.

I did not realize that there were 30 bolts in there.

OK
Fast forward, bolts out and engine swinging free on the the hoist hung off the skid steer.

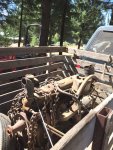
Loaded the beast up and sent it on its way.

Piccy's
 

Attachments

snowyrivers

Member
138
1
18
Location
Newberg Oregon
Picked up the TH400 last night for the project

Weather is going to close in here in a couple days so we need to finish getting the old tranny out and under cover.

It may be quite useful to someone doing a restoration on one of these trucks.
 
Last edited:

snowyrivers

Member
138
1
18
Location
Newberg Oregon
Just back from a 100 mile road trip to pick up the NP205 T case

It's one of the LH drop "Divorced" mount type units.

Dirty as sin but spins freely.

$50 bill was a great deal too.

First order of business is to CLEAN IT
 
Top
AdBlock Detected

We get it, advertisements are annoying!

Sure, ad-blocking software does a great job at blocking ads, but it also blocks useful features of our website like our supporting vendors. Their ads help keep Steel Soldiers going. Please consider disabling your ad blockers for the site. Thanks!

I've Disabled AdBlock
No Thanks