• Steel Soldiers now has a few new forums, read more about it at: New Munitions Forums!

  • Microsoft MSN, Live, Hotmail, Outlook email users may not be receiving emails. We are working to resolve this issue. Please add support@steelsoldiers.com to your trusted contacts.

M246 Revival

silverstate55

Unemployable
2,112
1,020
113
Location
UT
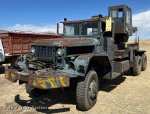
Several years ago I won an auction in Kansas for a 1954 Diamond-T M246. The auction video showed it driving and the crane operating, so I figured it would be easily put into service on my farm property.

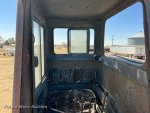
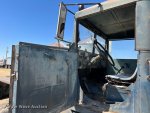
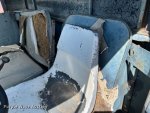
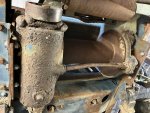
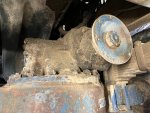
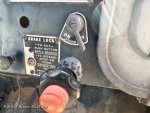
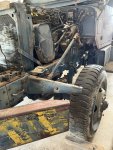
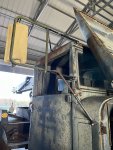
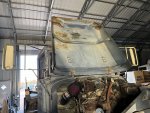
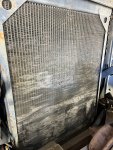
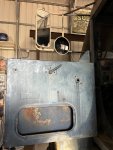
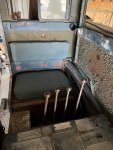
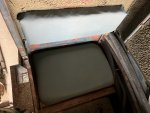
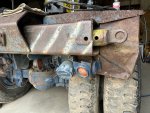
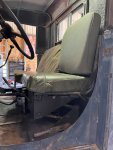
Once it was delivered I towbarred it off the lowboy with my 931 to my shop. It definitely had had a hard, outdoor life. But for a 70-year-old truck, it was in surprisingly decent condition. And it had a hardtop! It had definitely been used hard though; the front left corner was bashed in from running into something, the rear sheet metal was almost destroyed from backing into who knows what, the driver’s side window was shattered and the window frame broken, of course the seats were disintegrating and the driver’s seat was covered with a plastic chair, the wiring harness was almost totally unusable due to thoroughly rotting from weather/age, the front winch did not have any cable on it (and a couple of levers had been broken off), several missing glass panes from crane cab as well as missing heater/defroster parts, some of the crane hoses looked like they were original, brakes were unresponsive…. But it is a 70-year-old truck after all.
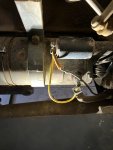
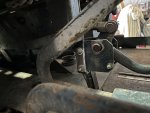
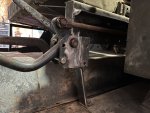
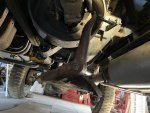
IMG_3469.jpeg IMG_3475.jpeg IMG_3471.jpeg IMG_2055.jpeg

IMG_3481.jpeg IMG_3472.jpeg IMG_3474.jpeg IMG_3473.jpeg
 

silverstate55

Unemployable
2,112
1,020
113
Location
UT
I wanted to get it into my shop, so I could work on it out of the weather. Someone at one point bypassed the original frame-mounted fuel filter to install a 24-volt fuel pump and used an inline Fram small engine filter. I drained the fuel tank and flushed it thoroughly, changed out the inline filter, flushed out the fuel lines and replaced any cracked fuel hoses, disassembled and cleaned the air cleaner element, filled the bottom tray of the air filter with some hydraulic fluid (didn’t have any 10wt oil on hand), freed up & lubed carb and accelerator linkages, sourced and installed missing accelerator and other misc springs, lubed up the distributor and other necessary spots in the engine compartment, and checked fluid levels in engine/trans/transfer case/diffs.

All 10 tires were just a couple of years old & were in great condition!

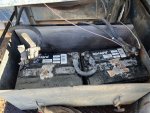
As shown in above post‘s pics, the batteries were in bad shape so I removed them and installed 2 new Group 31 batteries that were on sale at a local truck parts shop. I cleaned up all terminals and wire ends, removed a bunch of unnecessary wires, and tried to salvage whatever battery cables I could in order to see if it would turn over. Since the auction video showed it starting & driving, I figured it shouldn’t take much to fire it up.

Engine oil looked like it had been changed recently; it was still amber-colored and showed Full. So, connected batteries, flipped the switch in the cab & the Low Air buzzer instantly started its racket, and pressed down on the foot starter….NOTHING. Tried a few more times with the floor starter without success and then finally the starter engaged! Choked her about halfway and she instantly came to life!! It was a cold February day but once the starter engaged, she came to life and I didn’t need to leave the choke on for long at all. Clutch felt good & in First Gear she moved! High Range worked but couldn’t seem to get Low Range to engage. Drove her around my property for a bit but felt like something was dragging, preventing any up shifts.
Tried out the crane; the PTO lever engaged and I was able to use the aftermarket throttle control cable to rev the engine up to the -10 recommended range while transmission was in 5th gear. Had to block tires with large wood blocking, since there’s not a level spot on my property (hill country). Crane worked well! Boom up/down & out/in, cable out/in, slewed left and right without any issues…. Was a great feeling!

Drove her into a shop bay safely despite not having any functioning brakes. Tried retracting jib all the way but it stopped about 4 inches short; figured there was dirt & crud buildup in shipper boom so decided to put off rectifying that for a later date.
 
Last edited:

silverstate55

Unemployable
2,112
1,020
113
Location
UT
Once in a shop bay, I started an assessment of what absolutely needed to get fixed/rectified so I could start using the crane functions. First off was checking the floor starter switch, and noticed that the starter wires were frayed and completely missing insulation, so I replaced those and now the starter engages every time to floor switch is pressed.

IMG_9793.jpeg IMG_9792.jpeg
 

silverstate55

Unemployable
2,112
1,020
113
Location
UT
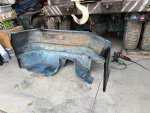
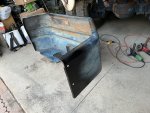
I removed the driver’s side fender to access engine and frame easier, and while it was out I hammered it back to close to what is should be. Had to chain a long bar to the fender mount to bend it back to straight. The bumper will eventually get heated with a torch and bent back to close to what it was, but for now it can wait.

IMG_9787.jpeg IMG_9789.jpeg IMG_9790.jpeg
 

silverstate55

Unemployable
2,112
1,020
113
Location
UT
The mirrors were just a bunch of WTF….someone deleted the original “Mickey Mouse” style and installed some aftermarket ones that were trashed. After digging through my spares I found most of what I needed, and found the rest on eBay. I decided that I would leave the aftermarket mirror arms in place and fit leftover M35-style mirrors to them on both sides. Had to soak the aftermarket mounting arms in in various fluids in order to break loose the decades of rust buildup but I was able to salvage them all.
IMG_9783.jpeg IMG_9801.jpeg IMG_9800.jpeg
 

silverstate55

Unemployable
2,112
1,020
113
Location
UT
I stripped out both cab doors to change out the totally destroyed window channels & non-existent weatherstripping. Also removed a driver’s side window from my M35 to install in this truck, as I wanted it to be as weatherproof as possible since it will be parked outside for a few years until I can get my covered parking structures built. It was pretty straightforward to do, just pay attention to proper mounting of the window regulators (make sure the button gets installed into slot inside door skin). What a positive difference! I bought enough to do my 931 & Deuce as well. I got all the hardware and parts from Big Mike’s.
IMG_9819.jpeg IMG_9820.jpeg
 

silverstate55

Unemployable
2,112
1,020
113
Location
UT
The crane cab seat cushions were totally disintegrated so I made up some replacements from my old 931 seat cushions (removed when I installed air ride seats). The original seat springs and base are usable so I saved them to eventually be restored and reinstalled.

IMG_9814.jpeg IMG_9813.jpeg
 

silverstate55

Unemployable
2,112
1,020
113
Location
UT
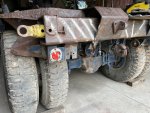
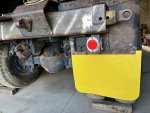
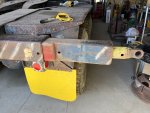
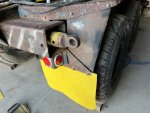
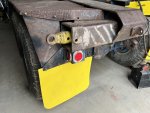
The rear mudflaps and sheet metal was smashed & bashed, and rubbing on rear tires so I set out to try to hammer everything back to close to what it was. I had some mudflaps that were removed from a scrapped semi trailer so I used them since I had them on hand. I removed all lights since the wiring harnesses were trashed, and stored them for future repair & reinstallation. If this truck ever does leave my property, it will just be down our private road to a neighbor’s property with only me driving/operating….lights aren’t a priority right now. I did install new armored reflectors just in case though.

IMG_9821.jpeg IMG_9822.jpeg IMG_9823.jpeg IMG_9824.jpeg

IMG_9834.jpeg
 

silverstate55

Unemployable
2,112
1,020
113
Location
UT
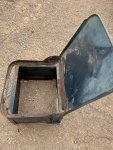
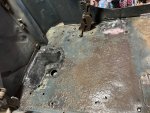
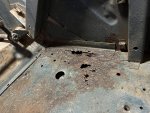
Moving on to the truck cab, the pedestal-style driver’s seat base was pretty rusted out around the bottom & the driver’s seat was very difficult to get in & out of. I had a spare spring-base Deuce seat as well as a complete passenger seat that were in good shape so I decided to swap them all out. The cab floor had several rust holes that I welded thin patches over. Under the passenger seat was an aftermarket coolant heater with an RV-style coolant pump connected to it, so I removed those as well as all associated wires/hoses. The bracket for the transfer case PTO engagement lever originally mounted to driver’s side pedestal base, so I had to modify it to fit the replacement spring-base Deuce seat. I had to replace some of the captive nuts in the cab floor due to rust/corrosion, and cleaned up the access panels as well as replaced the gear shift lever boot.

IMG_0226.jpeg IMG_0224.jpeg IMG_0223.jpeg IMG_0227.jpeg

IMG_0265.jpeg IMG_0319.jpeg IMG_0317.jpeg IMG_0315.jpeg
 
Last edited:

silverstate55

Unemployable
2,112
1,020
113
Location
UT
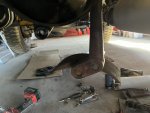
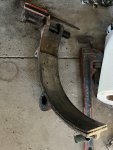
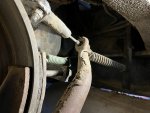
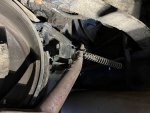
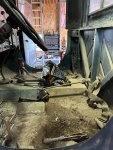
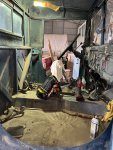
Since I live in hill country & there’s not a level spot anywhere on my property, I knew I had to get the truck brakes somewhat functional. I started by rebuilding the parking brake with new shoes & springs, and adjusting everything to work. None of the grease zerks were present so I installed new ones. The parking brake lever in the cab was disassembled and cleaned of rust/corrosion and everything lubed up. It works pretty good now.
IMG_0352.jpeg IMG_0353.jpeg IMG_0351.jpeg IMG_0350.jpeg

IMG_0349.jpeg IMG_0348.jpeg
 

silverstate55

Unemployable
2,112
1,020
113
Location
UT
Moving on to the rear brakes, as since this truck most likely would never get out of first gear while I own it, I opened up the master cylinder to find it bone dry (no surprise). But, the lack of corrosion and general positive condition gave me hope that maybe the brakes weren’t as bad off as I had originally suspected. It was obvious that the axle seals were long gone, but maybe the wheel cylinders might be salvageable.

I added DOT-5 to the master cylinder, bled it out along with the AirPak booster, and tried to bleed the rear wheel cylinders….nothing came out of any of the 4. Hmmm.

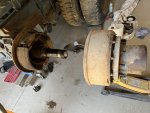
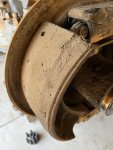
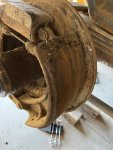
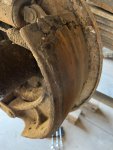
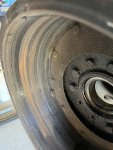
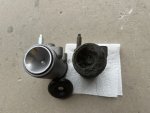
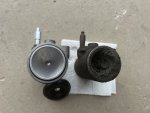
Time to pull axle shafts & drums, starting with the right far-rear. I modified the floor jack adapter (made & purchased from a fellow SS member years ago) to pull the brake drum & hub, which worked like a champ! To say I was dismayed at what I found once the rear drum/hub was removed would be an understatement… decades had passed since seals had disintegrated, pieces/parts were missing/broken, the brake shoes were disintegrating, and the drums were deeply scored. After removing the wheel cylinders, it was immediately apparent why no brake fluid was coming out of the bleeder screws: the cylinders were completely filled with dirt and other crud!

So, it was Decision Time. Since I had no intentions of driving this truck off my own property and it was very unlikely to even get out of first gear, the brake shoes & drums could wait…there was enough left on them to be able to stop & hold the truck while being used around my property. I ordered up new wheel cylinders as the originals were far too rusted and corroded to even try to rebuild, as well as everyone was out of stock on rebuild kits.

IMG_0321.jpeg IMG_0320.jpeg IMG_0322.jpeg IMG_0324.jpeg

IMG_0323.jpeg IMG_0325.jpeg IMG_0328.jpeg IMG_0329.jpeg
 

silverstate55

Unemployable
2,112
1,020
113
Location
UT
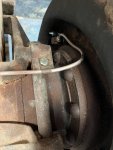
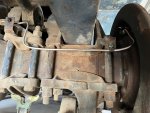
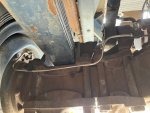
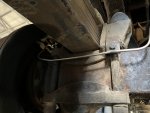
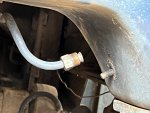
The rear brake lines were in bad bad shape and I couldn’t even find suitable NOS replacements. After reading through threads about originals bursting and whatnot, I went to NAPA to order 2 rolls of the copper-nickel brake line as well as new threaded fittings. I had doulble-flaring kits and benders already so I set to work to replace the originals. I avoided excessively sharp bends, taking care to be sure to be able to fit into stock mounting points and try to stay away from getting snagged by brush or other obstacles.

I wish someone would make this copper-nickel tubing in larger sizes! It is great stuff and very easy to use; very easy to double-flare without cracking as well.

IMG_0327.jpeg IMG_0332.jpeg IMG_0333.jpeg IMG_0334.jpeg

IMG_0335.jpeg IMG_0345.jpeg IMG_0347.jpeg IMG_0346.jpeg
 

silverstate55

Unemployable
2,112
1,020
113
Location
UT
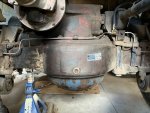
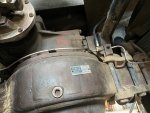
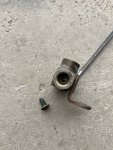
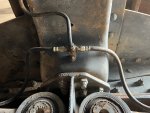
The two rubber brake hoses from the split valve block to the axles had been disconnected when I got it, and I couldn’t see through the split valve block mounted to the frame crossmember…it seems that it was plugged or blocked with something. So, it was a 2-day adventure to remove it, fix it, and reinstall it. Someone had for whatever reason sealed it with a small screw; I removed it and inspected the flare fitting points...they were fine and damage-free so I reinstalled it, later connecting the rubber brake hoses (courtesy of Erik’s) with the original screw-type clamps.

IMG_0337.jpeg IMG_0340.jpeg IMG_0341.jpeg
 

silverstate55

Unemployable
2,112
1,020
113
Location
UT
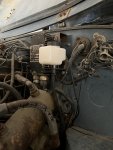
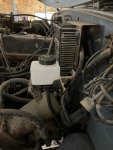
Master cylinder and AirPak booster bled out fine, but when I finished bleeding rear wheel cylinders (and tightening up leaking connections), a puddle of DOT-5 formed at the right rear-rear tire where it met the concrete floor….UGH.

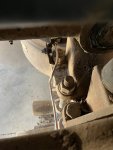
I pulled the axle shaft and drum/hub, to find that the locating pin for the rear brake shoe had broken off and the brake shoe had come to rest on the rubber seal of the wheel cylinder….and the rubber seal had been punctured by the brake shoe resting against it. So, I ordered some new pins & small parts from Big Mike’s as well as another new wheel cylinder (rebuild kits still completely out of stock) and installed the new parts. I put everything back together and started the bleeding procedure all over again.

This time all went well with the rear wheels, but noticed a steady drip of brake fluid coming from the hard line between the master cylinder and the booster...nothing I tried could fix it, so I found a NOS one on eBay. When it arrived, it was in perfect condition but needed some persuasion to even come close to fitting. Since it’s steel, I could only get it close enough and had to remove the brass block where it enters the booster to get it to fit without stripping the threads. However, since there was still a lot of tension pulling the steel brake line towards the back of the truck, it allowed brake fluid to leak out of the flare fitting. No amount of persuasion nor tightening could stop this leak, and I ended up over tightening the flare fitting which caused the flared steel line to crack. UGH.

Instead of trying to salvage the steel line or purchase another, I went to my local hose supplier and had them make me a hydraulic hose with matching fittings instead. After installing this and adding brake fluid, it leaked from flare fitting where hose mounts into brass block at bottom of brake booster. Disassembled everything AGAIN, and found that the brass block was slightly cracked around flare fitting (probably from my earlier tightening attempts.

I found one vendor who had these brass blocks as well as new copper washers from Big Mike’s, and I am currently awaiting them to arrive to finish the brake work and start using the crane on projects.
 

silverstate55

Unemployable
2,112
1,020
113
Location
UT
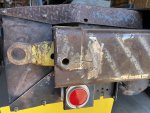
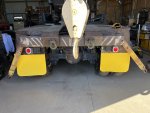
In the meantime I decided to tackle the rear outriggers; whenever I would push/pull on one side, the other side would respond as if they were one solid unit. They were in fact two separate pieces but rusted together.

I spent several full days researching TMs (-10, -20, -20P, -35, -34P, et al) as well as all through this forum as much as the Search function would allow me to….but I found NO reference to these rear outriggers at all. No schematics, no drawings, NOTHING. Not even for the elusive M819. I also noticed that there are no references for the crane cab structure for the M246/M819 either, other than the gondola and controls that are common with the 543/816 variants.

I verified that I had downloaded ALL TMs for not only my M246 & M39-series, but also M819 & M809-series as well. NOTHING. I found this odd as typically the military has TMs for EVERYTHING, even close-order drill….yet I couldn’t find anything to show how to repair or replace the rear outriggers (including rear sheet metal) nor the upper crane cab structure & accessories (defroster/heater hoses, fans, wipers, etc…). Strange.
 

silverstate55

Unemployable
2,112
1,020
113
Location
UT
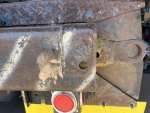
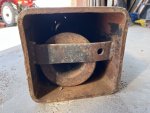
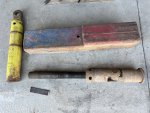
The rear outriggers needed attention, as it seemed like they were one solid unit inside the rectangular steel housing, and wouldn’t line up with the holes to insert travel pins into, nor would they extend out enough to both deploy at the same time. After reading through the many threads on M816 & M939 outriggers, I suspected that mine were also 2 separate pieces and set about to try to separate them.

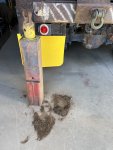
After some persuasive applications with a sledge hammer, the two rear outrigger sections finally separated and I was able to easily pull them out to disassemble on the ground. HOLY CRAP these things are HEAVY!!

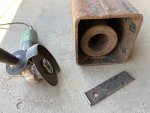
I found that someone had welded in some steel straps as limiters to prevent the outrigger jacks from fully retracting into the housings and not allowing the travel pins to be inserted. I used a cutoff wheel in my grinder to cut them out; I don’t see any reason to weld on new ones on the ends of the housings, since it’s just me using the truck.

I cleaned them up and painted the housings quick, replicating the traces of paint that were still present. I also put a light coat of grease on the threads of the jack legs.

The pads/feet for the jacks are still present, in their original mounts on the wrecker bed, and in great shape. I just had to source 2 new 1-inch mounting pins.

IMG_0941.jpeg IMG_0942.jpeg IMG_0943.jpeg IMG_0945.jpeg

IMG_0946.jpeg IMG_0947.jpeg IMG_0949.jpeg IMG_0944.jpeg
 

m1010plowboy

Well-known member
Steel Soldiers Supporter
3,945
2,839
83
Location
Edmonton, Canada
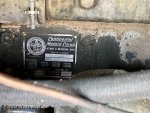
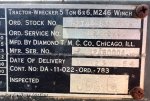
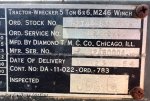
How do the serial numbers work? I see 246 a bunch of zeros and a 4.

Is that the 4th truck off the line?

IMG_3475.jpeg

I can't get to the TM library for a few weeks but will check for outrigger info. If other TM requests come up let me know. We found more manuals for 5 tons in a wrecking yard and need to see what we have.
Huge round of respect for anyone saving the big iron. It's not easy. :beer:
 
Top
AdBlock Detected

We get it, advertisements are annoying!

Sure, ad-blocking software does a great job at blocking ads, but it also blocks useful features of our website like our supporting vendors. Their ads help keep Steel Soldiers going. Please consider disabling your ad blockers for the site. Thanks!

I've Disabled AdBlock
No Thanks