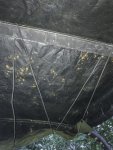
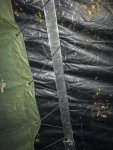
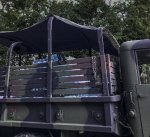
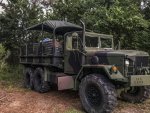
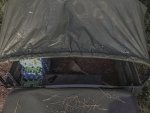
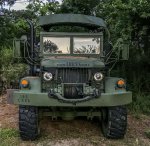
I don’t want to highjack the OP thread here. But since my bed cover design was mentioned here I’ll post it here on how I made it, design and testing.
The Design:
I wanted a shade cover that was durable yet light weight and easily stored on the truck. Something that could de used as a bed cover or a side type awning (think RV retractable side type awning but without the hard tube and permanent mounting). So that meant it was going to have to be a tarp like device. Foldable, compact, look fairly stock (to the untrained eye) be OD or black, be more durable than your average poly tarp and not break the bank. Also had to be full length of the bed 12’ and be 8’ wide, with tool less installation and be done by one person. If you think about ball those parameters that’s a pretty tall order.
For a material I came up with reinforced vinyl, that checks those boxes. Problem was to buy it was going to cost several hundred dollars and I couldn’t find the right OD color. Anything green was really green and would look aftermarket on the truck. So color was a big problem. I really dint want black as we all know how hot that is. It would also have to be custom made adding more $ to the several hundred dollars to the equation.
For years I have been using old billboard vinyl signs as equipment tarps. They will last ten times longer than the blue Poly tarps. They are usually like 14’ X 40’ ish. When you can find them, and they are well under $100. I had a couple on hand that were in really good shape, not weathered or full of pin holes. So I set out to choose one and cut it up for my project. Pro tip: if you stretch out a tarp that size on your lawn. Don’t walk away and leave it until it cools off this afternoon. The heat under the tarp will kill your grass in short order.
The Cover:
With a 14’ x 40’ rectangle of dead grass in the yard. On the 14’ side I measured 8’ wide and cut it with a straight edge. Making a 8 x 14 tarp basically. Pro tip: use a 2x4 to back your cuts. I used a utility knife and a piece of 1x1x 20’ square tubing as a straight edge.
Laying it out on concrete or any hard flat surface Is much better for accurately measuring. Also use some kind of weights to keep it taught for measuring. I know you thinking the bed is only 12’ why cut it 14’. Wait for it…..
The good thing about these billboard signs is there is usually an ultrasonic welded channel all the way around the outside of the sign. Reinforcement for mounting the sign to the billboard. That channel is just right to use as an outer sleeve for the first bow (closest to the cab) to go inside of.
So the front is secured from the factory, so to speak. There should be a channel on both ends front and back. Your going to need a grommet kit. There’s different sizes in brass, stainless steel ect. Dealers choice on that. You can put the grommets in before or after you put it on the truck. Again dealers choice. The grommets go on the rear, tailgate end. If it’s not reinforced (double layered)fold it over itself before putting in the grommets. If the rear is double layered it would hurt to fold that over (4 layers) before putting in the grommets. This what is going to hold it on the truck and make it a cover. Not a bed flag flopping in the breeze.
Center the cover on the front (#1) bow. Stretch it out to cover all the bows to the back of the bed. What’s left hanging over the last bow (#5) fold it under the cover. Using something like paracord. Lace the cover to the next closest bow (#4) using your newly installed grommets. And presto you have a shade cover for your bed.
Now, before say well that sounds easy and you set about getting the required materials. Understand, this is a static or VERY low speed cover. I have destroyed 5 of these covers trying to find a speed threshold that won’t destroy it. Or what it would take to secure the cover to be able to survive highway speeds. That takes a lot more work and expense that I haven’t perfected yet! As easy as it is to put up I don’t know that i will. One way to secure the cover for the highway is to roll it up. Cut a piece of 1/2” PCV 8’ long and roll up the cover on the PVC (rear to front) secure the cover and the PVC to the #1 bow with bungee cords. The PVC is flexible enough to bend to conform to the front bow. You can go down the road that way.
The PVC gives the rolling/ unrolling of the cover some structure to make it a one man job. Without that structure rolling the cover just becomes wadding it up really. Once your ready to put the cover on. Unroll it flip the end over the #5 bow and lace it up. Walla your done. Pro tip: put some screws in the PVC on each end to match your grommet spacing. Hook the screws in the grommets when you roll up the cover. It’s Much easier that way.
Colorizing your new cover:
I choose to put the black side down and the signage up on mine. So that meant I had to make all the signage go away so it looked somewhat stock. After much research and trial and error. I settled on just painting the vinyl. Easy touch up not much hassle to paint it. The best and more importantly east expensive solution I could find.
I washed and cleaned the vinyl first. Let it dry in the sun, but not on the grass ha I’m no idiot (rhetorical). The sun will dry it and also heat the vinyl to some degree. I don’t know if the heat helps the paint stick or not. It seemed a good idea in my head. And all I had to do was keep someone for steeling my lawn chair and have another frosty beverage. I used Behr premium OD in a HVLP gun to paint the top of the cover. It’s what I had on hand. I painted it in the sun and by the time I got to the bottom the top was dry to the touch. I gave it enough coats to cover the lettering (white letters on a dark blue background). Let it dry all day in the sun. Surprisingly it’s actually pretty durable. Its been on and off 5-6 times now and still in pretty good shape. Your mileage may vary.
Raising the bows to walk under:
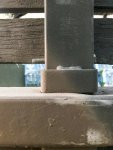
On the troop seats, the steel uprights/pockets where the bows go. There is a steel reinforcement strap and hinge for the seat portion to hinge down near the top on the bed. I drilled 1/4” holes through the steel rectangular tubing for 1/4x20 bolts. This is what the bow legs sit on. I used a mag-drill. I used bolts because they were cheaper than lynchpin’s. Pro tip: without nuts on the bolts they will walk out of the holes, so use your nuts gentleman! If you run a 1/4 x 20 tap part way thru a Ny-Loc nut it will give just enough resistance to hold the nut and bolt together but still be a tool less install. You will have to do this by feel.
I am 6’1” and there is enough room for me to stand comfortably in the bed. I have found if I leave the #1 bow at the normal height not only does it give me easier access to bungee the rolled up cover but when the cover is on I think it looks better as well. I have gone down the road at highway speeds with just the bows (no cover) in the raised position and not had any issues of loosing any part of the bows. However, I do have the bow uprights and corner pieces bolted together. The top pieces are not bolted to the corner pieces.
This gives you the basic theory behind my design and a few things I learned along the way. This is how I went about making the final product. Which is what you see in the pic posted previously. I have enough money in R&D with this design to buy 2 new cargo cover and a ton of hours in research. But in the end Im pretty happy with the overall end result and a lot of Deuce owners seem to really like it.
If you change something I’d be curious what and why.
I’ll have to set it up but Pics to follow.
So there you have it gents…


