• Steel Soldiers now has a few new forums, read more about it at: New Munitions Forums!

  • Microsoft MSN, Live, Hotmail, Outlook email users may not be receiving emails. We are working to resolve this issue. Please add support@steelsoldiers.com to your trusted contacts.

M35 GAS Motor wiring

Kaiser67M715

Member
699
26
18
Location
NH
Hi all, Figured I'd ask outside of my other thread, if this is out of line mods please move it.

BUT I have started on the wiring for the truck, my guess is the when it was overhauled by the military in '89, they upgraded the wiring to the later style so Turn signals can be used. my truck had the flasher, stalk and lights, and has the Alternator and the distributor wire was two piece. the NOS harness I have is for the generator, and of course the distributor wire is 1 piece.

So, should I cut it up to splice in the correct connections for turn signals(required for law) or try and sell the harness, OR adapt the A2 harness?

Heck if someone needs the correct GASSER harness, I would be more then willing to cut a deal, or even trade harnesses if some one is willing to do that

two pics of what I have, first is whole harness, second is the generator/voltage regulator plug

Harness.jpgGnerator plug.jpg

If I still had the generator I wouldn't be asking, and I would splice for turn signals, that isn't an issue. I just don't know if its worth more to not cut it, and get a new harness?

so, input?
 

Kaiser67M715

Member
699
26
18
Location
NH
OK, so I found a harness that converts to the 60 AMP ALT. so that will be easy enough. hard part now is the turn signals, I can't reuse the plug to the Flasher module, so I would need to find one. All the wiring is the cab wasn't too bad, so I cut off all the good connectors.

now I can't even find an A2 harness, 5 days ago it was all I could find, trying to find wiring diagrams. the one I keep finding is only $50, but happens to be the same exact harness I have! so I guess the M-F harness is rare?!!

any input on where to look for the turn signal relay connector? OR an A2 harness?? had I done another search before posting, I might not have posted. but I was going off what I found a couple days ago

this is turning into a rather long project
 

Kaiser67M715

Member
699
26
18
Location
NH
OK, whether or not anybody is really interested in this or not, figured I would update.

I found the connector for the Flasher Relay, and the GEN to ALT wiring. I bought the correct Mil-Spec wire(about 25 ft, but thinking maybe I should have bought more, I'll have to see) and Ill just wire into the current harness; I only have to Tap into the connector for the 3-Switch Light Control Box.

Now the part I need a little clarification on. Following the M35-A2 wiring schematic, while cross referencing with the M35 Gas wiring schematic. I need to tap into Wire #22, port C of the light control box for my stops to function. and Wire 160-161, Port J for my input signal for the flasher unit. Correct?, has anyone done this before?
 

gringeltaube

Staff Member
Super Moderator
Moderator
Steel Soldiers Supporter
6,986
2,523
113
Location
Montevideo/Uruguay
Wire #22 runs from L.SW-"C" to TS.SW-"D", only! Then #160 connects L.SW "J" with TS.SW "G".
Flasher input is #167 and connects "F" with "B" on the flasher unit.


G.
 

Kaiser67M715

Member
699
26
18
Location
NH
Yes, sorry, and thanks . guess I need to take a step back and rest my eyes. The A2 wiring is on a 24X18 sheet, but the original schematic fits onto half a page, been using a magnifier.

so splicing into #22 won't be too overly difficult, will also need to add 1 wire to the Rear Harness Connector, so I have 2 turn wires.

#160 is the Turn input, which I guess what I accidently called Flasher input, connects L.SW "J" with TS.SW "G"


I like making wiring looms from scratch, But I Hate, splicing and adding to existing wiring; Unfortunately money hasn't grown on any trees near me, them Douglas Connecters are a bit pricey.

Is it hard to open one of these connectors? I am a little wary of trying to open my new ones to add wires
 

gringeltaube

Staff Member
Super Moderator
Moderator
Steel Soldiers Supporter
6,986
2,523
113
Location
Montevideo/Uruguay
....The A2 wiring is on a 24X18 sheet, but the original schematic fits onto half a page, been using a magnifier.
Half a page?? You have that wiring schematic (PDF-file) downloaded to your PC, don't you?

Is it hard to open one of these connectors? I am a little wary of trying to open my new ones to add wires.
"Opening" as in disassembling? I understand that you want to do the splicing inside the connector, under the boot, right behind the metal pin or receptacle, crimped to the wire? It is possible yes, although not really practical. Most people simply strip the wire behind the connector and then after soldering plus some tape, use shrink tube to finish the joint.


G.
 

Kaiser67M715

Member
699
26
18
Location
NH
No, the M35A2(the linked one you posted) is on a 24"x18" sheet. but the GAS motor M35(before A1, no turn-signals) is in one of my TM's, I have been using both to verify differences, to figure out exactly what is needed to be done, while also comparing to the harness.

the reason I would need to actually open one is because the NEW harness Rear Harness Connector(the one I will be splicing/adding into) only has 5 wires(only 1 wire for both stop lamps) where for the turn signals I need 2 separate wires(1 for left, 1 for right), But as stated it may be easier to cut and splice, I will need to double check the plug currently on the truck, it may be usable enough for this. same thing with L.SW, #160, "J" is not used, so I need to add the wire, so splicing is a little hard, without a wire to splice into
 

gringeltaube

Staff Member
Super Moderator
Moderator
Steel Soldiers Supporter
6,986
2,523
113
Location
Montevideo/Uruguay
Ah.. now I know what you mean: yes every harness connector can be opened and you can easily add (solder) a wire to any of the unused pins.
Same with the light switch connector: just open it and add the missing wire at "J".

Lubricate the rubber parts with dielectric grease before applying too much force.


G.
 

Kaiser67M715

Member
699
26
18
Location
NH
OK, 'nother question,

I picked up the 20 amp GEN to 60 Amp ALT conversion kit. I am trying to determine how to wire it in, or connect it rather.

it says to add the y connector to #27 output from the Master Switch. I currently have it wired so #27("B" of M.S.) connects to #27 dash panel, AND #85 Air pressure switch. I have #12 distributor wire on its own circuit("D"), and 11 splits into "A" and "C"

#11 on the original wiring, is the power in for the M.S., is #27 just a wire to tell the Alternator to charge? and if so, can I safely split it so #12 and #27(Alt) come from "C" on the M.S.? I don't wish to overload a circuit and fry the harness... Or should I split #27(Alt) and #27(Dash) into one circuit, and #85(Air) and #12(dist.) into another???

I believe that #27 Alt wire is Labeled #1 on the new M35A2 Diagram
 

Kaiser67M715

Member
699
26
18
Location
NH
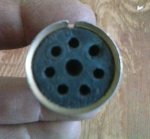
can someone please identify what letter corresponds to which wire on this connector, the one that plugs into the Turn Signal switch on steering column

Turn signial switch plug.jpg

I was hoping for metal tabs on the wires, but no such luck, so I need to figure out which wires went were so I can splice into it.

Thanks
 

gringeltaube

Staff Member
Super Moderator
Moderator
Steel Soldiers Supporter
6,986
2,523
113
Location
Montevideo/Uruguay
Attached picture showing list of wire numbers (on factory crimped-on aluminum tabs).

In our M35A2 Wiring Schematic everything coincides except for position "F" which is marked as 167 FLASHER INPUT; "G" as 160-161 TURN INPUT; AND "H" as 19A FLASHER OUTPUT.

Still clear enough, I guess.


G.
 

Attachments

gringeltaube

Staff Member
Super Moderator
Moderator
Steel Soldiers Supporter
6,986
2,523
113
Location
Montevideo/Uruguay
Glad to help.

Regarding your question in post #9: yes, I would simply connect the small wire on the ALT (= exciter wire) to your "distributor"-wire, terminal "D" on the MS.
And no, there is no way you could fry any of those wires/ circuits. It's all relatively low Amps, there.


G.
 

Kaiser67M715

Member
699
26
18
Location
NH
All right, got the signal wiring all done

Turn Signal Wires.jpg

working on hooking it up, got almost all of it all set, just need some help with the instrument cluster

I have two wires, #6 and #8, that don't seem to go anywhere

and the volt meter has a #12 wire on it, but nowhere to Connect? and I can't find a reference in the manual for #6 or 8 or where to hook the Vlt meter to.

any help is appreciated
 

Kaiser67M715

Member
699
26
18
Location
NH
all right, so I am loading these two pics,
Volt Meter connect.jpg#6 and #8.jpg

first is the Volt Meter, with the wire attached, labeled #12

second is the two unknown wires, I did find this

http://olive-drab.com/od_mseries_circuits.php

and so I guess I have #9 and #8, NOT #6, do those Two, or one connect to the Volt meter?

the PO had actually unhooked some wires, in prep for the new harness, so I didn't have a clear view of what went where, but with the military system of numbers, I figured it would be pretty straight forward. The switch between Douglass and Packard hasn't been much help either.
 

Kaiser67M715

Member
699
26
18
Location
NH
So I somehow managed to figure out that the Air pressure gauge is supposed to be mechanical, not electric, so that was where my missing power wire went. so I stole the one from the fuel level to get by, as my tank is out due to it being unable to hold fluid. and I did figure out that it is a VOLT gauge not an AMP gauge, so #8 and #9 are not needed

last thing to do is hook up GEN to ALT conversion kit, and I should be fine.

that should close out this thread, with no unanswered questions
 

rflegal

Member
128
11
18
Location
New Mexico
Nice job - I am doing the same thing to my M36 gasser. The truck was owned by a mining company an their electricians butchered the wiring to make it MSHA compliant. How bad were the connectors to disassemble and add the turn signal wiring to?
Just unscrew?
Keep up the good work, electrical is always fun!:naner:
 

Kaiser67M715

Member
699
26
18
Location
NH
Yup, just unscrew, pull the rubber bushing back(I put some dielectric grease on the wires before, bushing slid nice and smooth), then the cups are right there.

I would take sometime and use an old connecter(if possible) and figure how much solder is needed to fill the cup when soldering in a wire. I was able to twist 3 short lengths of solder, and cut off just above the cup, this gave the best amount. Pretty much, you don't want the solder to spill out, nor do you want so little you can't see it.

Also make sure you thread the new wire through the bushing, otherwise you will repeat soldering a couple time, happened to me.
 

rflegal

Member
128
11
18
Location
New Mexico
Thanks. Spool of 500' of 14 GA prestolite came in so time to make a new rear harness. Do you have the original trailer hookup? I was thinking about adding a new std. trailer plug as well, like my excursion.
 
Top
AdBlock Detected

We get it, advertisements are annoying!

Sure, ad-blocking software does a great job at blocking ads, but it also blocks useful features of our website like our supporting vendors. Their ads help keep Steel Soldiers going. Please consider disabling your ad blockers for the site. Thanks!

I've Disabled AdBlock
No Thanks