- 131
- 309
- 63
- Location
- Charlottesville, VA
This is admittedly a bit specialized, and maybe even obscure, but I thought I'd post my experience in the possibility that someone may find it helpful.
I was getting ready to paint the bare chassis. Even though everything except the springs and axles had been removed, the clutch and brake pedals remained. For some reason, I thought to check the freedom of movement of the pedals and discovered that they were "sticky." Thinking that 65 years of dirt, mixed greases (if greased much at all), and moisture had taken its toll, I elected to disassemble, inspect, and clean the unit. The cab has been removed for rehab, so access is obviously much easier. I think, though, that after removing a couple of access panels at the pedals, you'll probably find that it's not a bad job. Here goes:
The assembly as installed. Note the brake return spring at the base of the right pedal has to be removed. Also, the master cylinder is already removed. At the bottom of the photo is the cab mount bracket. The bolts extending from the bracket are the mounting bolts for the master cylinder.
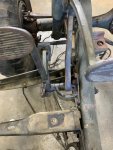
Inside the frame rail showing the shaft with the clutch lever. Note that the shaft extends through the frame rail inside a bearing (bushing) which allows rotation through the frame.
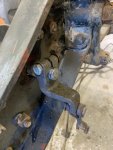
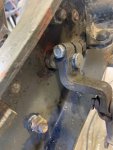
View of the free play adjusting bracket. You will have to loosen the adjusting bolts. The bolt that holds the bracket in place is shown loosened in the photo. Note that the shaft is grooved on one side which keeps the bracket from sliding off the shaft.
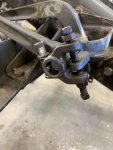
The clutch pedal is held in position by a Woodruff key which locks the pedal and allows the rotation of the shaft when depressing the clutch pedal. Woodruff keys make installation easier as the part can slip over the key as the key rotates in place. This is where it may get tricky if the cab is still installed. The key was jammed in place from dirt and some rust. I had to use penetrating oil, a punch, vise grips, and patience to remove the key.
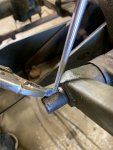
Using a dead blow hammer to tap the clutch pedal near the attachment point. I had already soaked the shaft with penetrating oil.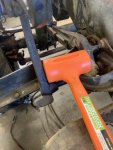
The shaft exposed (after I wiped off then end). Shown is the brake pedal. Note that I already removed the brake return spring which runs from the hole at the base of the pedal back to an L bracket mounted to the frame rail.
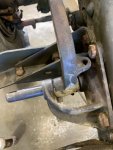
The shaft is removed next. I used a punch which is roughly the diameter of the shaft. If you're doing this with the transmission installed, you'll probably have to remove the clutch lever on the inside the frame rail and use a shorter punch to push the shaft to the outside.
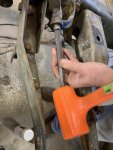
The shaft as it appears inside the frame rail. Note the bearing just inside of the clutch lever. The bearing fits inside the hole through the frame rail and allows the shaft to rotate in place.
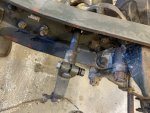
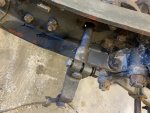
The shaft came out fairly easily without beating on it. Again, I used plenty of penetrating oil during the process. As the shaft moved, I applied more oil to cover the exposed part.
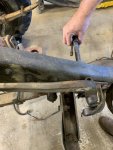
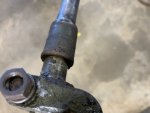
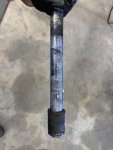
The removed shaft. Note the old dried grease on the shaft and the dirt and grease buildup on the bearing. In effect, there was no lubrication whatsoever.
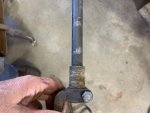
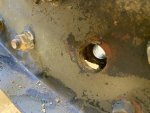
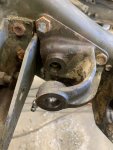
Here's a shot of the hole through the frame rail and the outside main bracket assembly. Note that the hole on the inside of the frame is of larger diameter to accommodate the bearing. Also note the grease fittings below the bracket. They are easy to miss when servicing your truck. These grease fittings lube the brake pedal. The clutch pedal has a dedicated fitting.
Shaft and bearing with clutch lever still attached after cleaning. Wear was present, though minimal. I used degreaser and a wire brush. The shaft is useable.
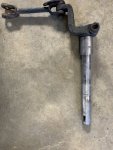
Next I took on the pedals. While clean up is similar, there are a few differences. Note the grease fitting on the brake pedal. This fitting is not present on the clutch pedal because it does not rotate on the shaft, unlike the brake pedal which does. Also note the encrusted dirt and grease on the grease fitting. This will have to be cleaned.
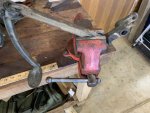
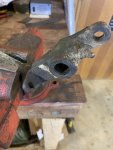
I used an old battery terminal wire brush to clean the holes through the pedals. The brake pedal has a brass insert with holes to retain grease. If you have a brass brush, you are less likely to damage the insert. My brush was steel, but I used degreaser and a light touch. I removed the grease fitting and used a pick to clean out the old congealed grease.
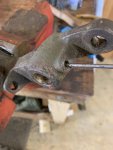
Finishing up. This is a better view of the brass insert. The pick is showing through the hole for the grease fitting. Note the dirt. I used a rag rather than a wire brush for final clean up. It's important to make sure the holes in the insert are as clean as possible to allow the grease to do its job.
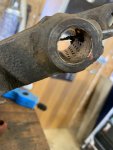
Clutch pedal is similar which, again, does not have the brass insert or the grease fitting.
Assembly will be in reverse order of disassembly. This should take care of the sticky pedals and allow for much smoother operation.
I was getting ready to paint the bare chassis. Even though everything except the springs and axles had been removed, the clutch and brake pedals remained. For some reason, I thought to check the freedom of movement of the pedals and discovered that they were "sticky." Thinking that 65 years of dirt, mixed greases (if greased much at all), and moisture had taken its toll, I elected to disassemble, inspect, and clean the unit. The cab has been removed for rehab, so access is obviously much easier. I think, though, that after removing a couple of access panels at the pedals, you'll probably find that it's not a bad job. Here goes:
The assembly as installed. Note the brake return spring at the base of the right pedal has to be removed. Also, the master cylinder is already removed. At the bottom of the photo is the cab mount bracket. The bolts extending from the bracket are the mounting bolts for the master cylinder.

Inside the frame rail showing the shaft with the clutch lever. Note that the shaft extends through the frame rail inside a bearing (bushing) which allows rotation through the frame.


View of the free play adjusting bracket. You will have to loosen the adjusting bolts. The bolt that holds the bracket in place is shown loosened in the photo. Note that the shaft is grooved on one side which keeps the bracket from sliding off the shaft.

The clutch pedal is held in position by a Woodruff key which locks the pedal and allows the rotation of the shaft when depressing the clutch pedal. Woodruff keys make installation easier as the part can slip over the key as the key rotates in place. This is where it may get tricky if the cab is still installed. The key was jammed in place from dirt and some rust. I had to use penetrating oil, a punch, vise grips, and patience to remove the key.

Using a dead blow hammer to tap the clutch pedal near the attachment point. I had already soaked the shaft with penetrating oil.

The shaft exposed (after I wiped off then end). Shown is the brake pedal. Note that I already removed the brake return spring which runs from the hole at the base of the pedal back to an L bracket mounted to the frame rail.

The shaft is removed next. I used a punch which is roughly the diameter of the shaft. If you're doing this with the transmission installed, you'll probably have to remove the clutch lever on the inside the frame rail and use a shorter punch to push the shaft to the outside.

The shaft as it appears inside the frame rail. Note the bearing just inside of the clutch lever. The bearing fits inside the hole through the frame rail and allows the shaft to rotate in place.


The shaft came out fairly easily without beating on it. Again, I used plenty of penetrating oil during the process. As the shaft moved, I applied more oil to cover the exposed part.

The removed shaft. Note the old dried grease on the shaft and the dirt and grease buildup on the bearing. In effect, there was no lubrication whatsoever.


Here's a shot of the hole through the frame rail and the outside main bracket assembly. Note that the hole on the inside of the frame is of larger diameter to accommodate the bearing. Also note the grease fittings below the bracket. They are easy to miss when servicing your truck. These grease fittings lube the brake pedal. The clutch pedal has a dedicated fitting.


Shaft and bearing with clutch lever still attached after cleaning. Wear was present, though minimal. I used degreaser and a wire brush. The shaft is useable.

Next I took on the pedals. While clean up is similar, there are a few differences. Note the grease fitting on the brake pedal. This fitting is not present on the clutch pedal because it does not rotate on the shaft, unlike the brake pedal which does. Also note the encrusted dirt and grease on the grease fitting. This will have to be cleaned.


I used an old battery terminal wire brush to clean the holes through the pedals. The brake pedal has a brass insert with holes to retain grease. If you have a brass brush, you are less likely to damage the insert. My brush was steel, but I used degreaser and a light touch. I removed the grease fitting and used a pick to clean out the old congealed grease.

Finishing up. This is a better view of the brass insert. The pick is showing through the hole for the grease fitting. Note the dirt. I used a rag rather than a wire brush for final clean up. It's important to make sure the holes in the insert are as clean as possible to allow the grease to do its job.

Clutch pedal is similar which, again, does not have the brass insert or the grease fitting.
Assembly will be in reverse order of disassembly. This should take care of the sticky pedals and allow for much smoother operation.


