• Steel Soldiers now has a few new forums, read more about it at: New Munitions Forums!

  • Microsoft MSN, Live, Hotmail, Outlook email users may not be receiving emails. We are working to resolve this issue. Please add support@steelsoldiers.com to your trusted contacts.

M37 Restoration - Newbie Attempt

jrodjared

Member
97
1
8
Location
Baltimore, MD
Made a little progress this week. Kind of tough when you don't have an indoor facility and daylight fades earlier, but you make do! The goal was to free the frame of the transfer case and axles.

Started by unbolting the leaf spring supports and knocking them out about half way.
Removed ye old master cylinder
Removed all of the linkages
Removed various brake line fittings and valves, being careful to label everything as I go.

I then got my friend Cliff to help me pull the transfer case from the frame with his little John Deer tractor.
 

Attachments

jrodjared

Member
97
1
8
Location
Baltimore, MD
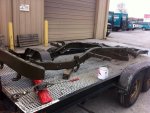
With the frame stripped down, it was time to load it up on the trailer. Cliff wanted to show off the lifting power of the tractor. :shock:
 

Attachments

jrodjared

Member
97
1
8
Location
Baltimore, MD
Before leaving, best to write down what the markings say. Won't ever see them in their original paint ever again.

Here I am dropping the frame off at Neighoff & Sons, a blasting and painting place here in Maryland. They did an OUTSTANDING job, very pleased with the results. Pics to follow.
 

Attachments

jrodjared

Member
97
1
8
Location
Baltimore, MD
At this point with a blown motor, I am contemplating swapping out for a 318. I picked up a motor for $200, it's a steal. I know it runs, the guy I bought it from started it right up on the ground. I look at it this way, even if I only get a year out of it, at least the truck is then mocked up to receive another 318. At that point, everything else will hopefully be done, I can just slide a new motor in it's place. Fingers crossed it won't come to that.

Going to take it to the shop on post tomorrow and use their heated pressure washer. Hoping with a little degreaser and some power I can free it from its filth and slap some paint on it. Thinking of keeping it original Chrysler Silver, with OD green and black accessories. Thoughts?
 

Attachments

jrodjared

Member
97
1
8
Location
Baltimore, MD
Here are some pics of me picking up the frame from the blast place. Absolutely amazing work. :beer:
 

Attachments

jrodjared

Member
97
1
8
Location
Baltimore, MD
Figured since it was cold out, I can't really work outside so I might as well work on what I can in smaller doses. I decided to start with the axles, since I will need them to put the chassis back together. Had a **** of a time getting it from my friend's yard to my M-Haul, but we made it.


Rear axle still in one piece with the springs, shocks and drive shaft attached. Might need some PB Blast and a torch.

After some messing with, I was able to free the shocks from their mounts. These bolts that go through the shock, do they come standard with the replacement set? Or do you/can you buy them separately?
 

Attachments

jrodjared

Member
97
1
8
Location
Baltimore, MD
I've got the axles pretty much torn apart at this point. Cleaned all the grease off, next step is to hit it with the wire wheel, prime and paint. I'm going to order new seals for everything too. No sense in putting old crummy parts back on. Got to start fresh!

When I first started working on the rear dif, I discovered a welded bolt on the 3rd member. I thought to myself, hmm that's strange? Why did Private Snuffy weld that sucker on there? So of course, I removed it to find out. When I did, the bolt came right out, and then a little piece of metal dropped in to the pumpkin. After fishing it out, this is what I saw.

Does anyone have any idea what it is for? It looks like it was being held in with nothing but that one bolt holding pressure to it against the ring. Was it to hold the gear in place under high torque situation? I imagine if you took this thing off while the truck was together, and then rolled it in either direction, it would fall to the bottom and you would be forced to pull the whole 3rd member out to fish for the part. What's up with this? I guess it explain why it was welded shut......
 

Attachments

Roller

Active member
Steel Soldiers Supporter
191
58
28
Location
North Lake, WI
I've got the axles pretty much torn apart at this point. Cleaned all the grease off, next step is to hit it with the wire wheel, prime and paint. I'm going to order new seals for everything too. No sense in putting old crummy parts back on. Got to start fresh!

When I first started working on the rear dif, I discovered a welded bolt on the 3rd member. I thought to myself, hmm that's strange? Why did Private Snuffy weld that sucker on there? So of course, I removed it to find out. When I did, the bolt came right out, and then a little piece of metal dropped in to the pumpkin. After fishing it out, this is what I saw.

Does anyone have any idea what it is for? It looks like it was being held in with nothing but that one bolt holding pressure to it against the ring. Was it to hold the gear in place under high torque situation? I imagine if you took this thing off while the truck was together, and then rolled it in either direction, it would fall to the bottom and you would be forced to pull the whole 3rd member out to fish for the part. What's up with this? I guess it explain why it was welded shut......
The welded in piece is the thrust block adjuster and lock nut. The thrust block rides against the ring gear with .005 to .008 clearance. Once adjusted the procedure was to tack weld the adjusting screw and nut to the housing.

Frank
 

jrodjared

Member
97
1
8
Location
Baltimore, MD
The 318 ran but looked like ****. Figured I'm going all the way here not going to put back an old dirty engine. I have to admit though, I was a little over zealous with my tear down efforts.
 
Top