• Steel Soldiers now has a few new forums, read more about it at: New Munitions Forums!

  • Microsoft MSN, Live, Hotmail, Outlook email users may not be receiving emails. We are working to resolve this issue. Please add support@steelsoldiers.com to your trusted contacts.


M561/M792 Gama Goat Parts X-Ref thread

quarkz

Supreme Galactic Cleric
805
71
28
Location
Kennewick, WA
I hope this can become 'just' a M561/M792 Gama Goat Parts thread.
No conversations, jokes or polls.

Please post comments to this thread in 'Comments on the Gama Goat Parts X-ref thread'.

Since there are 5 or 6 projects currently in the process of getting Goats up and running, plus the handful of Goat owners with historic info from when they were completing their restorations, along with the passing of Russ Blackburn Jr. and thus the loss of the gamagoat.com website, it would be nice to consolidate parts info.

So if you have part info to add please follow this guidance:

1.) put the item in the subject line,
2.) start the post with item name, part#, brand, quantity and NSN if you have it.
3.) don't quote previous posts,
4.) uncheck the box with your long signature lines,
5.) limit images to the picture of the part, or of its location, or electrical schematics.
6.) if you post up someone else info give them credit, post their username in parenthesis
7.) if you have an addition or update, PM the OP or a Moderator and ask them to add/update the info, rather than having info in multiple places. Or you can just PM it to me and I will tr to get it added.
8.) MM is a members message, not TM driven info.

For Technical Manuals go to:
http://www.steelsoldiers.com/showthread.php?119161-Gamagoat-manuals (patracy)
http://www.steelsoldiers.com/showthread.php?118882-M561-TM-9-2815-214-34-Engine (goat whisperer)

---------------------------------------------------------------------------------------------------------------------------------------------
Posthumous thank you to Russel E. Blackburn Jr., Wrangler of the now defunct Gamagoat.com

The following is borrowed from his site.

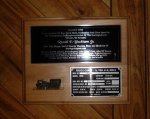
russ_blackburn_jr.jpgAward-Plaque2.jpg

I have been in several organizations, military and civilian, and have never worked with such a special group of
people as us "Goat Herders." We are truly dedicated to the preservation of the Gama Goat and sharing of knowledge
for future generations. Every one of us truly deserves credit for this fantastic web site.

Our web site will be one year old this month (February 2004), and we have already had over 56,000 visits to our
website. We have the worlds leading web site for Gama Goats, and set examples for many other military vehicle web
sites to follow; simply put there are no better military vehicle web sites in the whole world!

I wish to thank all of you for the wonderful award plaque - it honestly brought tears to my eyes when I was surprised
to receive it in the mail today (22 January 2004). A very special thanks to all of you who took the time and effort to
make this a special day for me and Gamagoat.com. All of you will always be special in my heart.

-Russell E. Blackburn Jr.
Gamagoat.com Webmaster
 
Last edited:

quarkz

Supreme Galactic Cleric
805
71
28
Location
Kennewick, WA
Belts, Oil, Brakes, Clutch, Crank Shaft Seal, Oil Filter

From the Ol' Gamagoat.com website.
------

Fan belt / Alternator:
NAPA: 25-9670HD (recommended)
NAPA: 25-17035, AC/Delco 17670 which is a 1/2 inch x 67-3/8 inch (fit is near perfect)
MM: Make sure the tensioner spring is working on the water pump pulley, I sprayed mine with some kroil to loosen it up, the TM also mentions this. Spray oil right on the spring and let it soak in. (m38inmaine)
MM: This water pump belt also fits: Napa XL 25-7345 (wsucougarx)
------

Oil - 13 quarts with filter change.

(Updated 10/27/2015)
MM:
The oil requirement for a 2 cycle Detroit 353 is a straight 40wt. CF-2 rated. Rotella and Chevron 100 (100 not 400). Do not use use multiweight (15w40) you will very quickly get liner scuffing that destroys cylinder honing and high levels of injector cam lob wear. NEVER use multi weight oil in a 2 cycle.
When you purchase or order oil be sure its single weight and has the correct rating. CF-2 (the 2 is for 2 cycle) Not CF-4 for 4 cycle. (gamagoat1)

-and/or-

MM: Chevron Delo 100 is specifically designed for Detroit 2 stroke diesels. I buy it from west marine. (doghead)

If you want more information then contact:

Shell Oil Products US
Houston, TX 77210
-or-
http://www.shell-lubricants.com.

------

Brake shoes are the same as those for the M715.


Wheel Cylinders:

The brake cylinders are common Wagner Lockheed (MCgraw-Edison) same as for the M715.

NAPA: wheel brake cylinder kit, PN 54

Wagner: cylinder assembly, hydraulic brake, wheel FSCM 7L639 MFR/PN F 72766
DLA700-85-1139

Wagner Lockheed
FD9346


-------

Clutch Parts
Rebuilt/Remanufacture numbers:
Pressure Plate - CA0351
Disk - CD0082
Bearing - CC1705C
Clutch fork ball stud - GM P/N 3725240
Clutch pressure plate bolts - NAPA P/N 615-1114 (identified as "Ford" style)
Clutch fork retaining spring - GM P/N 838987


If you can't find them locally then these guys would be happy to ship them to you.

Brake, Clutch & Drum Service, Inc.
4934 W State Street
Milwaukee, WI 53208
(414) 476-2292
(800) 478-2292

------

Crank Shaft Seal

Front crank shaft seal:
Detroit: PN 23514608


MM: interesting note on the crank shaft seal, it actually is the seal for a

71 series Detroit, the goat engine was the only 53 series engine to use that seal.

------

Oil Filter

MM: When you remove your filter take note of where the rubber seals go! Keep you old O-rings, you never know when or where you may be able to use them.

Oil Filter
Baldwin: PT11
Wix: 51138 (Carquest parts number is 8513)
Delco: PF147
Fram: CH119PL
NAPA: 1138


Oil filter/canister system replacement: The new adapter bolts to the block in place of the old system. Don't forget the gasket and oil filter (ordered separate).

Conversion Kit:
Detroit Diesel Adapter: 5104419
Detroit Diesel Gasket: 5121205

Filters:
Detroit Diesel Filter: 23530409.

MM: The long filter for heaver equipment is not necessary and may be hard on your oil pump; therefore not recommended.

AC Filter: PF911
NAPA Filter: 1810

Fumoto T201N
, oil draincock w/ 5/8" nipple, fits steel oil pan. (m38inmaine)

Oil plug 3/4"-14 NPT thread not 3/4-16 UNF
 
Last edited:

quarkz

Supreme Galactic Cleric
805
71
28
Location
Kennewick, WA
Cooling

------
Water pump: NAPA: 25-7355 or 25-09033
------

Radiator -

The radiator has a 4 core radiator design and will not overheat easily;
MM: Stick to a 7psi radiator cap ( add part# )which less likely to have problems.

Thermostat -
Thermostat is 303814, 3-53 (170 Deg. Opening Temp), MM: Make sure the tensioner spring is working on the water pump pulley, I sprayed mine with some kroil to loosen it up, the TM also mentions this. Spray oil right on the spring and let it soak in. (m38inmaine)

NAPA #34033 (mkcoen)

Radiator Hose -

Delco: Lower radiator hose, PN 70739
NAPA: Lower radiator hose, PN 8075
,
MM: Which as supplied is much longer than needed, both legs must be cut.

NAPA: Upper radiator hose, PN 745.

MM: My goat as most still probably do have a upper radiator pipe. I replaced mine with the NAPA (PN 745) to reduce
noise. I had to cut off about one inch on the engine connection end for a perfect fit.


MM: The top radiator connection uses two pieces of 1-3/4 inch hose. Since I'd seen a number of goats with the top
radiator fitting messed up I decided to use silicone coolant hose up there as it is more flexible. While it is much more
expensive than regular radiator hose, I figure it's more unlikely I'd have to take the radiator out later and get it fixed.

By the way, the silicone hose is guaranteed for life, if you use the special spring loaded hose clamps. There is also a 1
-7/8 inch hose on the goat but it's that hidden piece that connects the oil cooler to the fitting going into the block; it's
hidden behind the blower side engine mount. Then there is the bypass tube that is plainly visible on the blower side
also; it's up high near the fan; that uses two pieces of 1-1/8 inch hose.

Radiator Flushing -
MM: There is no drain on the radiator itself, for one thing it is not the lowest point on the system. There are only two
drains I found, one is under the oil cooler which is on the blower side of the engine up front (closer to fan that is). It's
under it, and there is a tube that comes off of it and runs back about six inches; basically all of this runs right along
the edge of the oil pan . My tube was plugged so I just took it off. The valve will drain the radiator, the oil cooler and
perhaps 80% of what's in the engine block. The rest of what's in the block is drained by the second drain valve which
is basically under the tail end of alternator, or just to the right of the bottom of the fuel filter. Mine was seized and
would not open so I took it out and replaced it. From what I saw, and tried to analyze, as I was going over my engine,
you must open both of these valves to totally drain the system, but perhaps 95% (just a guesstimate) of the coolant
will come out from the oil cooler valve alone. One thing to remember is that the goat does not have the kind of cooling
system your car does, there is no overflow or recovery bottle. The tank on the side of the radiator is just a reservoir.
The cap does not have the double seal such that you can connect a recovery bottle to the tube that comes off the top
like your car would have. All this means is that if you fill the reservoir to the top your going to loose some coolant the
first time you get the engine hot. I have not looked at the "official" material for what level to keep the coolant at yet
but in a system like this your are not supposed to fill it all the way. Also notice that they tap off three different places
and run small tubes back to the reservoir, the back of the head, the thermostat housing, and the top of the radiator
(inlet side), these should pass any trapped air in the system back the reservoir rendering it harmless.

MM: Detroit Diesel is very strongly opinionated about not using normal anti-freeze (coolant). Normally I am skeptical
of companies making statements to the effect that you must use their particular version of something in their machine.
But this issue with wet sleeved engines is well known and I would suggest that you follow it as well. Detroit does sell
several coolant products but you can also get coolant from Cummins or others which is meant for wet sleeved engines.
If you use normal anti-freeze your cylinder liners erode away over time from microscopic bubbles in the system.
Sounds strange I know, but like I said, this is common knowledge among many other diesel people I know.

MM: Had a talk with the one decent parts guy at my local Detroit Diesel Authorized (DDA) dealer. I think I've got the
straight poop on the coolant. Basically it seems that there are two issues, one being that they do not want you to use a
coolant with higher levels of silicates and phosphates, the silicates seem to be the biggy. From what I have heard
elsewhere this silicate issue is becoming more of a problem in recent years. The second issue is that they want you to
have what they refer to as Supplemental Coolant Additives (SCAs) in the coolant, this has to do with cylinder liner
erosion problems. He said Cummins uses a package they call "DCAs" (if memory serves) but Detroit does not like
Cummins' packages. Detroit's SCA package is very similar to Caterpillars package. So they have a number of products
including premixed and concentrated coolant with the additive, and the additive alone. I cornered him and said look,
this thing is going to get 20 hours of use a year, maybe as high as 100 but more likely 20 or so. Given that he
recommended getting the concentrate coolant, which is the low silicate, low phosphate type with the SCA additives.

Dilute with distilled water 50/50. Once a year check the coolant for the additive level using some paper test strips
(they have). If and when the test strip shows the additive level is below "acceptable" then go buy the pint bottle of
additive and bring it back up. You can really get carried away with this stuff, and perhaps if you were running a truck
full time it might be justified but for what I am, and most of us are, doing this is perhaps a reasonable compromise.
The coolant by the way is DDA part number 23512138, higher cost than bargain brand but not to grossly so.

Note:
Where possible, always use distilled or highly filtered (including carbon filtration) water for filling and/or flushing of
the radiator - this will eliminate electrolytes that may damage aluminum.
 
Last edited:

quarkz

Supreme Galactic Cleric
805
71
28
Location
Kennewick, WA
Fuel System

Fuel System

Fuel Filters -
Baldwin: F845-A (primary) and PF902 (secondary)
Delco: TP540X and T522
Fram: CH 1126PL and CH1169
NAPA: 3552 (primary ) and 3540 secondary (engine mounted)


General Information:

Diesel Additive -
MM: It is a good idea to add a diesel fuel additive about every 3,000 miles, or if the vehicle has sit for a long period of
time. This will prevent moisture in the fuel tanks, clean internal engine parts, and prevent diesel sludge.

Filters -
According to the TM, the fuel filters should be drained weekly. To do this, for the primary fuel filter open the
draincock and allow 1/2 cup of fuel to drain. Do the same for the secondary filter (engine mounted) and note if there is any moisture present. If there is moisture at the secondary filter the manual says to contact organizational maintenance,
but we know what that means to us: you will have to drain all the fuel out of the fuel tanks and clean out the fuel lines
up to the secondary filter. And, don't forget to change both filters or let them air dry out completely.

Note:
When you remove your filter(s) remember or write down where the rubber seals go! Keep you old O-rings, you never
know when or where you may be able to use them.

Priming the filters:
Make sure the filters drain cocks are closed, then remove the bolt on top of the filter housing and slowly pour in clean
diesel fuel until the filter housing is full. Using a wrench, you may wish to lightly tap on fuel lines to help remove any
air bubbles while filling the filter housing. Once you are done replace the bolt and start the engine.

Caution:
If the engine does not start almost immediately then turn off the switch and repeat the steps above.

Caution:
Always check your fuel filters for water after swimming by draining a little fuel in a cup.

Leaks -
Fuel leaks can predominately be narrowed down to one of three kinds: fuel lines, fuel filters, or tanks. Very rarely,
virtually never, will you find an engine internal leak.

Leaks in the fuel system allow fuel to escape and/or air to enter. This will cause the engine to bog down when
accelerating or operating at high speeds. To remedy this start at the fuel filters; did you just replace fuel filters, and
prime them correctly?

Sending Unit -
The fuel sending unit is an electro-mechanical device that measures the fuel in the fuel tank, usually with some type of
fuel flotation device, and transfers the fuel level either mechanically (on a spiraled stem) or electrically (electrical
resistance) to your fuel gauge.

MM: The fuel level sending unit is from the M-38 and can be purchased new. Some are pretty pricey but are available.

Tank
Fuel tanks are interconnected, meaning, as you fill one tank (driver or passenger vehicle side), you are filling both.
That's why you don't have two fuel gauges and/or a fuel switch from one tank to the other.

Caution:
The side you are NOT filling may be slow, but to help, remove both fuel caps to more quickly equalize tank pressures,
otherwise you may under fill or over fill your tanks. And, before you drive off ensure both tank caps are secured -
these are hard to find.

Inserts/Fuel Strainers:
When you remove the fuel cap you will find an insert (strainer) with a wire mesh primary fuel strainer to catch large
debris; the strainer is not so much important in today's modern refueling systems, but is when you get fuel from a
suspected/foreign source. Always check fuel strainers for rust and/or wear; you can prevent rust and wear by keeping
the fuel level above the strainer.

Caution:
Until further information is available if you have a strainer that is rusted out or weak remove it to prevent a fuel
blockage problem (the fuel filters should suffice for now).

Fuel gauge wire -
The fuel gauge wire is below the water level for swimming and requires a water tight seal. It is a good idea to re-route
this wire higher and permanently seal off the old hole through the tractor/cab by welding (complete weld, not spot
weld) in an aluminum plate or bolted with hard (water tight) plastic washers and stainless steel bolts. You may have to
splice in some wire to make a longer connection; make your splice well inside the tractor/cab so you will not have a
splice outside.

Tank level -
The tanks should never be completely full; this allows of fuel expansion and proper ventilation, plus helps in proper
tank-to-tank venting while filling. Tank vents behind the radiator, on the drivers side.
 
Last edited:

quarkz

Supreme Galactic Cleric
805
71
28
Location
Kennewick, WA
Steering & Suspension

Steering & Suspension

Steering
General Information
Steering System
Type Mechanical front and rear
simultaneous operated.
Steering ratio 24:1
Turning ratio 29 feet
Alignment (Wheel)

Camber and Caster: Gama Goat steering is not supposed to return to center when the steering wheel is released.

TM section for wheel alignment, TM 9-2920-242-34-2-1 (1981).

Steering Column Boot -
Steering boot: this boot protects and holds the lubricant for the lower steering column to steering gear box; it is
located at the bottom of the steering column and is a rubber boot with a hole to administer in lubricant.

------
NAPA: PN 4441 (contains boot, clamp, and grease).
------

Caution:
Some boots have a hole to add lubricant - don't over do it; if you have a leaking boot or overfill the boot then you will
end up with oil on your floor.

Steering Box (Carrier) -
Rear (carrier/trailer)

Fill plug access: to add fluid to the steering box access is located in the carrier on the drivers side, near the rear of the
carrier. Do not remove the entire plate, only the plate plug.

Fluid/Oil: use the standard lubricant/oil identified in General Maintenance (above).
Steering Box (Tractor)

Front (tractor/cab)

Access plate:
This plate is located outside (on the drivers side of the tractor/cab) is removed to work on the steering box, not to fill
the steering box with fluid.

Fill plug:
To check or fill the front steering box with lubricant the plug access is located in the tractor/cab on the drivers side
floor, near the steering column.

Fluid/Oil:
Use the standard lubricant/oil identified in General Maintenance.

MM: Corn Head Grease, John Deere , part# AN102562 1.5 tubes per gear box.
MM:
Add zerk fittings to either fill or drain plug for easier grease gun use?

MM: Corn Head Grease is a common substitute used in steering gear boxes on old tractors(restored for show and light use) it does not tend to drip out like gear oil.

Suspension (axles and wheel assemblies)
General Information
Suspension
Front and Rear Independent coil and springs at each wheel.
Center Single leaf spring and swing axle.

This section covers the axle arms: front and middle (on the tractor), and rear (on the carrier).

A-arm, coil spring - TBD
Shock absorber replacements: TBD

MM: I thought I would share the results of my research into goat shock absorbers. I measured a front shock and found
the compression and rebound lengths to be 11.75" and 16" respectively. I may have been off slightly, but I believe
these measurements are accurate. The shocks are of the "sleeve and bushing" mounting type. The closest replacement
I could find is a Monroe product with a 11.625" compression, and 16.5" rebound. This unit is the Monroe Gas Magnum
6500 series, part # 65419
.

The fact the rebound length of this unit is .5" longer than original may have a negative,
or even a hazardous effect upon operation if one were in the habit of "getting air" with the Goat, or just got in a
situation where a wheel is hanging in mid-air. Because the shock acts as the extension limit of the A-arms, were the
A-arms to over-travel there is the remote possibility that the coil spring could dislodge from its lower perch, but I
seriously doubt it. Of course the shorter compression length is of no concern because of the tractor-mounted rubber
bump-stop. I believe that the front and rear shocks are the same. I will let you know what I find out about the center
axle shock set when I get there. By the way, I found the Monroe # 65419 on-line. I hope this helps save some time for anyone needing to replace their shocks. I know some goat herders don't put enough time on their machines to even care about how they ride, but I do, and it made a great improvement!

Coil spring replacements: TBD

Caution:
Coil spring replace is a dangerous job and must only be done at a qualified automotive shop or you must have all
specialty and safety tools and equipment to remove them and install new ones.

Suspension plug replacements: TBD

Suspension plugs-
16 more points to check; don't forget to check these often and especially when you perform your
preventative/routine maintenance. Instead of using a sealant you may use teflon tape to seal these!

Ball Joints

TBD (ball joint sizes should be the same - part numbers are not provided yet - see the TM).

MM: Other ball joint replacement should be as the front ball replacement described below.

Front Ball Replacement: (I do not have any of the pictures.)

To replace the front ball joints! Tools and parts used (you should know or recognize) are shown in this picture,
including a 9/16" box/open wrench.

The bottle jack is placed under the lower swing arm while the small shop jack is placed under the brake drum
assembly to hold the weight and counter the spring.

The top joint is now easy: remove the cotter pin and loosen the castle nut from the taper pin (15/16" socket). Do not
remove the nut but leave it on enough to hold the total assembly from falling. Use a ball joint separator and hammer
to loosen the taper pin.

Loosen the lower joint the same way but note the angle of the ball joint separator in the picture.

Remove the four (4) bolts and nuts holding the upper joint housing. The bolt head from below is difficult to hold
because the head is in a channel. By holding the 9/16" open wrench at the right angle, you will get enough hold to
loosen the tightest nut (the upper arm will swing away a bit). The new joint can be fitted by the tapered pin and castle
nut. Do not attach the four (4) bolts and nuts yet. Instead, remove them and nuts holding the lower ball joint housing
(using the long extension from above).

Lower the shop jack as in the picture (enough to remove the lower old joint and fit the new one). Fit the castle nut and
jack up the assembly until you can fit the four (4) new bolts and nuts for the lower joint. Tighten completely and
remember you may have to hold the wrench at an angle.

Jack up the brake drum assembly to put pressure on the lower joint taper pin then tighten the castle nut and align the
hole with a groove. Install the cotter pin, tighten the upper joint castle nut, and fit the cotter pin.

Front Axle - TBD
Middle Axle - TBD
Rear Axle -TBD

Oil / Lubrication
Use the standard lubricant/oil identified in General Maintenance.

Springs - TBD

------
Wheel bearings: (2 parts)

Inner with race 27690
Outer cone 27620


------

MM Tool: Spindle nut socket, one of these may be hard to come by, but there are several out there, just ask our members on the Yahoo Group (I do not know if this is still true). Following is what it should look like (member made) with milling sizes following; please note, these are the same tool, the pictures were just taken at different distances.

MM: if you want to make your own then as to dimensions, I guess all you really need to know is that the slots in the
nut are 0.370" wide and a minor diameter (so to speak) of 3.900". My tool has 0.350" wide keys that are 3.920"
across, keep the tabs around 0.35" long.

MM: when removing the axle nut, take note of the keyed washer behind it. This washer has a dimple in it. Behind the
washer is the internal hub seal. The dimple on the washer fits into the hole on this seal.
Steering & Suspension
 
Last edited:

quarkz

Supreme Galactic Cleric
805
71
28
Location
Kennewick, WA
[Transmission

Transmission

The transmission is a common GM SM-420, 4 speed, except for the remote shift cover.

General Information
Transmission
Type - Manual shift

Speeds:
Four forward - One reverse:
Synchromesh shift - second, third,
and fourth.

Gear Ratios
First 7.06:1
Second 3.58:1
Third 1.71:1
Fourth 1.00:1
Reverse 6.78:1

Lubricant Capacity
5.5 pints

Milky looking lube oil: in many of the older models there was no vent plug to remedy moisture and pressure requirements. This lead to moisture and pressure build up giving the lube oil a milky look (like coffee with cream, mocha). There is a vent plug solution! Image in TM9-2320-242-34-2-1, (January 1981).

MM: Just look at the top of the transmission. There's a tower sticking up with a lever sticking out the side that goes to the actual shifter. On the side of that are two 1/8" NPT pipe plugs that are used to disassemble the internal mechanism. Just take one of them out and put the 1/8" NPT vent fitting in. My only thought about that is that you may get oil dripping out of there as it's sitting horizontal. You should not get oil splash way up in that tower but anything may be possible. I would think it would be better to install an 1/8" street elbow and then install the vent fitting vertical.

Cover Seals -
Some of the cover seals are attached to the tractor/cab body and are not specifically designed for waterproof protection, but only for noise and vibration. It is suggested that all tractor/body seals be removed and a suitable replacement be made to the fiberglass transmission cover - this way they will be easier to access and repair later.

Fluid / Oil
Use the standard lubricant/oil identified in General Maintenance.

Gear - TBD
Shifting - TBD
Rests - The transmission steady rests characteristics are as follows:
Seals / Gaskets - TBD
 
Last edited:

quarkz

Supreme Galactic Cleric
805
71
28
Location
Kennewick, WA
Engine

Engine

------
MM: I have a strong opinion about gasket cement, but it's just my opinion. The worst thing you could do is to use silicone. Since your filter mount is new and freshly machined, and assuming that the surface on the block should be nice and smooth/clean also, I'd soak the gasket (both sides) with Permatex high tack spray (thin red liquid). Let is get tacky, say 20 or 30 minutes, then install. Else if surfaces are questionable then my next choice would be Permatex #2 (non-hardening), spread out a thin layer on both metal surfaces and install. The nice thing about Permatex, be it #1 or #2, is that it is readily dis-solvable with acetone or other solvents. But I'd stay away from silicone, especially on an oil system.


Oil Gage

Note:
Some goats have oil pressure gauges that read 0 to 90, which may mean your goat has a different oil sending unit.

Oil Pan Gasket
Detroit: PN 5143271


Oil Pumps -
Dual oil pumps are what makes the Gama Goat a monster on slopes, where while on an incline or decline the engine (heart) is still supplied with it's life's necessary lubricant fluid. Other, 3-53 engines (non-aluminum block and not Gama Goat) are usually equipped with a single oil pump for level ground operation where block weight is not a consideration.

Oil Pump Gasket, pickup tube(s) to oil pump body (two required per Gama Goat engine).
Detroit: PN 5176680

Oil Pump Gasket, block to back plate.
Detroit: PN 5116386

Oil Pump Gasket, front cover to body (O Ring Cord).
Detroit: PN 5138991

Oil Pump Gasket, body to back plate.
Detroit: PN 5142712


MM: Here's were things get interesting. How many of you know that the Detroit in the goat has two pickup tubes (right rear, left front), two oil pumps, and two relief valves? They must have been serious about this thing running for extended periods of time at high angles. The civilian 53 series parts book shows a completely different oil pump setup than this. One little hint here, do not remove any of the 5/16 inch bolts, those are what hold the sandwiched parts of the pump unit together. If you only want to remove the pump intact then only remove the 3/8 inch bolts, of the 11 bolts, three are stand alone and eight also go through the radiator mount. Oh, another little hint, don't go banging on the pulley to get it off. I used a puller anyway as it was on tight but, after I got it off I realized that it is a cast Aluminum pulley, and will bend out of shape easily.

MM: there are two pumps and two pickups but they are not configured the way I was thinking. Now that I have the whole unit apart I see what they are doing. The first pump, call it the primary, sucks off the front of the engine (fan end). It feeds the oil cooler with an over-pressure relief/bypass, then after the cooler is the second relief which is the normal one that would limit max system pressure. From there it goes out to the oil galleries (one on each side of the block). Now this second pump sucks from the back of the sump. If one was driving down a steep grade the back sump would be full and the front one (primary) may starve for oil. The secondary pump however just dumps its output right back into the front of the oil pan, that's all it does! Looks like all it's doing is washing oil down the front end of the pan in hopes that if the front
pickup is sucking air, that it would suck up some of the oil running down underneath it. Not exactly what I had thought when I first found two pumps in there.

Pressure Washing / Steam Cleaning

Steam clean or pressure wash the engine and engine compartment as you would on any other vehicle.

Caution:
Be sure to remove the drain plug before steam cleaning or pressure washing.

Valve Cover Gasket - NAPA: OS-31585

MM: If you notice excessive oil and grime below your valve cover it probably means the gasket is leaking and needs replacement. You should always examine your engine for such leaks when you change your oil.
 
Last edited:

quarkz

Supreme Galactic Cleric
805
71
28
Location
Kennewick, WA
Other Part Numbers

This section will list part numbers or part info provided by various Goat Herders that didn't get moved into the previous sections.

From m38inmaine:
Brake light switch=M151/M151A1 Mutt/jeep
Speedo cable=M35A2 tach cable
Steering wheel=5 ton/any 18"
Front marker bulbs #623(1)#1251(1)#1683(1)
Rear B/O 1251(2)#1683(1)
Rear Stop/Turn #1691(1)#1683(2)
Steering Shaft(all)U-joint NAPA #861
Pintle Hook Nut Socket Size 1 7/8 (shallow)
Rear Steering Box Output Shaft Seal National 240480
 
Last edited:

quarkz

Supreme Galactic Cleric
805
71
28
Location
Kennewick, WA
Guidance from other Steel Soldiers

Gamagoat1
: Oil should be single weight (40wt) and have a CF-2 (for 2 cycle) rating. ( Oct 27, 2015 )

doghead : Chevron Delo 100 is specifically designed for Detroit 2 stroke diesels. I buy it from west marine. ( Oct 27, 2015 )

wsucougarx : Water Pump Belts-NAPA This water pump belt also fits: Napa XL 25-7345 (Oct 27, 2015 )

wsucougarx : Water Pump Belts-NAPA This water pump belt also fits: Napa XL 25-7345 : Are you looking for PN 11659951?
They're the brake lines at each wheel. They're available on a popular auction site starting with the letter E...
Unfortunately, site rules don't allow me to insert the link. Just search by the pn (Feb 22, 2018)

-----------------------------------------------------------------------------

Terry Shelswell : I have recently acquired an M561 and I am quite interested to learn all that I can about this MV. Thanks so much to all M561/792 owners
in this thread for their info. I am in need of 1 of the flex lines between the fuel tank and the hull, and some other parts that I probably
don’t even know that I need yet. Who is the best source? ( Apr 23, 2019 )

Jericho : Any local hose shop , I converted mine to Teflon stainless braid with AN fittings. sourced my fittings from a national speed / race supply catalog ( May 12, 2020 )

svaasand : The brake hoses are using hydraulic compression fittings, according SAE J514 standard. I purchased mine at at
www.discounthydraulichose.com. They can make any length with any fitting on the end. The goat uses 1/4" steel brake lines,
which is the -04 size. It would also be possible to purchase compression fitting to inverted flare adapters, and use normal brake hoses.
( Jul 31, 2020 )

--------------------------------------------------------------------------------


rdbisse : How about wheel seals, anyone have some or know where to get some? 5330-00-781-9639 PN 11602255! ( Jan 3, 2022 )
 
Top
AdBlock Detected

We get it, advertisements are annoying!

Sure, ad-blocking software does a great job at blocking ads, but it also blocks useful features of our website like our supporting vendors. Their ads help keep Steel Soldiers going. Please consider disabling your ad blockers for the site. Thanks!

I've Disabled AdBlock
No Thanks