• Steel Soldiers now has a few new forums, read more about it at: New Munitions Forums!

  • Microsoft MSN, Live, Hotmail, Outlook email users may not be receiving emails. We are working to resolve this issue. Please add support@steelsoldiers.com to your trusted contacts.

M809-series (M818) Air Brake Retrofit

MyothersanM1

19K M1 Armor Crewman
Steel Soldiers Supporter
1,958
427
68
Location
Culver City, CA
In this thread I will be discussing, hopefully in some detail, the conversion of my M818 to full dual circuit air brakes. I plan to post up as I progress with the installation. This mod should work for all M809-series and M39-series 5-ton trucks.

The air assisted hydraulic brakes, as delivered on these trucks, are incredibly efficient in bringing these vehicles to halt and if well maintained are very reliable. The problem I have with this whole system is the fact that there is nothing to fall back on if there was to be a brake line catastrophic failure. I want to lessen my liability in our over litigious society, err on this side of caution and render my truck more safe to travel on public rights of way.

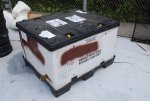
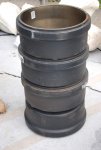
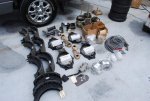
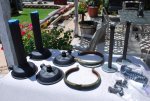
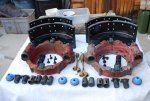
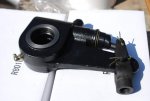
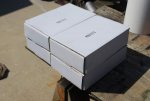
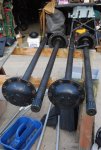
After much thought, study and consideration, I have decided to equip my truck with Q Plus 16.5" X 7" s-cam operated brakes for the rear tandems. These brakes and all associated parts are readily available readily available on the civilian market. I was able to purchase all the parts in kit from Cariboo 6X6 in British Columbia. These kits are supplied from an East Coast distributor. The kit comes with drums, shoes and shoe kits, spiders, chambers, s-cams and their brackets, seals, tubing, relays, seals, wheel studs and all hardware needed to complete the retrofit. It does not include front brakes.
DSC_0004.jpgDSC_0003.jpgDSC_0002.jpgDSC_0001.jpg

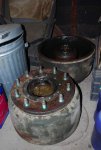
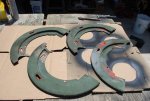
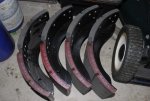
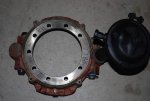
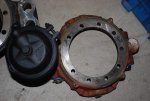
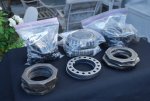
As far as the fronts go, I have seen an M817 dump truck that was converted with s-cams on the rears and a set of M939-series wedges on the front. I decided to also go this route. I was able to source all the parts, drums, hubs and spiders to retrofit my truck from a donor truck out in Hesperia, CA. At the same time, I was able to purchase for a very nice price a brand new set of four brake shoes. The other parts are completely serviceable and require cleaning with only the replacement of the air chamber diaphragms, plunger seals and return springs.
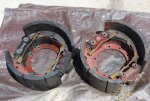
DSC_0193.jpgDSC_0192.jpgDSC_0190.jpgDSC_0191.jpgDSC_0194.jpg

Up to this point, I have only been amassing parts and have not undertaken any installation. My truck was just in a show and I have activities planned for it during the Memorial Day Weekend. I will have to take the truck completely out of service so hopefully after this weekend I can get started.
 

MyothersanM1

19K M1 Armor Crewman
Steel Soldiers Supporter
1,958
427
68
Location
Culver City, CA
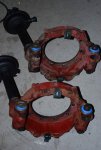
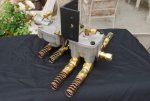
Last week I tackled the dis-assembly of the front brakes so I could inspect the plungers for serviceability. I was waiting on a brake spring tool I had ordered to simplify the job. Actuating plungers and anchor plungers were all serviceable and required minimal cleaning. The spiders were a mess especially the right hand side. A little degreaser and some , well, elbow grease cleaned them up quite well. All the plungers were reassembled with a light coat of clay-based grease (per Meritor) and new seals all the way around.

A few days prior, I had also replaced the front air chambers with new diaphragms. I screwed them in the actuating side to keep out the crud. This the farthest I will go with assembly until they are installed on the truck.


DSC_0009.jpgDSC_0004 (2).jpgDSC_0005.jpgDSC_0007.jpg
 

MyothersanM1

19K M1 Armor Crewman
Steel Soldiers Supporter
1,958
427
68
Location
Culver City, CA
These are the diagrams from Bendix which I will be using with slight modification. For instance, the front quick release valve (QR-1) will be replaced by a front axle ratio valve (LQ-4). I also have to tie in the front and rear service gladhands. The emergencies will be self-explanatory. My truck is no longer a tractor so I will not be incorporating a tractor protection valve and the associated parking brake valves for that application.

Three Axle Air Brake Diagram.jpg7aaccdb42140b8dd36b65bca41f22c8b.jpg
 

Bandit02

New member
199
3
0
Location
Blind Bay, BC
I would love to convert my M931 to full S-cam assembly's.

My issue is drums still being inboard. Life is so much simpler when I don't have to pull hubs to to do brake work.

Are you using Type 30 short or long strokes chambers for the rear? I see you have manual slacks, Have you thought about getting automatic slack adjusters?
 

MyothersanM1

19K M1 Armor Crewman
Steel Soldiers Supporter
1,958
427
68
Location
Culver City, CA
Yeah, the inboards do have their drawbacks. I haven't yet pinned down an outboard retrofit for the Rockwell top loaders. They would definitely make life easier. The problem is the hubs. If the hub flange was set inboard further it could be done with a slightly deeper drum.

The spiders in this kit will fit all rear 5-ton axles.

I am using Type 30 Short chambers on the rears. I have given the auto slacks a thought. The manuals came with he kit. With the minimal amount of driving I do with my truck, I may stick with the manuals.
 

Bandit02

New member
199
3
0
Location
Blind Bay, BC
I'm not sure how much experience you have with air brakes but a couple tips I can throw at you for their maintenance is anti-seize is your best friend. Lube the anchor pins religiously and well as the s-cam splines. Same with the clevis pin/slack bushing during assembly, everything needs free movement. I work as a HD tech in a truck shop and seized anchor pins need a air hammer and a torch to free up to remove (and it's so very preventative). Same with sized clevis pins, they'll prematurely wear out the slack bushing and if not caught early enough will rub into the slack itself.

Another thing I recommend is when you assemble the s-cam tubes with the seals/bushings. Place the inboard seal so it's lip is facing the slack. So when you pump grease it'll purge out onto the slack when the tube is full. With both seal lips facing toward each other you can over pressurize the tube with grease and worst case the pressure on the lining side will push the lip out of the seal and grease will get into the brake area and can soak your lining(s).

And the last I think it even though you got a kit. Make sure you got Q plus s-cams (the "S" head is skinny compared to a regular Q head s-cam) for the Q plus shoes.

Anyways I'm pumped you started this thread as I want to do this mod whenever my Wedge stuff all wears out one day.
 
Last edited:

MyothersanM1

19K M1 Armor Crewman
Steel Soldiers Supporter
1,958
427
68
Location
Culver City, CA
Thanks for the tips. Yes, anti-seize is my friend. I keep the large bottle on tap. I have had my fill of seized parts on my truck. So, you are so very right about 'so very preventative'.

Thanks for the seal tip.

The s-cams are marked 'Q-Plus'.

If you would, give me some recommendations on the better or best auto slacks.
 

Tow4

Well-known member
Steel Soldiers Supporter
2,097
647
113
Location
Orlando, FL
Good project. I will be following this thread since I want to convert the rear brakes on my M929 to S-cam. Please post up the parts list when you have time.
 

Bandit02

New member
199
3
0
Location
Blind Bay, BC
Thanks for the tips. Yes, anti-seize is my friend. I keep the large bottle on tap. I have had my fill of seized parts on my truck. So, you are so very right about 'so very preventative'.

Thanks for the seal tip.

The s-cams are marked 'Q-Plus'.

If you would, give me some recommendations on the better or best auto slacks.
Meritor auto slack 100%. No fixed anchor points for self adjustment, no ratcheting mechanism to fight against (especially when they're worn out like on Haldex ones). Just pull the Paul out with a screwdriver and turn the 5/16" head for adjustment. You can buy the special adjustment tool for them off any snap on truck for ease. Don't forget... On those turning them counter clockwise moves the shoes out and clockwise brings them in, every other auto slack including the manuals are the opposite.
 

73m819

Rock = older than dirt , GA. MAFIA , Dirty
Steel Soldiers Supporter
In Memorial
12,195
326
0
Location
gainesville, ga.
I am going to swap the complete rear assemble out from under the m819, and replace it with a full s cam rear assemble, leave my juice brakes for the front, they will be activated though the front tow air line, the rear I am going to use has a power divider AND air locking diffs. in both axles. At one time, I was going to roll a 939 complete rear under the 819, I believe I can swap a complete rear assemble faster then rebuilding the existing rears, With the rear assemble I am going to use now is by far a BETTER rear set then the 939 rear, on top of everything else, the ratio is 543 instead of the 5t 644s
 

MyothersanM1

19K M1 Armor Crewman
Steel Soldiers Supporter
1,958
427
68
Location
Culver City, CA
Another thing I recommend is when you assemble the s-cam tubes with the seals/bushings. Place the inboard seal so it's lip is facing the slack. So when you pump grease it'll purge out onto the slack when the tube is full. With both seal lips facing toward each other you can over pressurize the tube with grease and worst case the pressure on the lining side will push the lip out of the seal and grease will get into the brake area and can soak your lining(s).
The s-cam tubes were pre-assembled. However, I did check to see how the seals are installed. Both seal lips face toward the slack adjuster. So, we are good there.
 

MyothersanM1

19K M1 Armor Crewman
Steel Soldiers Supporter
1,958
427
68
Location
Culver City, CA
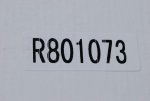
Bought a set of four Meritor Automatic Slack Adjusters (R801073) and the convenient tools to adjust them.

$_57.jpgDSC_0016.jpgDSC_0015.jpgDSC_0014.jpgAuto Slack Tools.jpg

I also put air on my spring brake chambers to make sure all are working and caged them while at it. I will cut the push rods once I get the slack adjusters just to be sure my cuts are accurate.
 
Last edited:

MyothersanM1

19K M1 Armor Crewman
Steel Soldiers Supporter
1,958
427
68
Location
Culver City, CA
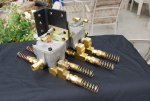
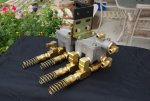
I built up my rear axle brakes service and spring-brake relay set-up yesterday using an R-12 and an R-14 relay. The mounting bracket I fabricated from 4" x 2 3/8" x 1/4" angle. I have nicknamed it "the turret" as it reminds me of such an appliance from a steam locomotive. I will just need to add a length of 3/8" nylon tubing from the R-14 balance port to one of the service delivery lines.

DSC_0002 (2).jpgDSC_0001 (2).jpgDSC_0003 (2).jpg


Here is a part list for the whole set-up:
½”NPT Female x ½”NPT Male 90º Street Elbow x 6
½”NPT Male Branch Tee x 2
½”NPT Street Tee x 1
½”NPT x 3/8” Air Brake (Nylon Tubing) x 1
1/4”NPT x 3/8” Air Brake (Nylon Tubing) x 2
1/8”NPT x 3/8” Air Brake (Nylon Tubing) x 1
½”NPT x ½” Air Brake (Nylon Tubing) x 1
½”NPT x 5/8” Air Brake (Nylon Tubing) x 1
¾”NPT Countersunk Hex Head Plug x 1
¾”NPT Male x ½”NPT Female Hex Pipe Reducer Bushing
x 1
½”NPT x 3/8” Air Brake Hose (SAE 1402A) w/ spring guard x 8
R-12V Relay (for service)
R-14H Relay (for spring brake) with anti-compounding


Today, I removed the tires and got the rear end up on jack stands. I pulled the axles, spindle nuts, washers, seals and bearings. My son and I cleaned and degreased everything. I will be putting a wire brush on the axle flanges to removes any gasket remnants. The axle flange bolts got some new grade 8 lock washers. With the help of a neighbor the hubs and drums are coming off tomorrow. I am not looking forward to getting the backing plates off as they are riveted in place...and why didn't we bolt those on...Rockwell:-x???

DSC_0004 (3).jpgDSC_0005 (2).jpg

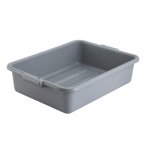
On a side note, I bought six of these restaurant dish boxes (Winco PL-5G) to catch wayward lubricants and for parts cleaning. They are very convenient, measuring 20 1/4" x 15 1/2" x 5", and very durable. I paid less than $4.00 a piece on eBay. Well worth the purchase.
Dish Box.JPG
 
Last edited:

MyothersanM1

19K M1 Armor Crewman
Steel Soldiers Supporter
1,958
427
68
Location
Culver City, CA
Here is a parts list for all the major components. I have added a few cross references also...

Brake Drum

OTR1610, Webb 68730, Gunite 3018AX, Dayton 122126

Spiders
RH: Meritor A3211W3819
LH: Meritor A3211V3818

S-Camshaft Brackets
RH: K683299S1553
LH: K683299R1552

S-Camshafts
RH: OTR9662, Meritor 2210V7536
LH: OTR9661, Meritor 2210W7537

Slack Adjuster (1 ½”-28 spline, 5 ½” arm)
Automatic: Meritor R801073
Standard: Ranger Brake RB-288753

Air Brake Service/Spring Brake Chambers
Type 3030 Standard Stroke

Brake Shoes
OTR4515Q-BLK

Brake Shoe Parts Kit
OTR4515QMB
 

Bandit02

New member
199
3
0
Location
Blind Bay, BC
Did your kit include the valves? I plan on when I do mine to use the existing valving and just run the appropriate line to each chamber.

Today, I did a vehicle inspection on a truck with s-cam brakes on the tandem and wedge on the steer. This setup used Dayton hubs. The backing plates on the Wedge assemblies were one piece and the adjusters were seized solid so backing them off took me 3 hours for one side using the little adjusting holes in the plates. After this I swore Wedge was pure evil. S-cam all the way!
 

MyothersanM1

19K M1 Armor Crewman
Steel Soldiers Supporter
1,958
427
68
Location
Culver City, CA
The kit came with an R-12V and two QR-1's valves. I won't be using the QR-1's as I'm following the diagram I posted earlier which uses the R-14 and the SR-1 spring brake valve. Yeah, I wouldn't mess too much with your truck's plumbing. The air may route differently, but all arrives at the cans the same.

I take it the wedges you battled with were not well maintained? Luckily the M939-series backing plates are two piece for easy removal. I tell you, once I find a viable s-cam set-up for the fronts, I will switch.
 
Last edited:
Top
AdBlock Detected

We get it, advertisements are annoying!

Sure, ad-blocking software does a great job at blocking ads, but it also blocks useful features of our website like our supporting vendors. Their ads help keep Steel Soldiers going. Please consider disabling your ad blockers for the site. Thanks!

I've Disabled AdBlock
No Thanks