• Steel Soldiers now has a few new forums, read more about it at: New Munitions Forums!

  • Microsoft MSN, Live, Hotmail, Outlook email users may not be receiving emails. We are working to resolve this issue. Please add support@steelsoldiers.com to your trusted contacts.

MEP-003 Water in Exhaust

GAPRIME

Member
41
26
18
Location
GA
I want to thank you all for the volume of knowledge on this website about these military machines. You inspire all of us that aspire to be DIY mechanics.

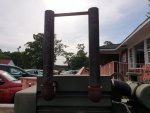
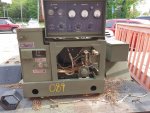
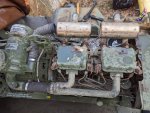
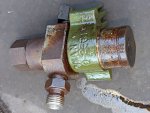
I have a MEP003 with a modified exhaust that allowed water to get into the engine. The exhaust pipe was installed straight up and then stored outside... :eek:

The engine is seized and I have been following some threads on water in the 803 gens engines but there is not a lot of information for the 003a since the exhaust are usually installed with a downward orientation.

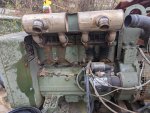
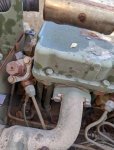
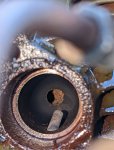
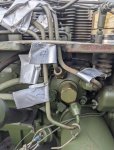
I have siphoned off most of the water from the exhaust and mufflers, removed the shroud and trying to remove the fuel injector nozzles to inspect the chambers, siphon any sitting water and put some of the suggested mixtures into the cylinders in an attempt to free them.
  1. Some of the flange nuts are rusted and difficult to remove so I've soaked them with penetrating oil and trying to get a claw foot adapter... I don't want to break any of the lines - is there an easier way to get them off?
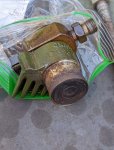
  2. How do you remove the injector nozzle after you remove the fuel lines and the retaining bolts and flange?
Any other suggestions? I was about to give up on this machine but gurus like Ray70 and Suprman have been encouraging me to go further and see the extent of the damage. Thank you Ray and Suprman.

Thank you.

Gaprime

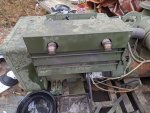
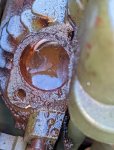
20190423_172309.jpg20190423_172223.jpgPXL_20220125_211311938.jpgPXL_20220125_211808859.jpg
PXL_20220125_213244478.jpgPXL_20220125_213316796.jpg
 

Mullaney

Well-known member
Steel Soldiers Supporter
Supporting Vendor
7,712
19,755
113
Location
Charlotte NC
I want to thank you all for the volume of knowledge on this website about these military machines. You inspire all of us that aspire to be DIY mechanics.

I have a MEP003 with a modified exhaust that allowed water to get into the engine. The exhaust pipe was installed straight up and then stored outside... :eek:

The engine is seized and I have been following some threads on water in the 803 gens engines but there is not a lot of information for the 003a since the exhaust are usually installed with a downward orientation.

I have siphoned off most of the water from the exhaust and mufflers, removed the shroud and trying to remove the fuel injector nozzles to inspect the chambers, siphon any sitting water and put some of the suggested mixtures into the cylinders in an attempt to free them.
  1. Some of the flange nuts are rusted and difficult to remove so I've soaked them with penetrating oil and trying to get a claw foot adapter... I don't want to break any of the lines - is there an easier way to get them off?
  2. How do you remove the injector nozzle after you remove the fuel lines and the retaining bolts and flange?
Any other suggestions? I was about to give up on this machine but gurus like Ray70 and Suprman have been encouraging me to go further and see the extent of the damage. Thank you Ray and Suprman.

Thank you.

Gaprime

View attachment 857006View attachment 857007View attachment 857008View attachment 857009
View attachment 857010View attachment 857011
.
Start soaking the cylinders and exhaust valves with marvel mystery oil. It may be too far gone, but a quart of that red stuff sometimes performs magic to bring a power plant back to life.

You definitely have some of the good guys on the job with you!

.
 

Ray70

Well-known member
2,584
5,865
113
Location
West greenwich/RI
Yup, probably should get the injectors out so you can get the mystery oil into the cylinders and start soaking.
It is possible to get it in through the exhaust valves too as a last resort.
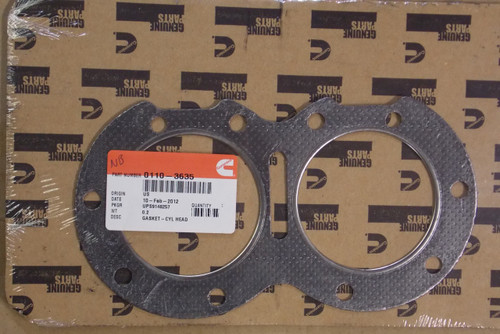
Worst case you end up pulling the heads, but that honestly is very simple and head gaskets are available for like $15 each direct from Cummins.
It might actually be the best route to allow you to assess the damage easier an you surely have water in the cylinders, so removing heads may be a necessity.
 

glcaines

Well-known member
3,914
2,594
113
Location
Hiawassee, Georgia
.
Start soaking the cylinders and exhaust valves with marvel mystery oil. It may be too far gone, but a quart of that red stuff sometimes performs magic to bring a power plant back to life.
You definitely have some of the good guys on the job with you!.
You can also pull the valve covers to see if any valves are stuck. On other suspect engines, I have pulled the valve covers and pounded on the rockers with a soft rubber mallet to see if the valves were stuck. They won't move much. If a valve doesn't move at all, don't try to turn the engine as something is liable to bend or break. Pull the injectors and try to get as much water out of the combustion chamber as possible. After any siphoning, you can blow high pressure air into the cylinders to try to blow any remaining water out and preferably dry them. After soaking the cylinders like Mullaney suggested by putting MMO or another suitable oil in the cylinders, if the valves appear to be free, try to turn the engine manually, not with the starter, and with the injectors still removed.
 

Sazabizc

New member
21
19
3
Location
Wv
A good friend of mine and his cousin was working on a 110 cat backhoe . It was from a oil refinery and spent its hole life moving salt . So it was a rust bucket. But my uncle got it very cheap. They said it was running when it was delivered but little did they know , the intake had a hole in it and it filled up with water from rain and locked the motor up.

What my friend did, they removed the head and pulled the oil pan . They sprayed penetrating oil in all 4 cylinders and let it soak for days and every once in awhile they would take a dead plow hammer and tap the pistons . They did get it to break free and the damage to the cylinder walls was minimal . It did have a few small pits in the walls from the rust but my uncle didn’t care and said slap her back together and it’s still running to this day . It was a wet sleeved motor so ideally it would have been best to replace the sleeves .


Sent from my iPhone using Tapatalk
 

GAPRIME

Member
41
26
18
Location
GA
Thank you for your suggestions Mullaney, Ray70, glcaines and Sazabizc

Yup, probably should get the injectors out so you can get the mystery oil into the cylinders and start soaking.
It is possible to get it in through the exhaust valves too as a last resort.
Worst case you end up pulling the heads, but that honestly is very simple and head gaskets are available for like $15 each direct from Cummins.
It might actually be the best route to allow you to assess the damage easier an you surely have water in the cylinders, so removing heads may be a necessity.
I was able to work on the machine yesterday and removed two of the fuel injector nozzles #2 and #3.

#2 (counting from the instrumentation panel)

The nozzle and chamber were clean and dry see pictures belowPXL_20220126_212617978.jpgPXL_20220126_212346614.jpg

#3
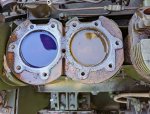
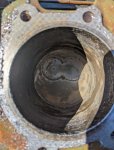
The nozzle was wet but in relatively good shape but the chamber was full of water.
PXL_20220126_214316120.jpgPXL_20220126_214322870.jpg
I siphoned off as much as I can but this might mean I have to open the head as suggested above.

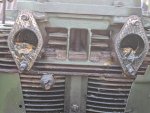
I also disconnected the exhaust manifold

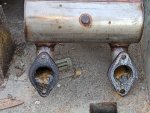
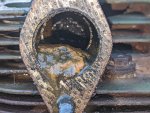
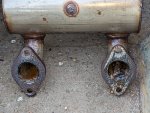
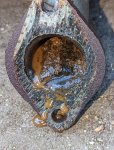
#1 Exhaust assembly
Had water and sludge in them

PXL_20220126_223438062.jpg
PXL_20220126_223457074.jpgPXL_20220126_223510556.jpg

#2 Exhaust also had water in them.
PXL_20220126_222139271.jpgPXL_20220126_222144109.jpg

Looks like I am going for a swim in this machine...:oops:

Any additional suggestions and tips are welcome.

Also if you have specific guidance on how to open the head please share.

Have a great day
 

GAPRIME

Member
41
26
18
Location
GA
Tip: for folks trying to remove the injector nozzle - disconnect the fuel lines (note they are very tight and it is easy to slip the nut), disconnect the retaining bolts and remove the bolts and retainer, then if the fuel nozzle is stuck - gently tap the body of the injector on either side until it starts to move then wriggle it out
 

Ray70

Well-known member
2,584
5,865
113
Location
West greenwich/RI
Wow, looks like you have a LOT of water in it!
Just pull the heads off, nothing much as far as tips, its straight forward.
Pull valve covers, remove rocker arms and pushrods, remove head bolts including the rocker arm studs.
Don't forget the glow plug wires and oil lines under the intake.
Also watch out you don't misplace the caps on the valve tips or the shims under the rocker arm bolts.
Pushrod tubes also have a thin washer under them.
 

GAPRIME

Member
41
26
18
Location
GA
Wow, looks like you have a LOT of water in it!
Just pull the heads off, nothing much as far as tips, its straight forward.
Pull valve covers, remove rocker arms and pushrods, remove head bolts including the rocker arm studs.
Don't forget the glow plug wires and oil lines under the intake.
Also watch out you don't misplace the caps on the valve tips or the shims under the rocker arm bolts.
Pushrod tubes also have a thin washer under them.
Good Morning All,

I removed the injector nozzles and all were dry except #3 above. I put some MMO and Blaster through the injector holes and let it sit overnight.

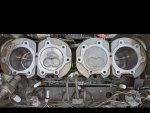
Yesterday, I removed the heads using the instructions above... It was not difficult as Ray suggested even for someone mechanically challenged like me.

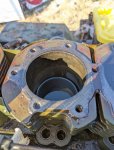
All the cylinders looked good and filled with oil except cylinder #3 - see below. #3 was full of water and rust on the walls of the cylinder. I removed all the water and filled it up with Blaster. The other 3 cylinders looked very good and I filled them with MMO. I think the walls may need to be sanded/honed so any tips on how to do that would be greatly appreciated.

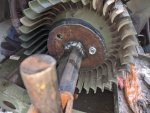
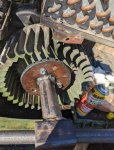
Will try to rock the engine gentle with a makeshift crank my consultant mechanic rigged for me to sit across the 3 main bolts in the blower unit...


PXL_20220129_212814272~2.jpg
 

GAPRIME

Member
41
26
18
Location
GA
It might not be wise to spin that engine, once free, until you remove/check the injection pump for being stuck with old fuel. (I learned this the hard way!) Just my .02
Thanks for that tip Ray C. Will rocking the engine as described above create a problem? I have soaked the bottom of the IP with blaster so that I can open the bottom and inspect today. Is there a way to clean out the IP in place with solvent/lubricants without removing them?
 

GAPRIME

Member
41
26
18
Location
GA
Might be worthwhile to just remove the IP to be sure, while working on the pistons.
I know you can't put it at "PC" mark beforehand, but it's easy to retime it later, if the IP has to be removed without setting it at PC first.

Forgive my ignorance Ray - What is "PC"?

Also would disconnecting the fuel line to and from the IP protect them from damage during the rocking process?
 

GAPRIME

Member
41
26
18
Location
GA
Where can I find the head gaskets to buy?

I have found the
  1. Valve Rocker Cover Gaskets
  2. EXHAUST PARTS KIT for MEP-002A MEP-003A Military Diesel Generators p/n 155-1473
  3. Onan 0113-0167 Piston Ring Set MEP 003A (not sure if I need them but bought them anyway)
Am I missing anything else?

Thanks
Des

p.s. for others looking for these parts I have listed the exact names of the parts so you can google it.
 

Ray70

Well-known member
2,584
5,865
113
Location
West greenwich/RI
Ok, "PC" is the timing mark you use to align the engine with to install and time the IP. PC stands for Port Closing and is marked on the flywheel and can be seen through the round hole where the timing pointer is, but don't worry about that just yet.
Remove the IP and clamp the mounting flange loosely in a vise if possible and fill the body of the pump with acetone or Berrymans B12 carb cleaner or similar and leave it sitting.
After the cylinders have been soaking for several days, you can use a bar on the blower wheel bolts to apply pressure, but don't over do it!
While holding pressure on the blower wheel, take a 2x4 scrap or a 4x4, sit in on top of the stuck piston (s ) and smack it hard with a 5 lb. sledge or big dead blow hammer. try to see if you can make sure hitting the piston down will rotate the motor in the same direction as you are applying pressure on the blower bolts.
Head gaskets are cheapest at Cummins parts on line. If they want much more than $15 ea. keep looking! Last time I bought they were $12.99 each for the newer graphite composite gaskets. New PN is 110-3635
$13.95 here.
 

Ray Cook

Member
Steel Soldiers Supporter
24
68
13
Location
Apollo, PA
Thanks for that tip Ray C. Will rocking the engine as described above create a problem? I have soaked the bottom of the IP with blaster so that I can open the bottom and inspect today. Is there a way to clean out the IP in place with solvent/lubricants without removing them?
There IS a way to do it, and I'm certain it is covered somewhere here on the forum, but I don't know it off by heart. I'm not certain how much rotation you could get away with before the injection pump would get unhappy; it can't be very much.
There's 2 injection pump models on these engines. Earlier machines used a PSU from Bosch; later ones use an M50 from Ambac. The Bosch pumps are not repairable if damaged, but the Ambac ones are, and it's not too hard to do.
So, how to tell which pump? Easy. There should be a 'bump' pointing straight down on the bottom of the pump housing, as it's installed on the engine. Touch that 'bump'. If there's a slot in it for a screw driver, then that's a Bosch PSU. If it's just a flat bottomed 'bump', then you have an Ambac M50. Hope that helps :)
 

Ray70

Well-known member
2,584
5,865
113
Location
West greenwich/RI
These days due to the rising cost of an IP Its best to just remove the pump. It will tolerate about ZERO amount of rotation if its frozen.

OR, IF you have an Ambac M50 pump you could remove the fuel line from the filter assy. raise it up above the level of the IP and fill it with acetone. Remove the large cap in the center of the IP, then remove the 5/8" 12 point cap under it and expose the delivery valve. Remove delivery valve and holder. Once the IP is full of acetone you should get some leaking out of the delivery valve area. replace the delivery valve, holder, cap and large nut.
Add more acetone to fill the raised up fuel line.
Let it sit a week while the cylinder lube is doing its job.
After a week check the throttle linkage to be sure it is moving free. If not, do not rotate engine.
If the linkage is free you have an 80% chance the pump is free.

IF you have a Bosch PSU pump I would not recommend taking a chance. if you are unsure if it is free and it is not free, it will 100% surely break when you rotate the motor. As Ray C. said, the PSU is NOT Repairable and these days it will cost you at least $750 to replace the pump.

If you leave the IP in place, you can try rotating the motor a little, then rock it back and forth.
Then remove the caps and delivery valve holder again. if the plunger is free it will rotate as you turn the engine. It will also move in and out while rotating.
You can lightly tap the plunger with a brass punch to see if it is sticking outward. Brass punch will push it in against the cam lobe if it is stuck out.

Once things are freed up and engine is turning you can move on to inspecting the cylinder walls to see what you need to do next.
 

GAPRIME

Member
41
26
18
Location
GA
So after a few days sitting with the blaster and MMO in the cylinders I used a tool crafted by an extremely skilled mechanic to rock the engine using the flywheel...

PXL_20220202_221435454.jpgPXL_20220130_201855961.jpg

I am so pleased that the engine turned with minimal effort but did not do a full rotation because of the rust in cylinder #3.

PXL_20220130_204925273.jpg

I used a honing tool to scrap up some of the rust and the engine turned 360 degrees with minimal effort

PXL_20220202_221548661.jpg


PXL_20220202_221418621_2.jpg


Good Morning All,

I removed the injector nozzles and all were dry except #3 above. I put some MMO and Blaster through the injector holes and let it sit overnight.

Yesterday, I removed the heads using the instructions above... It was not difficult as Ray suggested even for someone mechanically challenged like me.

All the cylinders looked good and filled with oil except cylinder #3 - see below. #3 was full of water and rust on the walls of the cylinder. I removed all the water and filled it up with Blaster. The other 3 cylinders looked very good and I filled them with MMO. I think the walls may need to be sanded/honed so any tips on how to do that would be greatly appreciated.

Will try to rock the engine gentle with a makeshift crank my consultant mechanic rigged for me to sit across the 3 main bolts in the blower unit...


View attachment 857409
 

Attachments

GAPRIME

Member
41
26
18
Location
GA
Thank you for the tip Ray C.

I don't think I have been so anxious about checking a "bump" and "slit" before ;). Using your technique below I confirmed that this IP is a Ambac M50 as it does not have the slot.

I removed it and have it soaking in a metal bowl with acetone. I will need some tips about reinstalling it and setting the timing.

PXL_20220202_202214666.jpg

There IS a way to do it, and I'm certain it is covered somewhere here on the forum, but I don't know it off by heart. I'm not certain how much rotation you could get away with before the injection pump would get unhappy; it can't be very much.
There's 2 injection pump models on these engines. Earlier machines used a PSU from Bosch; later ones use an M50 from Ambac. The Bosch pumps are not repairable if damaged, but the Ambac ones are, and it's not too hard to do.
So, how to tell which pump? Easy. There should be a 'bump' pointing straight down on the bottom of the pump housing, as it's installed on the engine. Touch that 'bump'. If there's a slot in it for a screw driver, then that's a Bosch PSU. If it's just a flat bottomed 'bump', then you have an Ambac M50. Hope that helps :)
 
Top
AdBlock Detected

We get it, advertisements are annoying!

Sure, ad-blocking software does a great job at blocking ads, but it also blocks useful features of our website like our supporting vendors. Their ads help keep Steel Soldiers going. Please consider disabling your ad blockers for the site. Thanks!

I've Disabled AdBlock
No Thanks