• Steel Soldiers now has a few new forums, read more about it at: New Munitions Forums!

  • Microsoft MSN, Live, Hotmail, Outlook email users may not be receiving emails. We are working to resolve this issue. Please add support@steelsoldiers.com to your trusted contacts.

MEP 501A Fix-up Thread

CallMeColt

Well-known member
Supporting Vendor
1,026
1,475
113
Location
Wilson County, Texas
Another one of my fix-up threads!

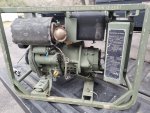
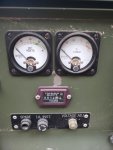
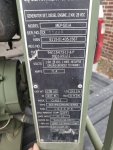
Got myself another MEP 501A generator.

Hour meter says it has 16 hours if it is working. Pull start handle is missing along with some of the fuel lines & fittings. That's typical of units like this that has sat around outside forever.

Going to dig in & at least see if I can get it started!
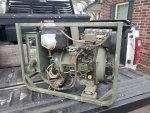
20200223_174353.jpg 20200223_174405.jpg 20200223_174424.jpg 20200223_174442.jpg 20200223_174615.jpg
 

CallMeColt

Well-known member
Supporting Vendor
1,026
1,475
113
Location
Wilson County, Texas
Cleaned up the inside of the fan area. Lot of bee & mud dobber nests. The rubber grommets were basically goo like happens to these all the time. Replaced them with something similar. Search 1/2" Rubber Grommets for 1/8" panel, 3/8" ID x 5/8" OD on eBay.

There was 550 cord in the recoil start winding & it seemed okay. Put a spare handle I had on.

Put oil in the crank case.

Used a tank I had from another commercial unit I am working on to feed fuel to the injection pump.

After getting the fuel system primed, I attempted to pull start. It tried, but after a whole bunch of attempts, the recoil start assembly obliterated.

Rigged up a way to use the electric start. Got it to start but found that the injection pump wasn't assembled correctly & the governor lever inside was broke off.
87491944_209094150468415_3648077042911543296_n.jpg

The commercial unit I am working on has the same exact issue. I ordered the required parts after looking at the TM & a LOT of searching. Finding genuine parts for these Yanmar L series engines isn't easy.

Hopefully I will learn something & get it going! I don't really have a use for a 28 volt generator, but know some who do. I could always use the engine for a project or just keep it for charging batteries on my other generators if need be.
 

CallMeColt

Well-known member
Supporting Vendor
1,026
1,475
113
Location
Wilson County, Texas
So, I got my parts in.
20200310_180553.jpg
Started working on it after work today.

Slowly labeled & disconnected all the wires & got the engine with the alternator removed from the frame & control box.
20200310_180530.jpg 20200310_180535.jpg 20200310_180540.jpg

Got just about everything off the except the stubborn 3/16 allen head screw that holds the rubber connector flange on.
20200310_184544.jpg 20200310_184531.jpg

Tried heat & PB blaster. No luck.

I pulled one of these apart years ago. Learned a lot on it. But, I never got that bolt out. Ended up stripping it, drilling it out, re taping threads, & cutting stuff. Really don't want that headache again this time. I don't think it's left hand thread.

I stopped for the evening & will do some reading.
 

CallMeColt

Well-known member
Supporting Vendor
1,026
1,475
113
Location
Wilson County, Texas
This is a video I made on the first one that I took apart. Got really involved & made a cool project out of it. Ultimately, ended up selling it to help pay for me MEP-802A.


CallMeColt

Well-known member
Supporting Vendor
1,026
1,475
113
Location
Wilson County, Texas
There is nothing in the TM (TM 9-6115-673-13&P) on the removal of that coupling part.

There is a work package (WP 0021) in the TM on inspecting them & it says "Inspect flexible flange couplings on alternator and engine crankshaft for damage and wear. If damaged or worn, refer to next higher level of maintenance."

Is there a higher level TM for these little units?
 

CallMeColt

Well-known member
Supporting Vendor
1,026
1,475
113
Location
Wilson County, Texas
Alright, after going at it for a few days, I got it off! The 3/16 screw is a regular thread with yellow thread locker.

Damaged my regular allen key & a socket allen key but ultimately got it off.

Used a puller & heat again to get the adapter off the tapered part of the thread.

20200317_171420.jpg 20200317_171430.jpg

Got the crank case cover off.

20200317_184455.jpg 20200317_184514.jpg

Removed the injection pump & injection fuel line.

Removed the fuel on/off lever assembly.

Hit the pin out on the governor lever. It only goes on way!

Removed the broken parts from the engine.

20200317_184705.jpg

Unfortunately, the camshaft needs to come out to get the new governor fork in.

Ran out of time this evening so I will read in the TM how to remove the valves properly & pick up where I left off tomorrow.

Learned a lot today!
 

Guyfang

Moderator
Staff member
Moderator
16,766
24,072
113
Location
Burgkunstadt, Germany
There is nothing in the TM (TM 9-6115-673-13&P) on the removal of that coupling part.

There is a work package (WP 0021) in the TM on inspecting them & it says "Inspect flexible flange couplings on alternator and engine crankshaft for damage and wear. If damaged or worn, refer to next higher level of maintenance."

Is there a higher level TM for these little units?
No higher level TM. What you see, is what you got.
 

CallMeColt

Well-known member
Supporting Vendor
1,026
1,475
113
Location
Wilson County, Texas
Well, worked a bunch this afternoon again.

Was able to remove the valves & camshaft.

Got the new governor fork in.

Put everything back in the way it should be.

Primed it up & tried to start. Nothing!

Fiddled with the valve timing & tried to start again. It ran, but poorly.

I think I need to get the timing better but was getting worn out & it was getting dark.

Cleaned up & put everything to the side. May get to it this weekend. I learned a lot today. Even though it's not done, I'm happy I learned so much.

No pictures today, just video. Will share when I get it uploaded.
 

CallMeColt

Well-known member
Supporting Vendor
1,026
1,475
113
Location
Wilson County, Texas
Got everything put back together yesterday except the fuel tank, fuel filter, & fuel lines. Found the needed parts today & ordered

Found some crud in the fuel injection pump. Did the valve timing one more time. The spring on the governor was in the wrong spot & read up in the TM on where it should be. Should have been on the middle hole. Looked closely & did notice there was a little notch in the paint on the middle hole even though when I got it it was on the hole to the right.

After troubleshooting all that, it still is putting out a lot of white smoke & isn't running perfectly smooth. My guess is from it sitting for so long, that may be why & it may be a little wet stacked. I'm hoping that the piston rings aren't worn from it running away on whoever had it before me since the governor fork was broken.

Also thinking that it's possible there is a fuel pump shim missing. There is a timing procedure in the TM & I'm going to check that.

To load test it, I may unhook the batteries on my MEP-802A & cycle the glow plugs a bit. Otherwise, I'm not sure what else I have to pull the 24 volts from it.

Defineltly have learned a lot while working on this unit. That was my goal with rebuilding it since I have no real need for a 24 volt generator.
 

CallMeColt

Well-known member
Supporting Vendor
1,026
1,475
113
Location
Wilson County, Texas
Well, got it all finished!

Turns out as I suspected at the beginning, the spring was in the wrong hole of the governor lever.

Found some crud in the injection pump. Cleaned it out.

Got the needed fittings for the fuel tank. Put all new fuel lines on.

Tidied up all the electrical & fuel lines.

Ran it for a while to be sure all the air was purged out.

Kept my batteries disconnected on my 802A & powered it up. Tried to start but not enough power to do it. The preheat did nothing... I'm thinking that the glow plugs may not be good or something on my 802A

Kept batteries disconnected on my 831A. Preheat pulled a 50% load. BARLEY got it to start but it did.

So it's 100% now! Starts first pull. Still has some white smoke but a good load on it will clean it up good I'm sure.

Probably try to sell or trade it now as I have no real need for a 28 volt generator.

90204233_10156736215405919_7775991152141926400_o.jpg 90211307_10156736215715919_664228997407703040_o.jpg 90219999_10156736215865919_7552929100751437824_o.jpg
 

CallMeColt

Well-known member
Supporting Vendor
1,026
1,475
113
Location
Wilson County, Texas
Generator has been sold! Had someone who came to look at another unit I had for sale & he said it was to supplement his 24 volt solar system. Told him I had this & he took both of them.

I did figure out how to keep the chinging noise from the aftermarket pull start. Pull it about an inch back out & then let it go back in. Not sure why that works but it does.

Onto the next project...
 

Light in the Dark

Well-known member
Steel Soldiers Supporter
3,828
5,936
113
Location
MA
I've got a pair of these that have been sitting here, decided to get one going yesterday. Runs (albeit a bit of a surge up an down, but only slight) but no voltage per the gauge. Is it these sets I remember reading about that if they have a bit too much oil, they dont run correctly?

I just pulled down the two TMs on this, going to start reading.
 

Light in the Dark

Well-known member
Steel Soldiers Supporter
3,828
5,936
113
Location
MA
Ill check the level later, but upon a quick inspection yesterday it appeared to have just a bit too much in it. Ive replaced the fuse on the panel, and still no voltage. All wires appear to be intact and in their correct positions, but I have not verified by schematic.
 
Top