• Steel Soldiers now has a few new forums, read more about it at: New Munitions Forums!

  • Microsoft MSN, Live, Hotmail, Outlook email users may not be receiving emails. We are working to resolve this issue. Please add support@steelsoldiers.com to your trusted contacts.

MEP 802A Fix-up Thread 2.0

CallMeColt

Well-known member
Supporting Vendor
1,052
1,520
113
Location
Wilson County, Texas
Long post inbound, standby....

Just wrapped up what I hope is the last of any major work for this unit!

Started by removing the top panels, and the one side panel so I could replace the fuel return lines & the fuel feed line with the incorrect fitting.

20230215_200311.jpg

Even with the side panel removed, getting at the nut on the AN fitting for the fuel line is a PITA, so I removed the entire fuel/water filter assembly. That in itself is a bit annoying. Also, got the battery out of the way. Made the new 4AN fuel line with a kit I had.

4AN fuel line kit on Amazon - https://amzn.to/3Y66Bu1

20230215_200326.jpg 20230215_200333.jpg

Installed new fuel return line & the upgraded brass T's. Made everything nice and neat. Removed the muffler & air intake filter assembly to make it easier. I sell the T's in pairs on my eBay store. Since we can't share links to eBay, you can get there via my website in my signature at the end of any of my posts.

20230215_200215.jpg 20230215_200219.jpg 20230216_075623.jpg

Figured since I was at it, I would replace the crappy rubber fuel tank well nuts. This is where things started to go bad....

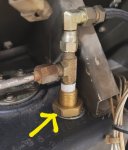
Fuel tank drain well nut was STUBBORN and took me hours to get out. I basically had to rip it apart to get it out. Because of this, it slightly "puckered" (lack of a better term?) the hole of the fuel tank. But, since I was installing the new brass type fitting & o-ring I sourced, I figured it would just flatten it out. In the end, I was right that it would, but took a while to get there.

So, issue with this lower well nut is, that they made the opening in the metal body of the generator JUST big enough. When you put the big 7/8 nut in there, you have no room. If the tank is off center at all, it will not tighten properly down... catching the metal body, and leak. You might get lucky, or not. So far on these, I have been 0-2. I ended up needed to remove the fuel tank.

With that said, it being the second time I have done this & overall having a lot more "repair" experience now, removing the fuel tank when you have the top off for everything else I had been doing, is annoying but not horrible. Now that I am 0-2, I will probably just NOT try to fish a fitting into place anymore, and just remove the tank to install everything. You get to clean the tank out at this point as well. I got the bottom half of the old fuel sender out of the tank while it was removed.

I didn't document any pictures at this point because I was covered in diesel, grime, oil, and irritated. But, you basically just remove all the bottom bolts along the main frame, along the inside along that lip where the well nut come through, and don't forget the two on each side tucked facing toward the fuel tank end. I will try to grab some pictures & come back to update this post pointed out these not so obvious ones. If I forget, remind me!! Added. :)

20230221_162530.jpg

There is just enough to lift the body to not have to remove the shroud around the fan. Getting two items around 1 inch thick and putting them between the main frame and the body along the sides once you lift it to remove the tank is helpful. Sorry if this is not as detailed as I usually am with my work. These few tips all will make a tone of sense if you are going for this task though!

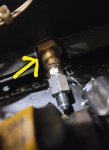
Here are the well nuts that are different that the ones talked about on the forum a lot that I sourced. I got a bunch of different ones over the past few months. Finally found ones that were a good length, size, and had a little lip to hold the o-ring in place. They worked out fantastic. I plan to order them in bulk & keep them in stock, like the upgraded brass T's, on my eBay store. They will be sold as a set & with Viton o-rings.

20230217_181603.jpg 20230217_181614.jpg 20230217_181409.jpg

At this point, everything was just done in reverse, and just kept everything neat & cleaned up. I can't attach more files so I am going to move on to another post.
 
Last edited:

CallMeColt

Well-known member
Supporting Vendor
1,052
1,520
113
Location
Wilson County, Texas
After getting the tank back in, I just neatened up. I used mostly new hardware when putting the panels back on. Found a great source for them on eBay in 50 counts for cheap, shipped. I also put some terminal covers on the battery connections & proper color coded heat shrink wrap on the cable ends. Used some zip ties to neatened the wires all around and keep them away from the generator enclosure. The typical areas where they end up rubbings did show signs of it doing so for a while, so glad I got to it.

Battery terminal covers - https://amzn.to/3KsKdaN
Heat shrink - https://amzn.to/3EsYSPp

20230215_200316.jpg 20230219_181951.jpg20230219_182002.jpg 20230219_175746.jpg

This is the first unit I had that actually put the parts back in place that go around the exhaust between the cover and the muffler. One of the other units had the 3 parts in the bottom under the motor. Since this one will probably end up living at my off grid place, I will make it as complete as I can. I took the battery hold down clamps from that unit as well. I think I found I good solution to battery hold downs for these that isn't super expensive that I will experiment with on that other unit as it goes back together.

20230217_185830.jpg 20230221_162515.jpg

Used some caulk to seal the control panel cover as you should.

20230220_145319.jpg

Lettings everything dry. Will check it out later today. I have already given this generator a good load test, but will do it again since it had been pulled apart to be sure it's okay again. I did start it & let it run for a few & it is super smooth and quiet. Even though it's the oldest & has the most hours, it really is the best running one I have!
 
Last edited:

CallMeColt

Well-known member
Supporting Vendor
1,052
1,520
113
Location
Wilson County, Texas
Added a few more details to post #21.

Put a new cover & gasket on the outlet. The gasket was falling apart. Cover hinges were shot. Found nice ones for less than $5 to my door the next day with all hardware & gaskets. I got enough to do all the ones on my generators.

Outlet cover - https://amzn.to/3xMTJya

20230221_162613.jpg

Previous hardware that was holding the controls cover on was rusted on... forgot to add that previously. One of the many PITA things. But, grinding wheel solved that. Stainless hardware will not do that again. All back together.

20230221_162559.jpg

20230221_162505.jpg

May use a wire wheel and get the weathered number markings off & then paint it with the CARC match paint I have. I also have a blank plate that goes where the hole is for the wire pass through I may put in place with a weather tight fitting. Then, some of the tighter wire mesh to help with critter control since this will live at my off grid place ultimately.

Will hook up my testing lead and give it a load test again soon! But hopefully this one can be "closed out".

:)
 

loosegravel

Just a retired mechanic who's having fun!
504
892
93
Location
Enumclaw, Washington
Long post inbound, standby....

Just wrapped up what I hope is the last of any major work for this unit!

Started by removing the top panels, and the one side panel so I could replace the fuel return lines & the fuel feed line with the incorrect fitting.

View attachment 891574

Even with the side panel removed, getting at the nut on the AN fitting for the fuel line is a PITA, so I removed the entire fuel/water filter assembly. That in itself is a bit annoying. Also, got the battery out of the way. Made the new 4AN fuel line with a kit I had.

4AN fuel line kit on Amazon - https://amzn.to/3Y66Bu1

View attachment 891575 View attachment 891576

Installed new fuel return line & the upgraded brass T's. Made everything nice and neat. Removed the muffler & air intake filter assembly to make it easier. I sell the T's in pairs on my eBay store. Since we can't share links to eBay, you can get there via my website in my signature at the end of any of my posts.

View attachment 891577 View attachment 891578 View attachment 891579

Figured since I was at it, I would replace the crappy rubber fuel tank well nuts. This is where things started to go bad....

Fuel tank drain well nut was STUBBORN and took me hours to get out. I basically had to rip it apart to get it out. Because of this, it slightly "puckered" (lack of a better term?) the hole of the fuel tank. But, since I was installing the new brass type fitting & o-ring I sourced, I figured it would just flatten it out. In the end, I was right that it would, but took a while to get there.

So, issue with this lower well nut is, that they made the opening in the metal body of the generator JUST big enough. When you put the big 7/8 nut in there, you have no room. If the tank is off center at all, it will not tighten properly down... catching the metal body, and leak. You might get lucky, or not. So far on these, I have been 0-2. I ended up needed to remove the fuel tank.

With that said, it being the second time I have done this & overall having a lot more "repair" experience now, removing the fuel tank when you have the top off for everything else I had been doing, is annoying but not horrible. Now that I am 0-2, I will probably just NOT try to fish a fitting into place anymore, and just remove the tank to install everything. You get to clean the tank out at this point as well. I got the bottom half of the old fuel sender out of the tank while it was removed.

I didn't document any pictures at this point because I was covered in diesel, grime, oil, and irritated. But, you basically just remove all the bottom bolts along the main frame, along the inside along that lip where the well nut come through, and don't forget the two on each side tucked facing toward the fuel tank end. I will try to grab some pictures & come back to update this post pointed out these not so obvious ones. If I forget, remind me!! Added. :)

View attachment 891630

There is just enough to lift the body to not have to remove the shroud around the fan. Getting two items around 1 inch thick and putting them between the main frame and the body along the sides once you lift it to remove the tank is helpful. Sorry if this is not as detailed as I usually am with my work. These few tips all will make a tone of sense if you are going for this task though!

Here are the well nuts that are different that the ones talked about on the forum a lot that I sourced. I got a bunch of different ones over the past few months. Finally found ones that were a good length, size, and had a little lip to hold the o-ring in place. They worked out fantastic. I plan to order them in bulk & keep them in stock, like the upgraded brass T's, on my eBay store. They will be sold as a set & with Viton o-rings.
View attachment 891582 View attachment 891583 View attachment 891580

At this point, everything was just done in reverse, and just kept everything neat & cleaned up. I can't attach more files so I am going to move on to another post.
Just like you, these well nuts have kicked my tail. I often think about a quote that I once heard. "Pain is a great motivator for change." Well, it's painful for me every time that I deal with these well nuts. I even posted a thread a while back looking for some good direction in this area. It seems that there are multiple different viewpoints and multiple different ways to repair this problem. That being said, our experience is all that we really have to offer others. With the clearance issue that you described above, I've used a pneumatic die grinder with a carbide bit to open up that hole in the skid. It gives me the clearance for the deep one-inch socket that I need. I've found that it's less painful to do this rather than remove the fuel tank. The other thing that I've been doing is setting these generators up on my car lift in the shop to get my tail up off of the floor while dealing with these well nuts. I also have a heavy welding table that I've used if the car lift is in use. I would much rather deal with these well nuts while having them at face level and sitting in a chair then laying on my shoulder on the ground. Let's make it easier on ourselves!
 

CallMeColt

Well-known member
Supporting Vendor
1,052
1,520
113
Location
Wilson County, Texas
Just like you, these well nuts have kicked my tail. I often think about a quote that I once heard. "Pain is a great motivator for change." Well, it's painful for me every time that I deal with these well nuts. I even posted a thread a while back looking for some good direction in this area. It seems that there are multiple different viewpoints and multiple different ways to repair this problem. That being said, our experience is all that we really have to offer others. With the clearance issue that you described above, I've used a pneumatic die grinder with a carbide bit to open up that hole in the skid. It gives me the clearance for the deep one-inch socket that I need. I've found that it's less painful to do this rather than remove the fuel tank. The other thing that I've been doing is setting these generators up on my car lift in the shop to get my tail up off of the floor while dealing with these well nuts. I also have a heavy welding table that I've used if the car lift is in use. I would much rather deal with these well nuts while having them at face level and sitting in a chair then laying on my shoulder on the ground. Let's make it easier on ourselves!
Working on these when they are on the floor is not fun. I was real soar the next few days! The trailer mounted one can be a bit annoying at times for it's own reasons but I think I'd rather that. Unfortunately, not lift for me to use. Maybe one day.

I thought about cutting the hole bigger, but with the way my luck goes, I'd puncture the tank. I also get irritated the the amount of room in there. Once the tank is out, figured there is no reason to do it. The brass well nut should never fail. SHOULD. :ROFLMAO:
 

CallMeColt

Well-known member
Supporting Vendor
1,052
1,520
113
Location
Wilson County, Texas
So, made a deal with a friend of mine & this one will be getting sold to him. It will be living at the the top of a hill in the Texas Hill Country to be backup power for his families well for the homes on the property. Quite an off road trek up there so I'm thinking it will be delivered with the LMTV and the newly commissioned LMHC.
 

loosegravel

Just a retired mechanic who's having fun!
504
892
93
Location
Enumclaw, Washington
I always appreciate your videos and the time it takes to make them. Very helpful.! I'm wondering about the MEP-803A machines though. Because the lower well nut is located outside of the enclosure, basically on the skid frame, do you still remove the tank on those units? I know that the hole in the skid is kind of small making it difficult to put a wrench or a socket on the new nut to tighten it. I've experimented with using a die grinder with a carbide bit to enlarge the hole in the skid with some success. Although, like you I've also removed tank on the MEP-802A units, I haven't done this on the MEP-803A units. This is mainly because I don't believe that the tank can be reinstalled with the new lower well nut installed. What has your experience been with them? Thanks again!
 

Light in the Dark

Well-known member
Steel Soldiers Supporter
3,860
6,074
113
Location
MA
You should be able to install the bulkhead fitting on an 803 without any issue, in the machine. If the tank opening is off center at all, you could just loosen the hold down bracket on the top of the tank and bump it slightly from the backside (or pull it forward), but Ive never had an issue putting one in on the 803 as-is.
 

loosegravel

Just a retired mechanic who's having fun!
504
892
93
Location
Enumclaw, Washington
You should be able to install the bulkhead fitting on an 803 without any issue, in the machine. If the tank opening is off center at all, you could just loosen the hold down bracket on the top of the tank and bump it slightly from the backside (or pull it forward), but Ive never had an issue putting one in on the 803 as-is.
That’s what I’m thinking too. I haven’t actually removed the tank on an 803 yet. I’m not even sure if the tank could be reinstalled with the new well nut fittings in place. It protrudes from the tank quite a bit, would probably make reinstalling a problem.
 

CallMeColt

Well-known member
Supporting Vendor
1,052
1,520
113
Location
Wilson County, Texas
I always appreciate your videos and the time it takes to make them. Very helpful.! I'm wondering about the MEP-803A machines though. Because the lower well nut is located outside of the enclosure, basically on the skid frame, do you still remove the tank on those units? I know that the hole in the skid is kind of small making it difficult to put a wrench or a socket on the new nut to tighten it. I've experimented with using a die grinder with a carbide bit to enlarge the hole in the skid with some success. Although, like you I've also removed tank on the MEP-802A units, I haven't done this on the MEP-803A units. This is mainly because I don't believe that the tank can be reinstalled with the new lower well nut installed. What has your experience been with them? Thanks again!
I just got an MEP-803A & noticed that the fitting is on the outside instead of inside. At first glace, I didn't think it would be much of an issue. I plan to start a separate thread for that generator once I dig in. I was going to do it last weekend, but then a tree fell on it. o_O Mostly cosmetic, but annoying! It was in PERFECT looking condition.
 

loosegravel

Just a retired mechanic who's having fun!
504
892
93
Location
Enumclaw, Washington
I just got an MEP-803A & noticed that the fitting is on the outside instead of inside. At first glace, I didn't think it would be much of an issue. I plan to start a separate thread for that generator once I dig in. I was going to do it last weekend, but then a tree fell on it. o_O Mostly cosmetic, but annoying! It was in PERFECT looking condition.
I was also following that thread from you about the damaged unit. Sad, but I'm sure that you'll get it repaired like new. I believe that @Light in the Dark is a great source for sheet metal parts. Good luck!
 

CallMeColt

Well-known member
Supporting Vendor
1,052
1,520
113
Location
Wilson County, Texas
I was also following that thread from you about the damaged unit. Sad, but I'm sure that you'll get it repaired like new. I believe that @Light in the Dark is a great source for sheet metal parts. Good luck!
I forgot I already started a thread on it! Can you tell I have to much going on? I have managed to knock a bunch off the list.
 

loosegravel

Just a retired mechanic who's having fun!
504
892
93
Location
Enumclaw, Washington
Supporting vender!!!!!!!!!!!! Lookin good!
Since I began playing with these marvelous machines a few years ago, I have been on this forum, even more so than some of my friends who indulge in social media. I’m not a fan of social media, but this forum has got a hold on me. I wonder if there’s a 12 step program out there for me🤫
 

CallMeColt

Well-known member
Supporting Vendor
1,052
1,520
113
Location
Wilson County, Texas
Well, as of yesterday, this unit is at it's new home in the Texas hill country.

It ended up getting mounted on a M1101 chassis trailer I had & was sold with it.

Used the Light Material Handling Crane (LMHC) I just got fixed up for my M1078 to remove the MEP 803A from the trailer and install the MEP 802A.

Went smooth. It's at the limit for the LMHC but all done safe!

345070090_1325042421558619_6418024557111348068_n.jpg 348358424_613746284046508_3795677383971793402_n.jpg

I sent a link to this thread to my buddy, not sure if he will join the forum or not.
 
Top
AdBlock Detected

We get it, advertisements are annoying!

Sure, ad-blocking software does a great job at blocking ads, but it also blocks useful features of our website like our supporting vendors. Their ads help keep Steel Soldiers going. Please consider disabling your ad blockers for the site. Thanks!

I've Disabled AdBlock
No Thanks